Alrighty, as promised...one bat house.
I buzzed the www to narrow the design options to something that was consistently used and easy to make at the workbench. I had some leftover 3/8" exterior plywood siding and pine 1-by stock, so the final design and size pretty much got dictated by existing inventory. The out-to-out dimensions: 19" wide, 34" hi, 4.250" deep. It is a essentially a big box with 2 slide-in panels that create 3 separate 7/8" deep chambers. All surfaces are potential for roosting and have been scored about 1/16" deep with a radial arm saw so the critters can crawl and hang on.
-
-
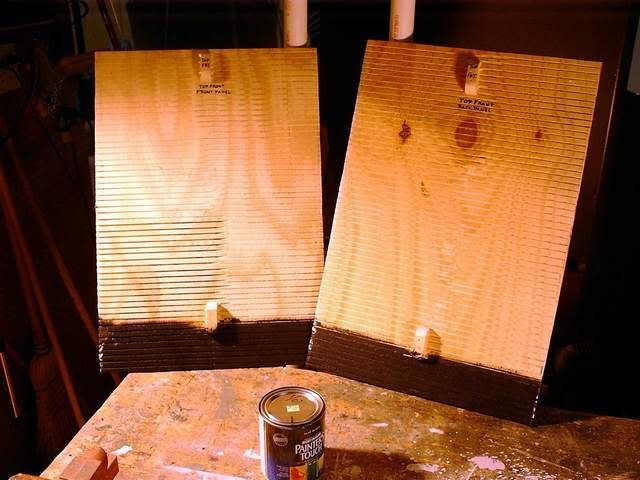
This is the 2 slide-in panels. The bottoms have been painted to provide some weather resistance as the tenants wipe off their bat feet. The balance of the unpainted panel will be slid up and tucked inside the weatherproof box.
-
The small blocks attached to the panels are milled to a dimension and shape that allow them to not only slide along the adjacent panel during installation, but they will maintain the 7/8" gap between panels if there is any warping.
-
-
The panels are slipped into their respective tracks routed into the inside face of the side panels of the box. In this pic, they are slid about 1/2 way in.

-
The SS screws will be buzzed in when the panels are completely inserted. They will pass thru the side panel, the center-line of the routed panel groove, and miss the panels just below them. These screws will provide support so the panels don't slide out AND a quick and easy way to remove the panels should the box or panels ever need maintanance.
-
-
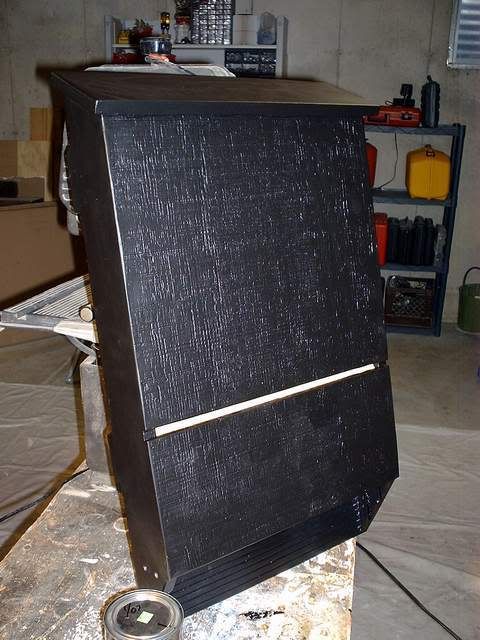
The finished product
-
The permanent back panel of the house extends about 6" lower to provide a landing pad. The entire interior surface of the back panel and the front panel are also lightly grooved for bat-traction. In essence, there are a total 6 grooved panel surfaces creating 3 separate 7/8" compartments, providing a dry and cozy bat mosh-pit. The entire exterior is primed and finish coated with flat black latex. The 1/2" slot across the front panel is recommended to provide some heat control for this, the sun-facing compartment. I was concerned for blowing rain that might eventually compromise the unpainted interior, so I caulked and screwed on a drip cap over the vent crack.

-
The mount is beefed up with a pair of 1" thick treated blocks, glued and screwed horizontally across the back of the house. A 3/8" SS tee-nut is embedded from within the box, thru the back panel; one at the top mount block and one at the bottom mount block. A pair of 3/8" SS hex bolts will crank 'er down to the bat pole.
-
-
The real issue is going to be mounting the unit. It has to be a min of 12' above the ground, or in my case, the water. Like the Wood Duck boxes, it is also kinda heavy (the WD boxes are alot lower, so no issue). I bought a length of 2" square tubing and cut it to length. It is primed and painted and the mounting holes are pre-drilled. I plan to bolt it to one of the unused 4 x 4 treated pole units that is embedded in concrete in about 2' of wetland water at normal pool. I fear, tho, that the box is gonna be like a kite when it gets windy. The stout treated 4 x 4 base may be overtaxed by the tall kite fulcrum; we'll see. Worse comes to worse, we can move it over to the building pad and use the rest of the 2" tubing, embedded in another concrete-filled post hole.


