|
Forums36
Topics40,961
Posts557,952
Members18,500
| |
Most Online3,612
Jan 10th, 2023
|
|
|
11 members (LeighAnn, Bobbss, Jambi, catscratch, jludwig, John Folchetti, shores41, Theo Gallus, Shorthose, phinfan, Zep),
1,132
guests, and
312
robots. |
|
Key:
Admin,
Global Mod,
Mod
|
|
|
|
Joined: Dec 2004
Posts: 5,713 Likes: 35
Administrator Lunker
|

Administrator Lunker
Joined: Dec 2004
Posts: 5,713 Likes: 35 |
If you go to User List and click on display name all display names are listed in alphabetical order. Dwight, he said it's not available to non-registered members. I didn't know that. Me either.......
|
|
|
|
|
Joined: Jan 2013
Posts: 352
|
|
OP
Joined: Jan 2013
Posts: 352 |
OK, I�m back in operation. Apparently, a stuck key on the keyboard was the culprit. Now, back to the story. After taking delivery of the track hoe we spent the first couple of days clearing the gully. Bob, my track hoe operator uprooted the trees and brush, and I used my tractor to push the debris the length of the pond to the backside of the dam. This created a massive brush pile within the confines of the gully where it could be safely burned in the future. Hiring Bob not only saved time, but also provided for the 100 gallon auxiliary fuel tank in his truck, which we used to haul diesel. He would have probably worked for free, but I can�t ask that of anyone. Besides, I�ve found that when I hire a helper for a project it�s motivates me to get busy, and not lollygag around. (1st picture) Bob carves out a ramp while descending into the gully. 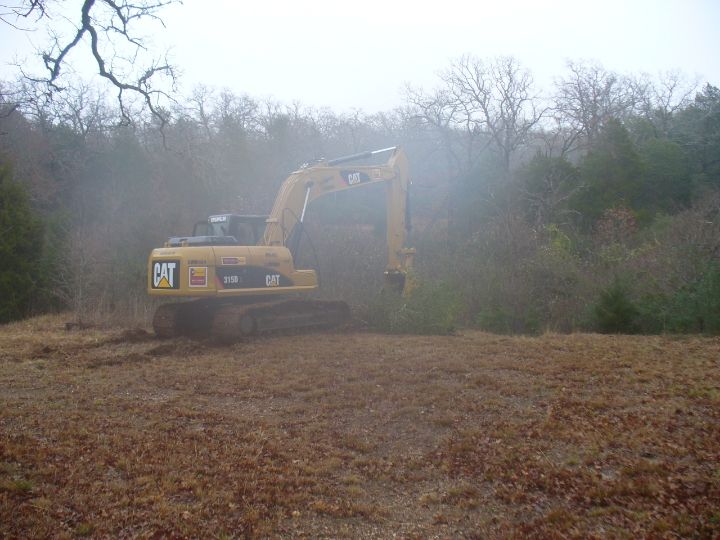 . 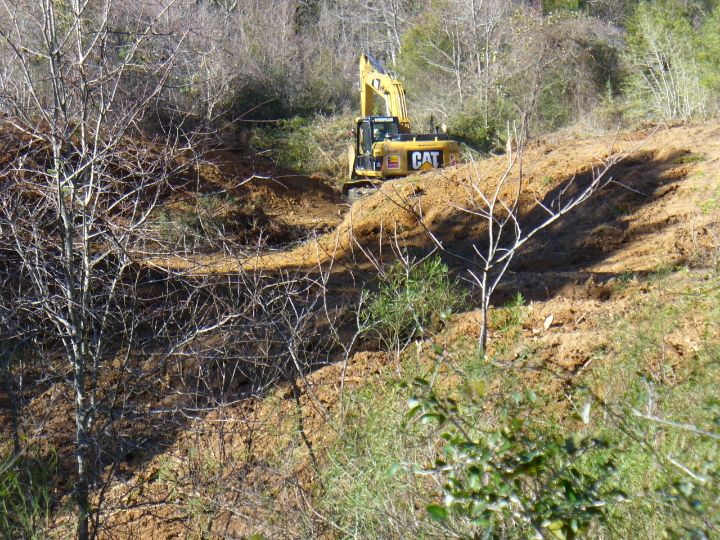 . 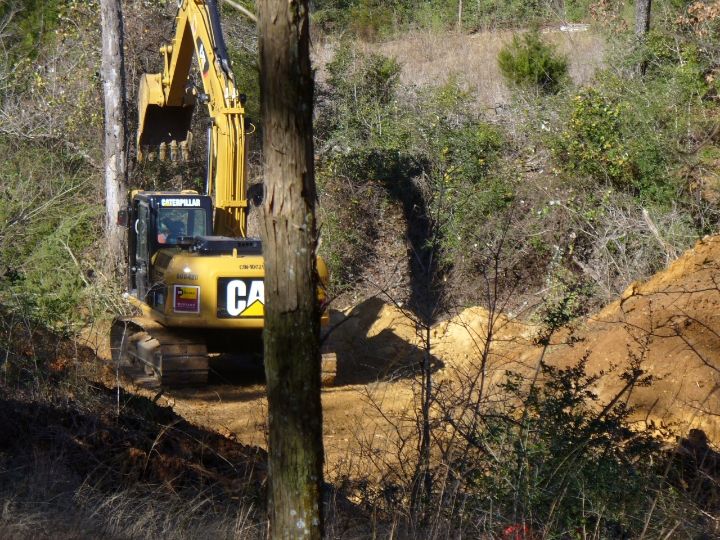 (Picture above) Pushing down a dead oak tree. 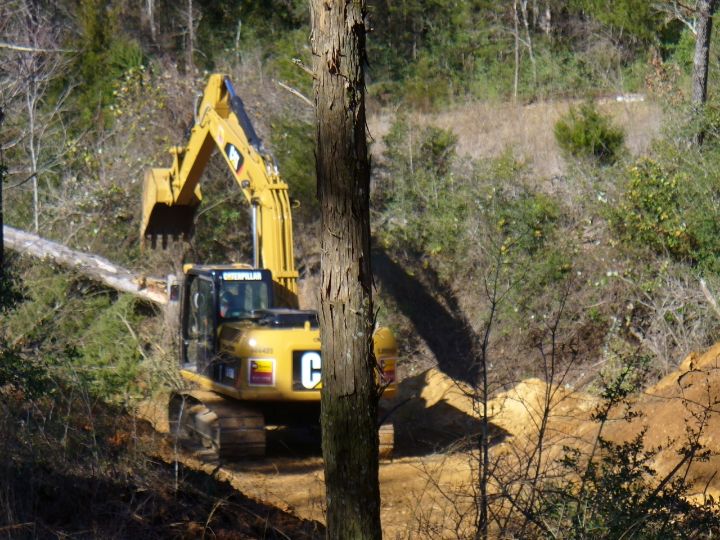 (Picture above) Snap!���He broke it��..I left all the big oaks standing when I initially cleared the gully with a chainsaw, to make it easier to remove the root ball, using the trunk as leverage. Unfortunately, this tree had died and the root ball had to be dug out.
|
|
|
|
|
Joined: Jan 2013
Posts: 352
|
|
OP
Joined: Jan 2013
Posts: 352 |
(More pics) 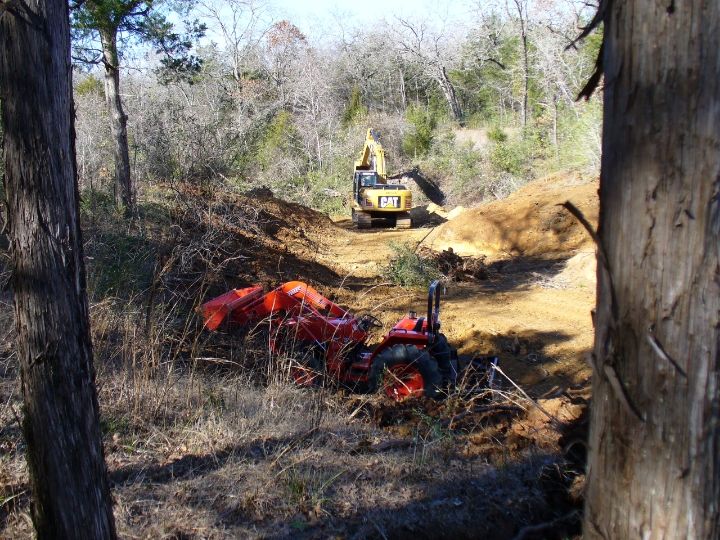 . 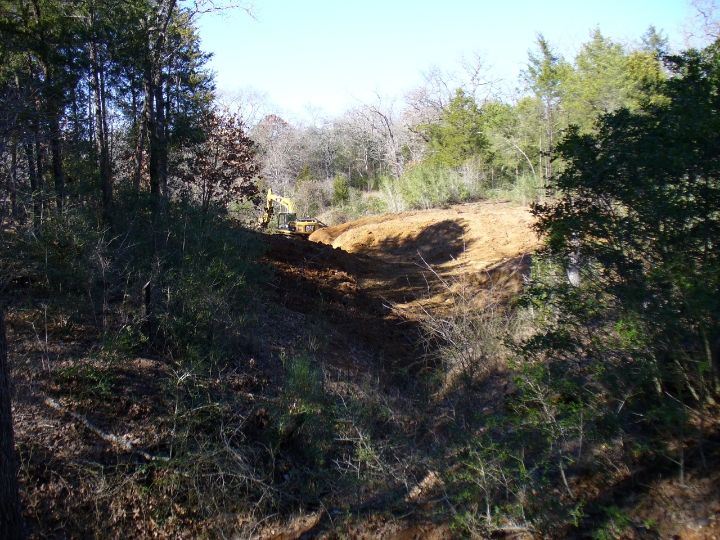 . 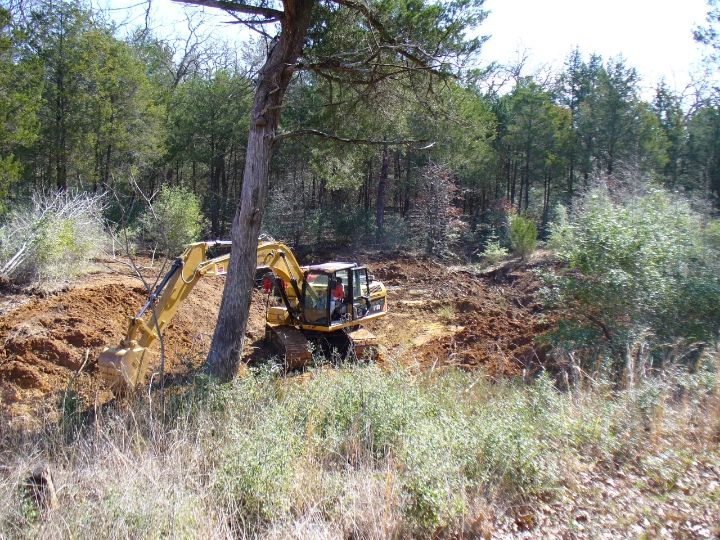 . 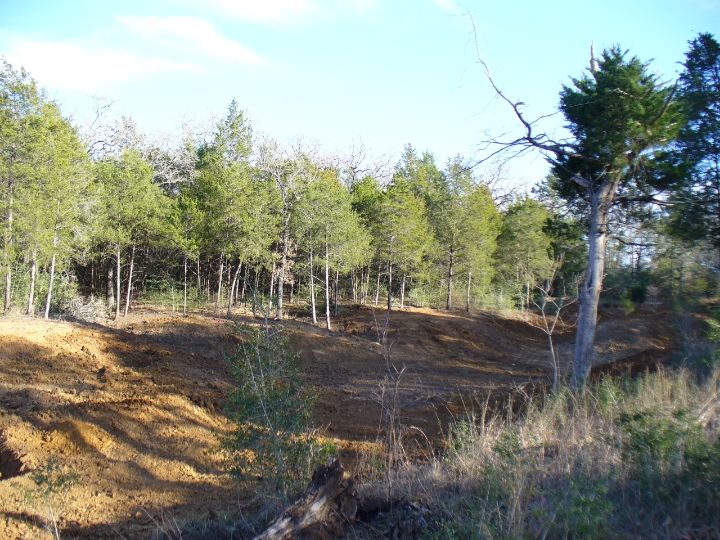 (Picture above) Deforestation is almost complete. The tattered old cedar tree on the right was the last victim. 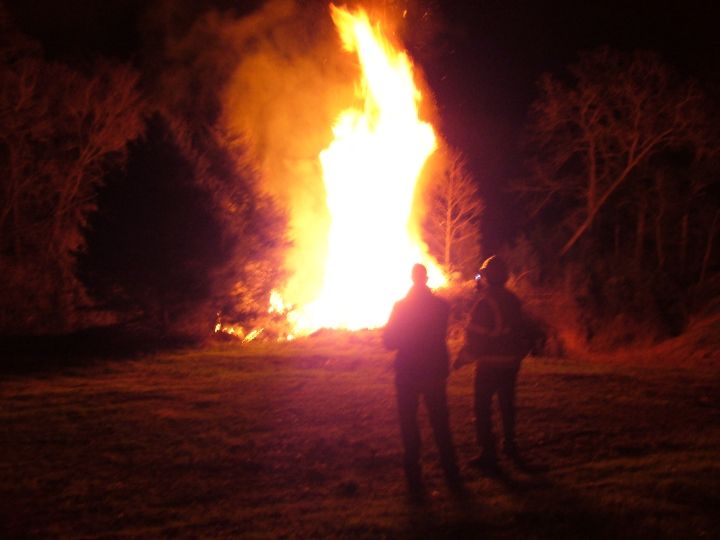 (Picture above) Skipping forward a year. Some friends were visiting one evening. It was a calm, damp night. Perfect conditions to burn the big brush pile behind the dam. Other than the roar of the flames the silence was deafening as we watched in awe, not to mention a certain amount of fear...... To be continued.
|
|
|
|
|
Joined: Mar 2011
Posts: 621
|
|
Joined: Mar 2011
Posts: 621 |
I'm enjoying the story. Keep it coming when you can.
|
|
|
|
|
Joined: Mar 2004
Posts: 2,435
Ambassador Hall of Fame 2014  Lunker
|
Ambassador Hall of Fame 2014 Lunker
Joined: Mar 2004
Posts: 2,435 |
Good story. Looking forward to future installments.
Just do it...
|
|
|
|
|
Joined: Dec 2004
Posts: 5,713 Likes: 35
Administrator Lunker
|
|
Administrator Lunker
Joined: Dec 2004
Posts: 5,713 Likes: 35 |
Golly, how many times did I just say gully? Oh well, better get used to it. They don�t call me �gully washer� for nothing. Actually, they don�t call me �gully washer.� It seemed to be the only pond related name not yet taken on this forum, that I could think of. And I thought of a lot of names, only to be denied, time and time again. I wish forums would provide an alphabetized list of it�s member�s names for new applicants to review before submitting their applications. I must have filled out the application about dozen times. I almost gave up. Don�t ask me what my latest e-mail address is. It�s really lame. Oh well, enough of that rant. On with my story. We switched the User List on for guests thanks to your input. Thanks.
|
|
|
|
|
Joined: Jan 2013
Posts: 352
|
|
OP
Joined: Jan 2013
Posts: 352 |
[roadwarriorsvt wrote] I'm enjoying the story. Keep it coming when you can.
[Rmedgar wrote] Good story. Looking forward to future installments.
(gw replied) Thanks for the comments guys. I�m finding this chronicle to be more challenging than I had anticipated. However, being the DIY type of guy that I am, underestimating a project is not foreign to me. Since starting this thread I�ve gained a new found respect for others who have chronicled their pond building experience, not to mention the actual building of the pond itself.
[Dwight wrote] We switched the User List on for guests thanks to your input. Thanks.
(gw replied) You're welcome. Actually, I was just kidding around. Glad I could help though. Thanks, gw
|
|
|
|
|
Joined: Jan 2013
Posts: 352
|
|
OP
Joined: Jan 2013
Posts: 352 |
While clearing the brush we had scraped the soil from the bottom and sides of the gully, exposing the geological structure of the site. It is as follows. A 1ft. Layer of topsoil and gravel. Under that is a 4ft. Layer of red clay. Under that is a 4ft. Layer of white clay. Under that is a layer of snow white sugar sand. I don�t know what�s under the sand. I dug a 8ft. deep hole in it before giving up. After all the brush was cleared we shot grades with a laser to determine the future water level and depth. We then removed 3 foot of sand from the bottom and placed it on the backside of the dam base . Utilizing the depth benchmarks to gauge how much coverage we placed on top of the sandy bottom we eventually covered it with approximately 3 feet of clay. At the juncture where the sandy bottom met the sides we dug out the sand so as to create an overhang, under which, we refilled with clay in order to achieve a good seal. During construction we incrementally knocked down the small pond�s dam, allowing the water to drain and dissipate. I had originally planned on moving the dirt from the small dam the length of the pond, for use in the construction of the large dam. Instead, in the interest of saving time I decided to remove each end of the small dam and stack the material behind it�s center, to create an island. A decision I would later regret, as the island turned out to be too large in proportion to the surface water surrounding it. It�s funny how large an empty pond appears to be, until it actually fills up. 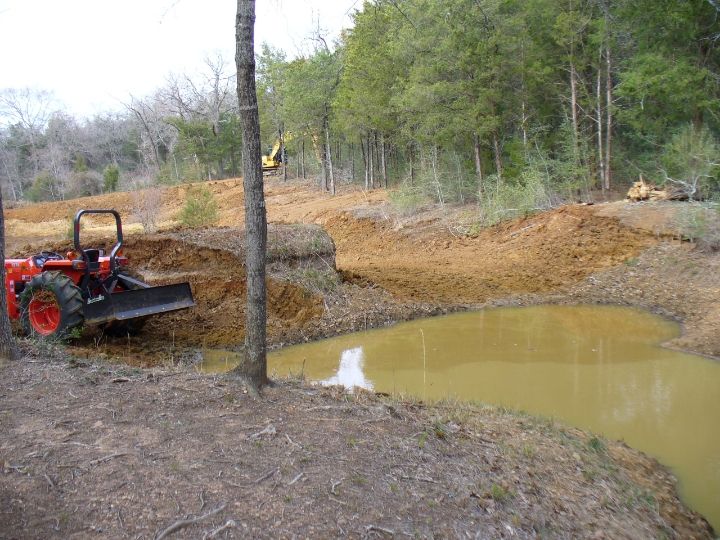 (Picture above) Remnants of the little pond. Remaining portion of the dam to the right of the tractor became an island. 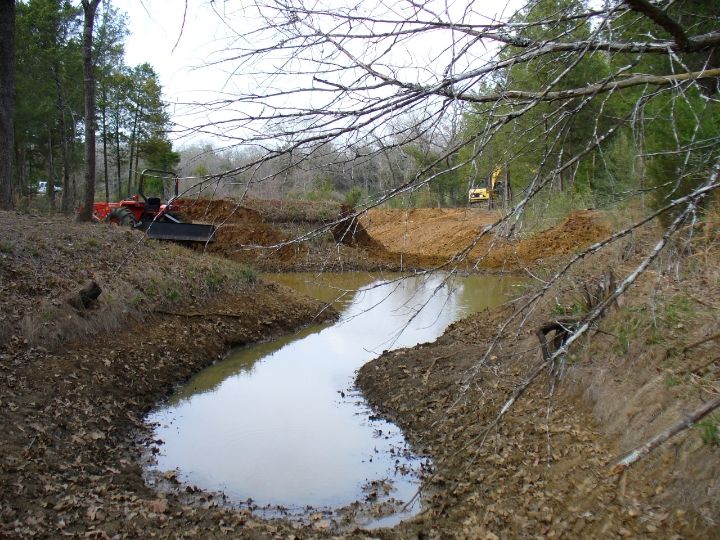 (Picture above) Upper end of the small pond. This is where the gully begins it�s downhill course across the property. 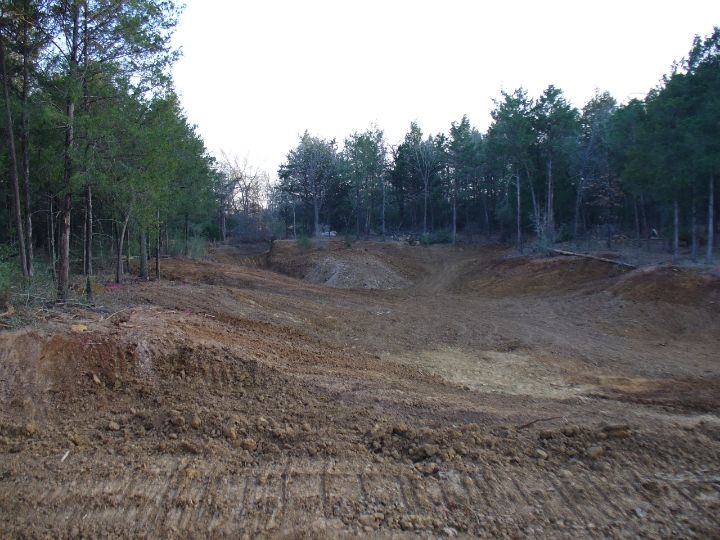 (Picture above) View from the dam. We�re almost finished.
|
|
|
|
|
Joined: Jan 2013
Posts: 352
|
|
OP
Joined: Jan 2013
Posts: 352 |
After most of the work was completed in the body of the pond we proceeded to construct the dam. Most of the material used for the dam was collected from the excavation of a large trench in the wall of the gully on the right end of the dam. This trench was originally meant to be used as a runaround spillway. I say it was originally meant to be the spillway, because, while digging it the weather forecast began to call for rain. Due to the fact that we were working in this gully, which is a drain for a large catchment area,(approx. 80 acres) and susceptible to flash floods, I freaked out and decided to build the spillway next to the dam instead of spending another day or two cutting a sufficient trench around the dam. I hated doing so, because, I had envisioned the original runaround design would look like a natural creek channel meandering around the dam, hiding the concrete spillway. As Bob dug out the spillway area and placed the dirt on top of the dam I used my tractor�s box blade to spread it. After doing so we had gathered enough material to complete the dam. 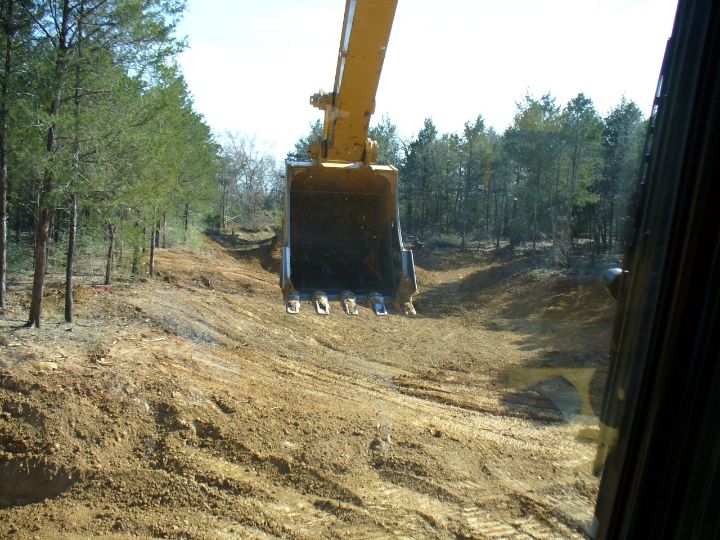 (Picture above) View from inside the track hoe. I would takeover track hoe duty in the evenings. Not to brag, but I got to be pretty good with it. It was a new machine with a cozy, air conditioned, radio equipped cab, and was a pleasure to operate. Nonetheless, an experienced operator is an invaluable asset. Not only can their knowledge save time and money, it may also prevent a costly, and possibly deadly mistake. 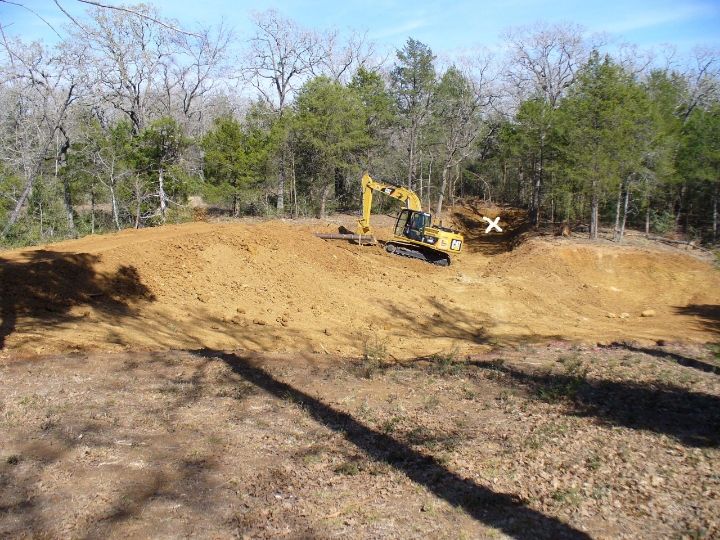 (Picture above) The white X marks the trench that was originally meant to be the runaround spillway. This is where a large portion of the material used to construct the dam came from. 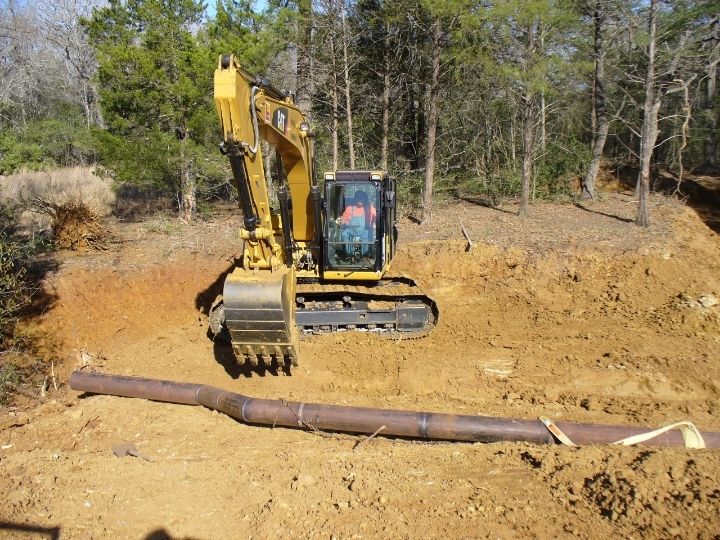 (Picture above) Here we are setting the overflow pipe. I welded several sections of scrap 10 inch pipe together that I had accumulated over the years. Due to my frugal ways, I have a penchant for collecting free or inexpensive building materials.  (Picture above) After frantically finishing the dam and pouring the concrete spillway, it soon began to rain. It didn�t rain as much as was forecast, but, it was enough that would have made it really messy to operate the machinery in the pond, not to mention driving a cement truck through. In my rush to finish I screwed up and set the overflow pipe and spillway one foot too low. One of those elevation calculations when I should have added instead of subtracting, visa-versa, or something like that. Anyhow, since then I�ve thought of some relatively easy fixes for both if I ever decide to correct it. In the future I may weld some offsets onto the 10 inch pipe and make a siphon overflow/drain, as well as pouring a 1 foot high extension on the front edge of the spillway. For now, the 10 inch pipe is capped and the spillway is the primary drain. The emergency spillway is located on the other end of the dam.
|
|
|
|
|
Joined: Jan 2013
Posts: 352
|
|
OP
Joined: Jan 2013
Posts: 352 |
 (The drawing above is the original plan, with the runaround spillway. Approximately 0.9 acre water surface.) (The drawing above is the original plan, with the runaround spillway. Approximately 0.9 acre water surface.) 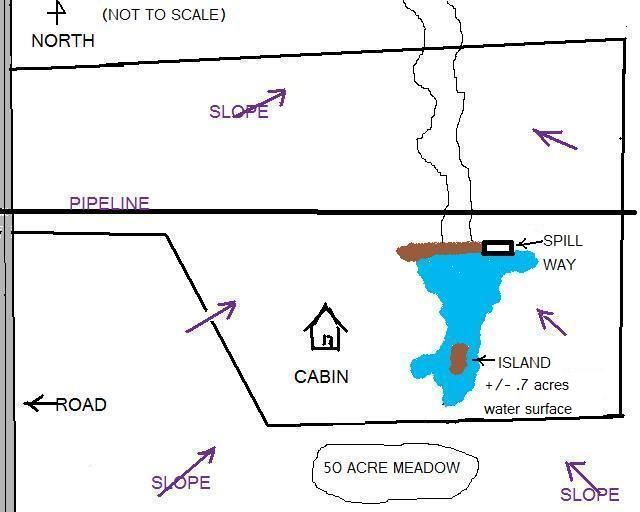 (The drawing above is the revised plan, with the island and relocated spillway. Approximately 0.7 acre water surface.) (The drawing above is the revised plan, with the island and relocated spillway. Approximately 0.7 acre water surface.)
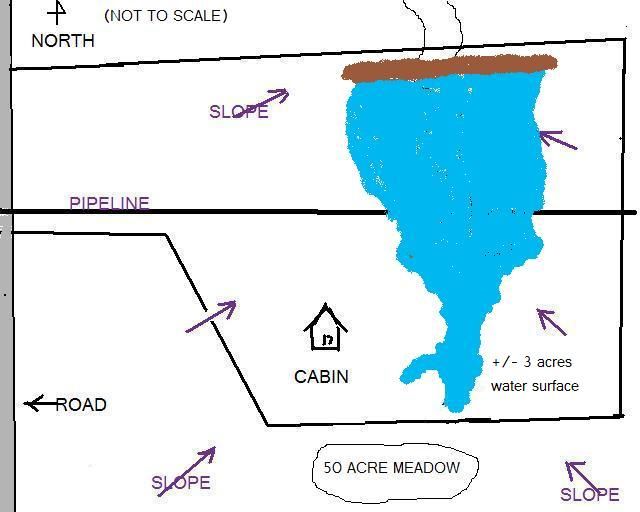 (The drawing above is what could�ve been, if the pipeline didn�t cross the property. Apparently, the folks at Conoco Philips don�t care to have ponds built on top of their underground pipelines. Oh well, maybe it will be abandoned someday. Although, I doubt it will be anytime soon. Would have been pretty sweet though.) (The drawing above is what could�ve been, if the pipeline didn�t cross the property. Apparently, the folks at Conoco Philips don�t care to have ponds built on top of their underground pipelines. Oh well, maybe it will be abandoned someday. Although, I doubt it will be anytime soon. Would have been pretty sweet though.)
|
|
|
|
|
Joined: Jan 2013
Posts: 352
|
|
OP
Joined: Jan 2013
Posts: 352 |
As luck would have it, after finishing the pond we experienced a drought for the next 10 months and got just enough rain to occasionally fill the bottom up to a 2 to 3ft level. It maintained this low level reasonably well. 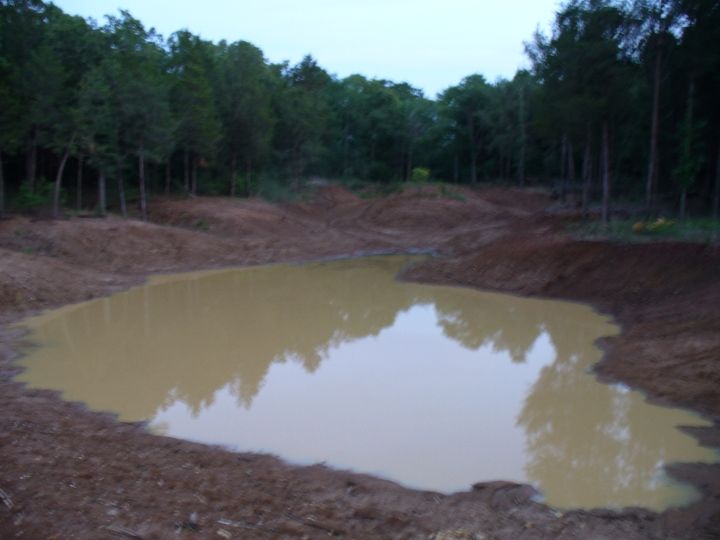 (Picture above) The first water. About 2ft deep, approx 7ft below full pool. Finally starting to look like something. 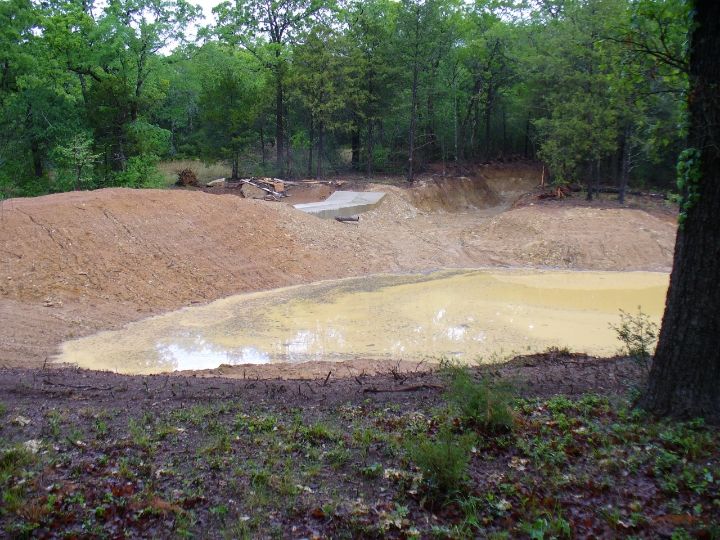 (Picture above) Need to put some top soil on the dam, and the banks. 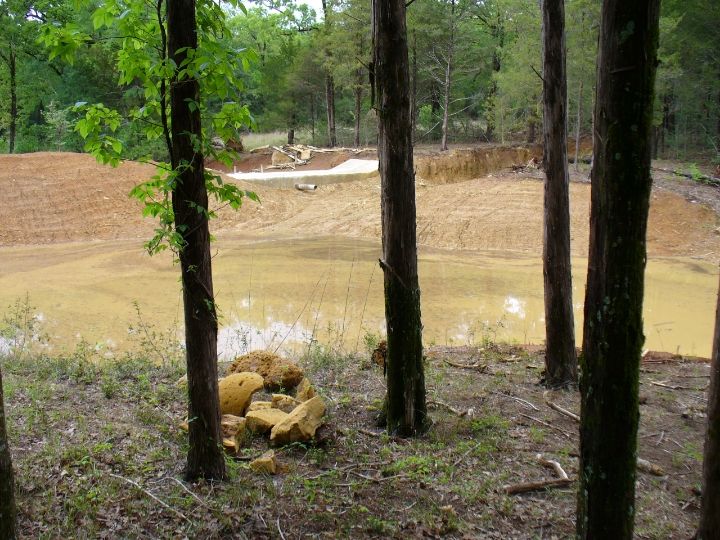 (Picture above) Have yet to clean up construction debris behind the spillway, as well as sawing the downed oak trees for firewood. 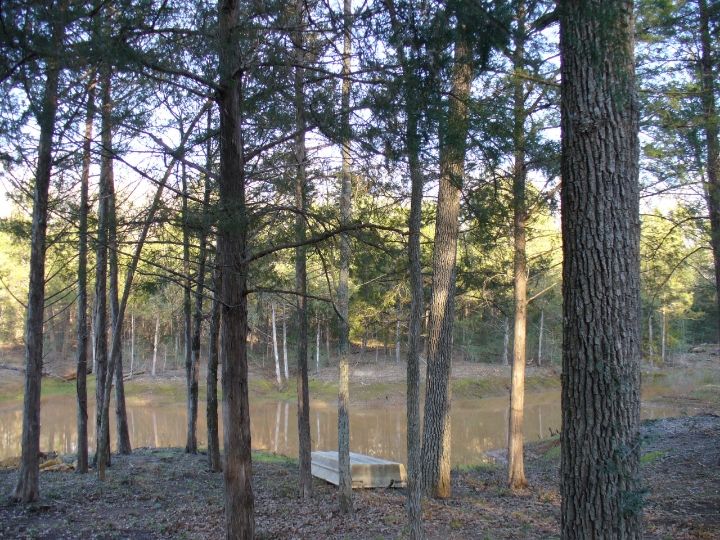 (Picture above) It�s already Winter. Got just enough water to float my boat. Winter rye grass is starting to grow on the banks. 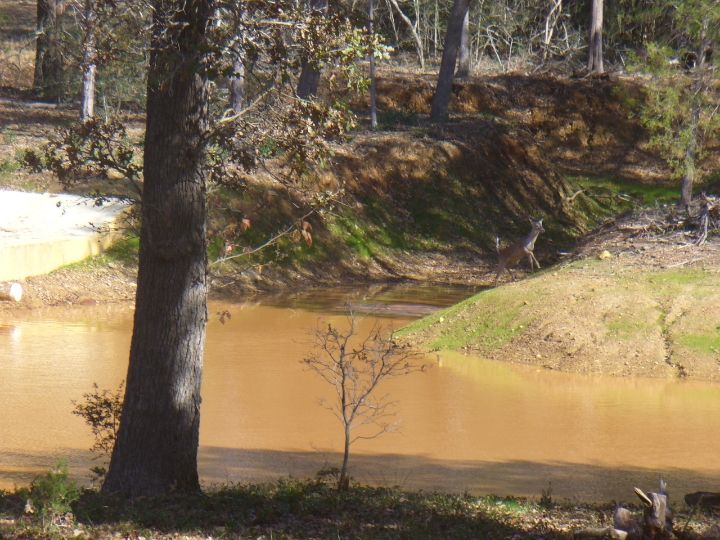 (Picture above) About 40 degrees out. The little yearling had just swam across the deepest part of the pond, which at this time is about 5ft. 4ft short of a full pool. Come on rain!!!!
|
|
|
|
|
Joined: Sep 2009
Posts: 3,544
Hall of Fame Lunker
|
|
Hall of Fame Lunker
Joined: Sep 2009
Posts: 3,544 |
I noticed you put a bend in your drain pipe.. I'd attach some kind of trash rack too your drain it'll be alot easier to clean a trash rack than a clog down in those bends.. Really cool looking place..
I believe in catch and release. I catch then release to the grease.. BG. CSBG. LMB. HSB. RES. ![[Linked Image from i90.photobucket.com]](http://i90.photobucket.com/albums/k247/jmilczski/Fish/PBSubscribe.gif)
|
|
|
|
|
Joined: Jan 2013
Posts: 352
|
|
OP
Joined: Jan 2013
Posts: 352 |
During the winter of 2009 we finally had a good rain. It not only completely filled the pond, but provided enough overflow to flush out all the debris. The run-off subsided after a couple of days and the water level begin to drop at a rate of about 2 inches per day. I was cautiously optimistic this recession was due to the initial soaking of the clay. However, after the continuing drop of 2 inches per day for about 3 weeks, I new I was screwed. After about a 4 foot drop the rate of recession decreased to about an inch and a half per day for another 3 weeks or so, until it reached the 2 to 3ft. level again. An occasional heavy rain would refill it, only to have it drop again at the same rate................Question: Did I use a Sheeps Foot roller to pack the clay?.....................Answer: NO! At this time in my life I had never even heard of a Sheeps Foot roller. I had assumed that packing 6 inch lifts with the trac hoe would be sufficient. I even ran a temporary water line out to the pond area so I could add moisture to the soil, to aid in the compaction. Like I said at the beginning of this thread. �I wish I had found the Pond Boss forum earlier.� Oh well! 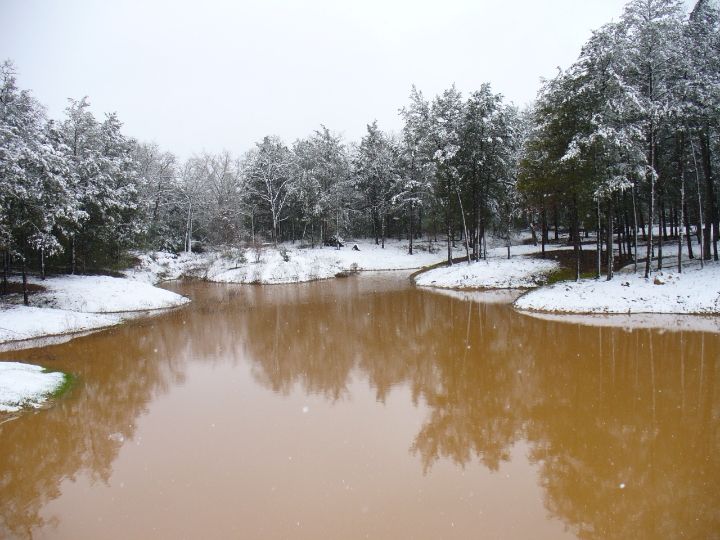 It snowed! A rarity for central Texas. At the time of photo the water level is about 3ft below full pool........................................................ Question: Would you call this water condition turbidity? Or,would you call it turdidity? 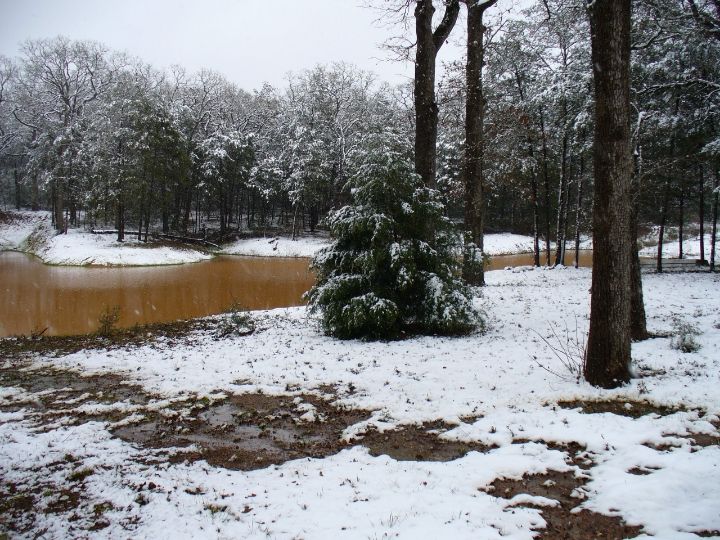 xxxxxxxxxxxxxxxxxxxxxxxxxxxxxxxxxxxxxxxxxxxxxxxxxxxxxxxxxxxxxx 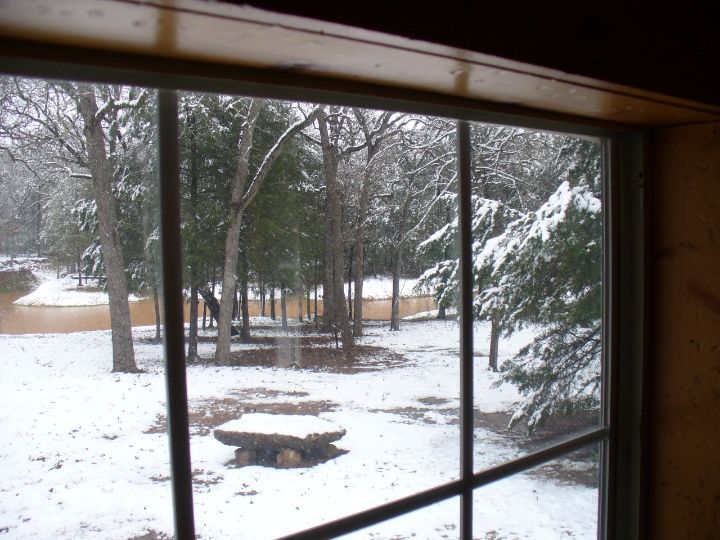
|
|
|
|
|
Joined: Jan 2013
Posts: 352
|
|
OP
Joined: Jan 2013
Posts: 352 |
Throughout the first 24 months of this up and down repetition the water quality remained muddy. In the late spring of 2011 the pond was only � full when it was refilled and flushed out by a heavy rain. A couple of days later the water became clear and remained clear over the next few weeks as the pond dried up again. Except, this time the rate of recession was slightly less, but still excessive. 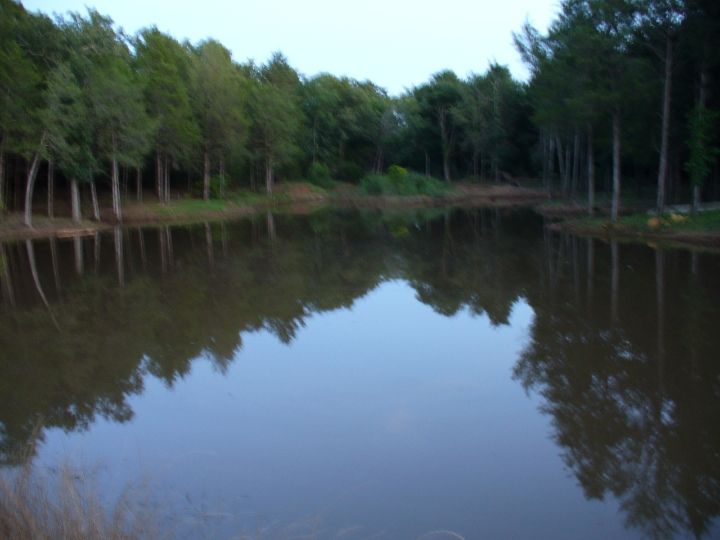 .(Picture above) Wow! That last rain must have flushed all the turds out. Now, this is what I had in mind when I started this frickin project. Too bad it still leaks. 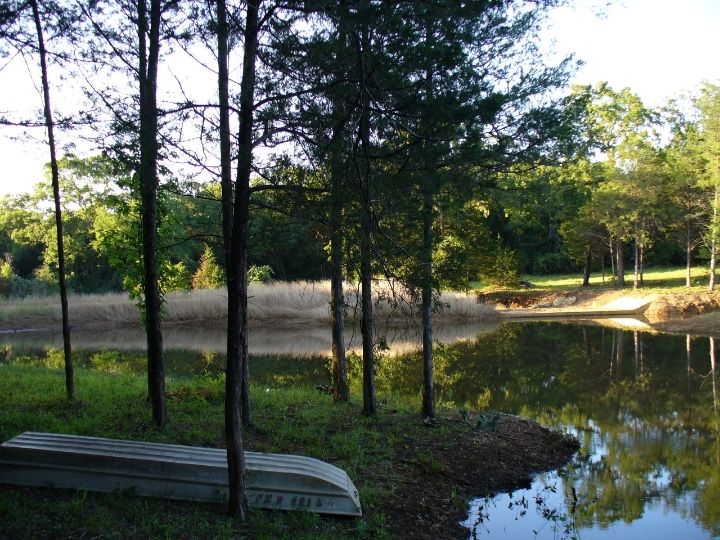 xxxxxxxxxxxxxxxxxxxxxxxxxxxxxxxxxxxxxxxxx 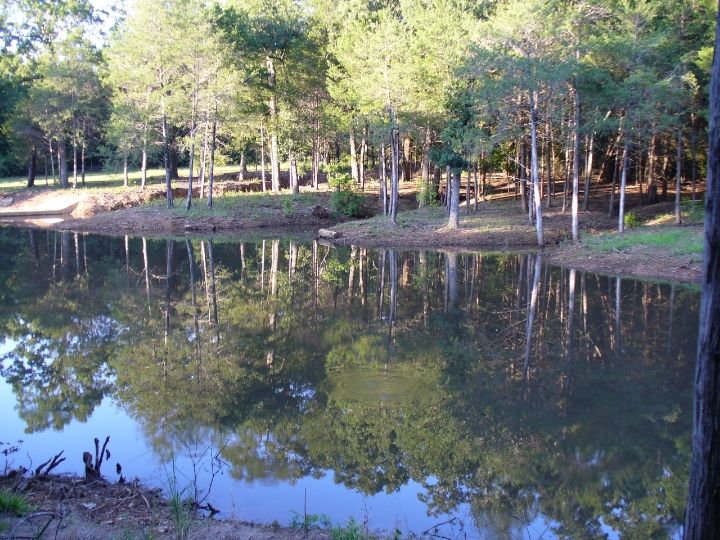 xxxxxxxxxxxxxxxxxxxxxxxxxxxxxxxxxxxxxxxxx 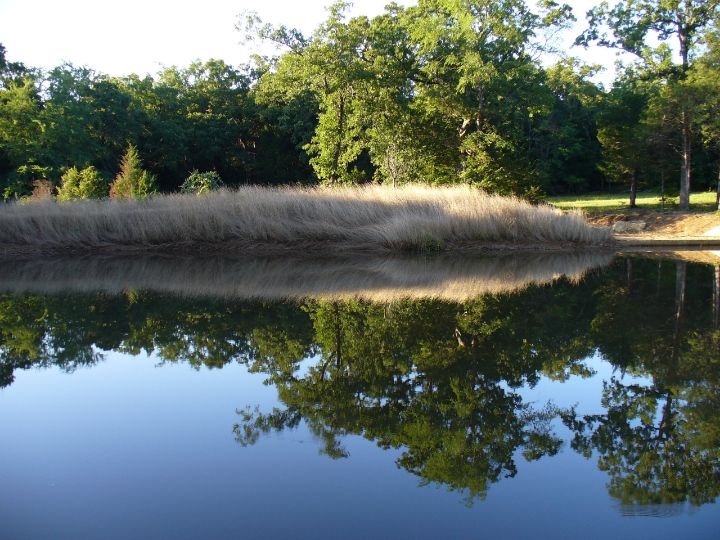 )(Picture above) The dead rye grass on the dam looked cool, especially when rippling in the wind.
|
|
|
|
|
Joined: Jan 2013
Posts: 352
|
|
OP
Joined: Jan 2013
Posts: 352 |
More pics. 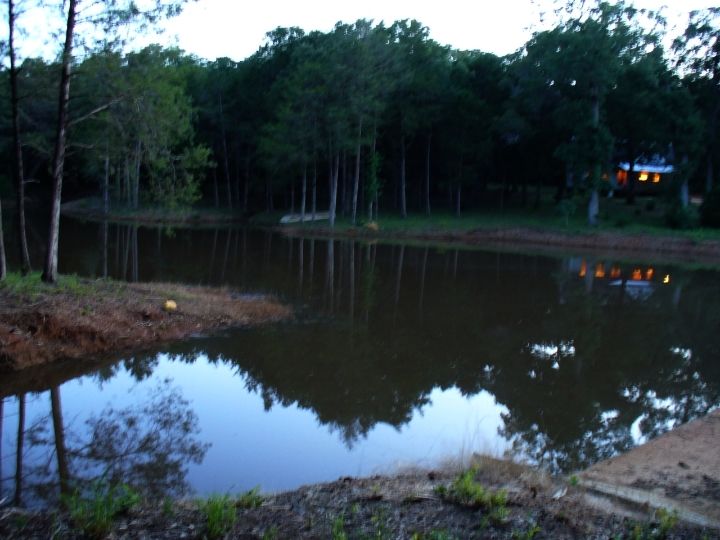 xxxxxxxxxxxxxxxxxxxxxxxxxxxxxxxxxxxx 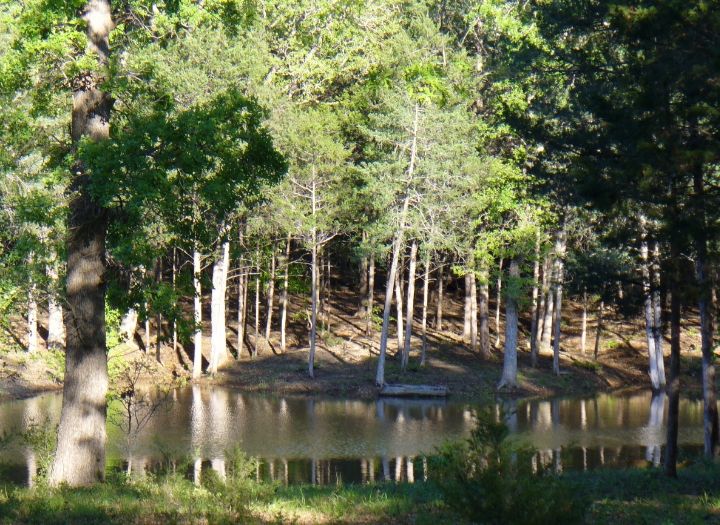 xxxxxxxxxxxxxxxxxxxxxxxxxxxxxxxxxxxxx  )(Picture above) The 40ft wide concrete spillway may look like overkill, but, it has come into play a few times. Once, I measured the water flowing over it at 16 inches deep. However, I�m not happy with the way it looks. I regret my decission to not spend more time and money to dig the original runaround spillway. Although, I may do so in the future. Until then, I�m either going to grow some type of non-evasive tall growing vegetation in front of it, or build some sort of feature to disguise it. If anyone has any suggestions feel free to chime in������..Stay tuned, cause I ain�t givin up on this dammed gully yet!
|
|
|
|
|
Joined: Jan 2013
Posts: 352
|
|
OP
Joined: Jan 2013
Posts: 352 |
I noticed you put a bend in your drain pipe.. I'd attach some kind of trash rack too your drain it'll be alot easier to clean a trash rack than a clog down in those bends.. Really cool looking place.. Yes, a trash guard is a good suggestion. I had originally intended for the end of the pipe with the offset to be on the pond side, angled down so as to draw water from below. Due to an impromptu design change I flipped it around. In the future I plan on welding some offsets on both ends in order to make a siphon overflow / drain. For now, the pipe is capped and the spillway is the only overflow. Thanks for the suggestion, and compliment�.. gw
|
|
|
|
|
Joined: Sep 2009
Posts: 3,544
Hall of Fame Lunker
|
|
Hall of Fame Lunker
Joined: Sep 2009
Posts: 3,544 |
Also I would think about how much fish you could be losing when your flowing at 16" depth over your emergency overflow..
I believe in catch and release. I catch then release to the grease.. BG. CSBG. LMB. HSB. RES.
|
|
|
|
|
Joined: Nov 2004
Posts: 1,074
Lunker
|
|
Lunker
Joined: Nov 2004
Posts: 1,074 |
testing to get back in thebox
|
|
|
|
|
Joined: Jan 2009
Posts: 28,534 Likes: 841
Moderator Ambassador Field Correspondent Lunker
|
Moderator Ambassador Field Correspondent Lunker
Joined: Jan 2009
Posts: 28,534 Likes: 841 |
Mike!! Good to see you back! Test was successful. 
|
|
|
|
|
Joined: Mar 2011
Posts: 621
|
|
Joined: Mar 2011
Posts: 621 |
To disguise the concrete spillway, maybe look in to some rock vaneers. At least that would make it appear a little more natural. Or paint/epoxy it some earth tone color?
|
|
|
|
|
Joined: Jan 2013
Posts: 352
|
|
OP
Joined: Jan 2013
Posts: 352 |
Also I would think about how much fish you could be losing when your flowing at 16" depth over your emergency overflow.. You're right, that could be a problem. Maybe, after I complete the 10 inch siphon it will lessen the need for the spillway during a heavy overflow. Until then, I won't be investing in fish. Thanks for the observation.......gw
|
|
|
|
|
Joined: Jan 2013
Posts: 352
|
|
OP
Joined: Jan 2013
Posts: 352 |
To disguise the concrete spillway, maybe look in to some rock vaneers. At least that would make it appear a little more natural. Or paint/epoxy it some earth tone color? Wow! Those are some excellent ideas. I never thought of that. A rock facade does make for some interesting possibilities, and is something I might consider doing in the future. For now though, I think the idea of painting the concrete is golden. I could camouflage it with some earth toned concrete stain, and grow some vegetation in front of it. Seems like an inexpensive and simple solution. I also have some various sized boulders I've gathered from other areas of the property that I could randomly place around it. Thanks for sharing your vision..........gw
|
|
|
|
|
Joined: Jan 2013
Posts: 352
|
|
OP
Joined: Jan 2013
Posts: 352 |
One of my primary reasons for building a pond was for wildlife enhancement. During the drought of 2011 my pond and most of the surrounding ponds went completely dry, leaving the local wildlife very few places where they could quench their thirst. To help out the wildlife I placed some makeshift water troughs around the yard. These immediately became very popular with the local inhabitants. 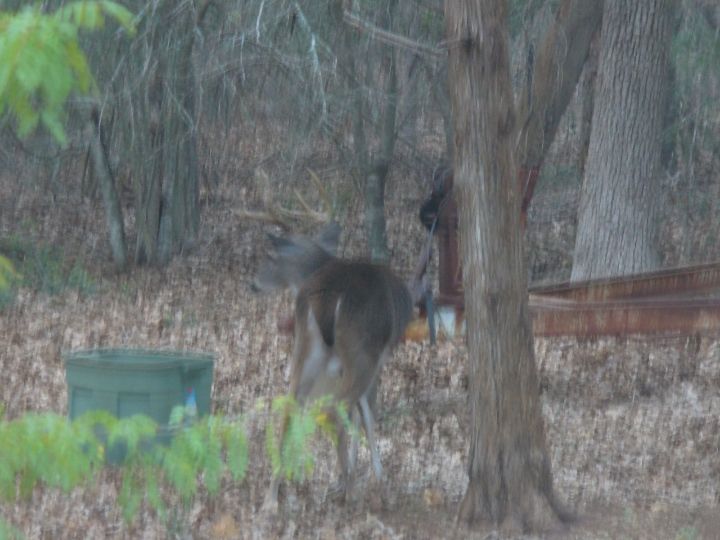 (Above) I used some green plastic storage containers as water troughs. 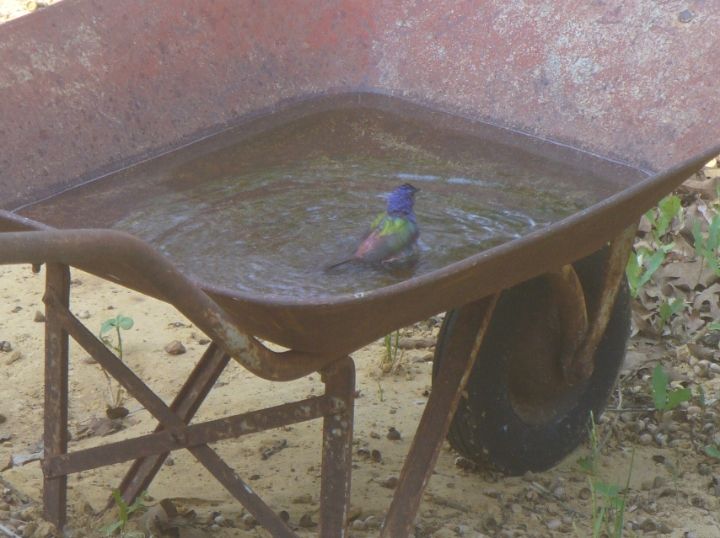 (Above) This old wheelbarrow made for a nice bird bath. A raccoon kept tipping it over, so I had to anchor it down. 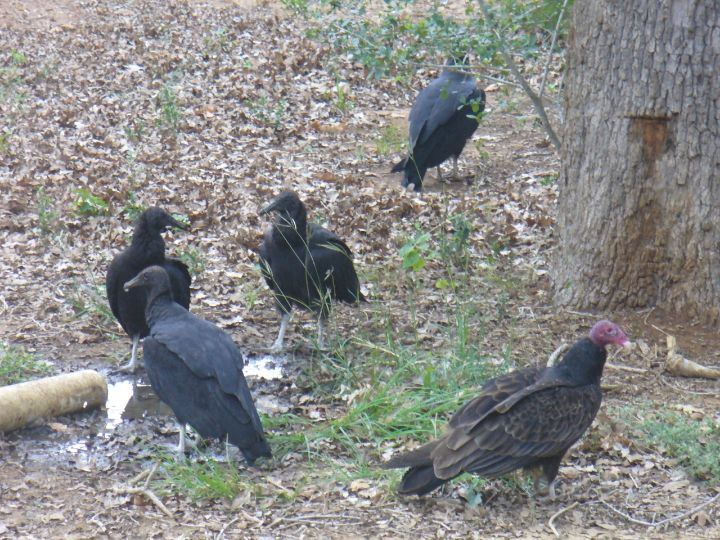 (Above) I diverted the drain from the kitchen sink to the yard, in an effort to water the trees. The puddles it created quickly became very popular with these lovely creatures, as well as the crows, and many other critters. Heck, I'm surprised a Great Blue Heron didn't show up as well.  (Above) A couple of times this speedy little guy was spotted drinking from the wheelbarrow. From what I've read about Road Runners, supposedly, they don't drink water. Instead, they are said to absorb the water from their prey, i.e.; lizards, bugs, snakes, etc.... I guess, he didn't get the memo..... Beep! Beep!
|
|
|
|
|
Joined: Jan 2013
Posts: 352
|
|
OP
Joined: Jan 2013
Posts: 352 |
After the initial construction of the pond I used the rented trackhoe for some other projects on the property. One of these projects was the clearing of a 1/4 mile long driveway through the woods. This driveway would replace the old one that was located on the pipeline right of way, next to the neighbor's fence line. In the area where this new drive exited the woods and crossed the pipeline I had to install a culvert. A couple of years later I carved out a diversion ditch with my tractor to divert the runoff from this culvert to the pond. I figured that with the repeated periods of drought I should capture all the water that I possibly could. 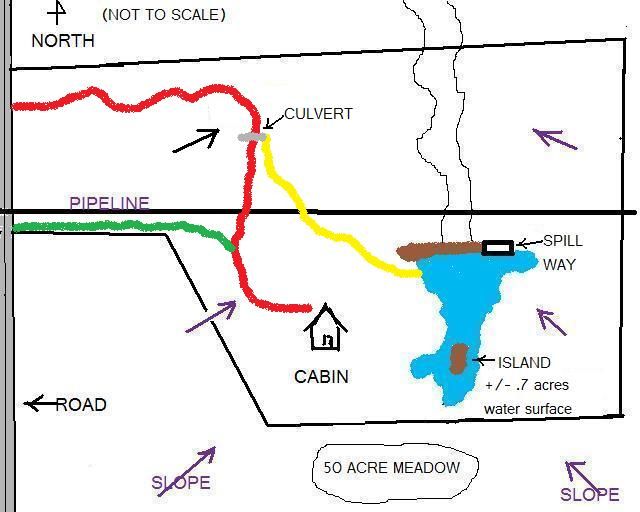 Red line is the new driveway. Green line is the old driveway. Yellow line is the diversion ditch, which, captures all the runoff to the left (west) of it. 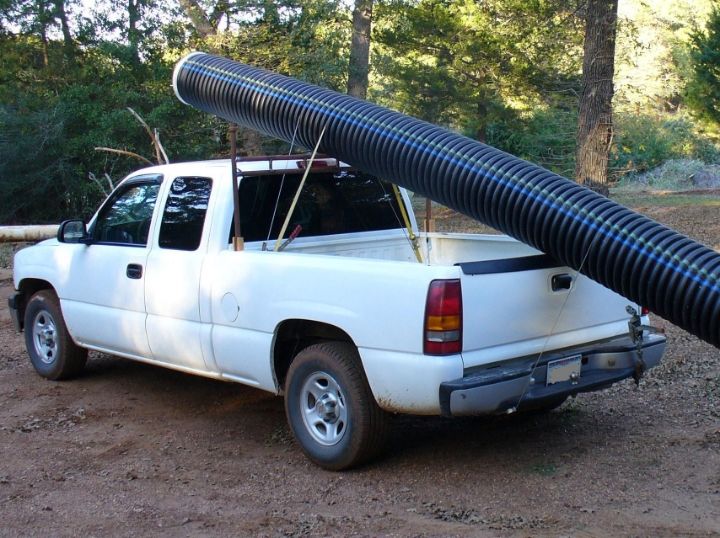 (Above) I didn't have access to a trailer, so I fabricated a headache rack with some scrap 1 inch pipe. 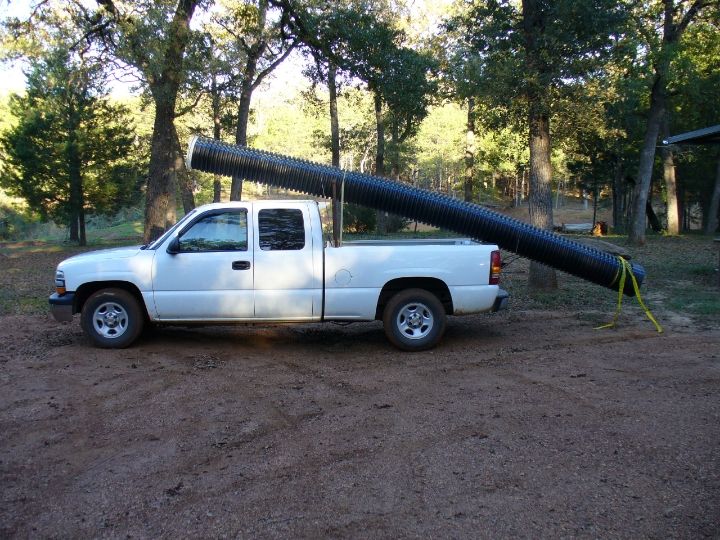 (Above) I received some strange looks as I drove down the road. Not sure if it was my truck's appearance or, the loud, low pitched whistling noise emitting from the culvert pipe when I exceeded 50 mph.
|
|
|
|
|
Joined: Jan 2013
Posts: 352
|
|
OP
Joined: Jan 2013
Posts: 352 |
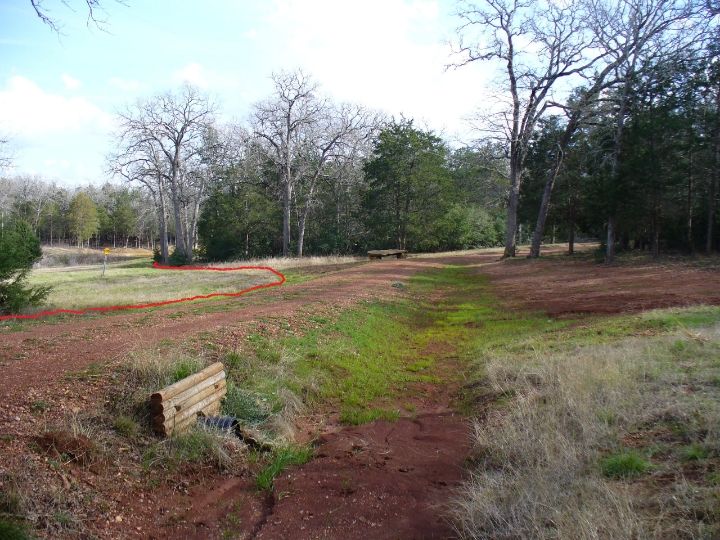 (Above) Red line is the diversion ditch. 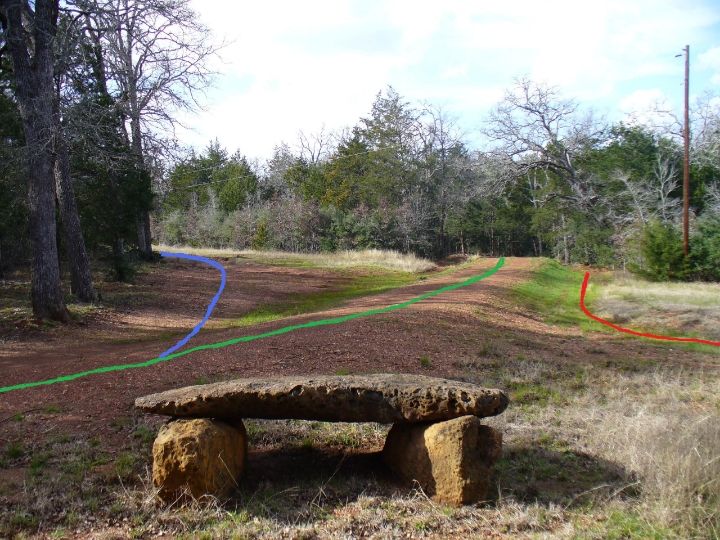 (Above) Blue line is the old driveway. Green line is the new driveway. Red line is the diversion ditch. 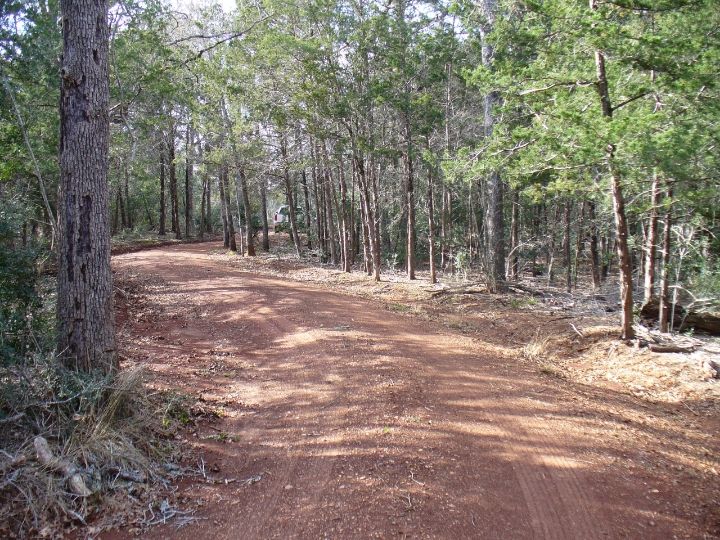 .... 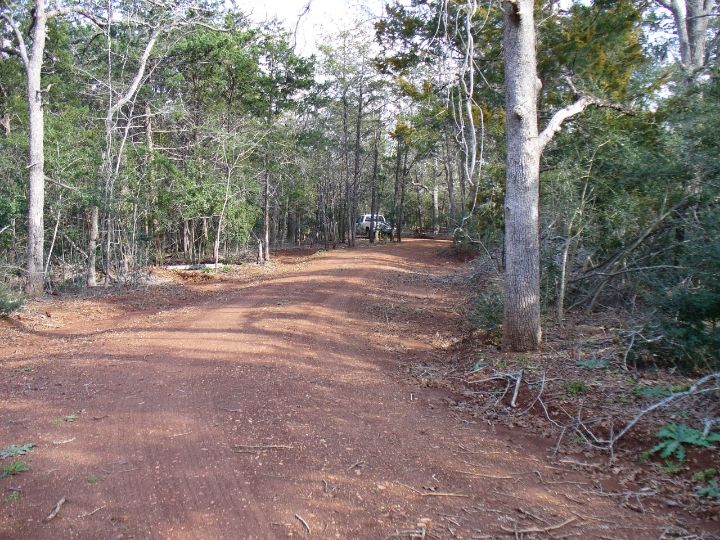 The last 2 pictures are of the new driveway......(To be continued.)
|
|
|
Moderated by Bill Cody, Bruce Condello, catmandoo, Chris Steelman, Dave Davidson1, esshup, ewest, FireIsHot, Omaha, Sunil, teehjaeh57 |
|