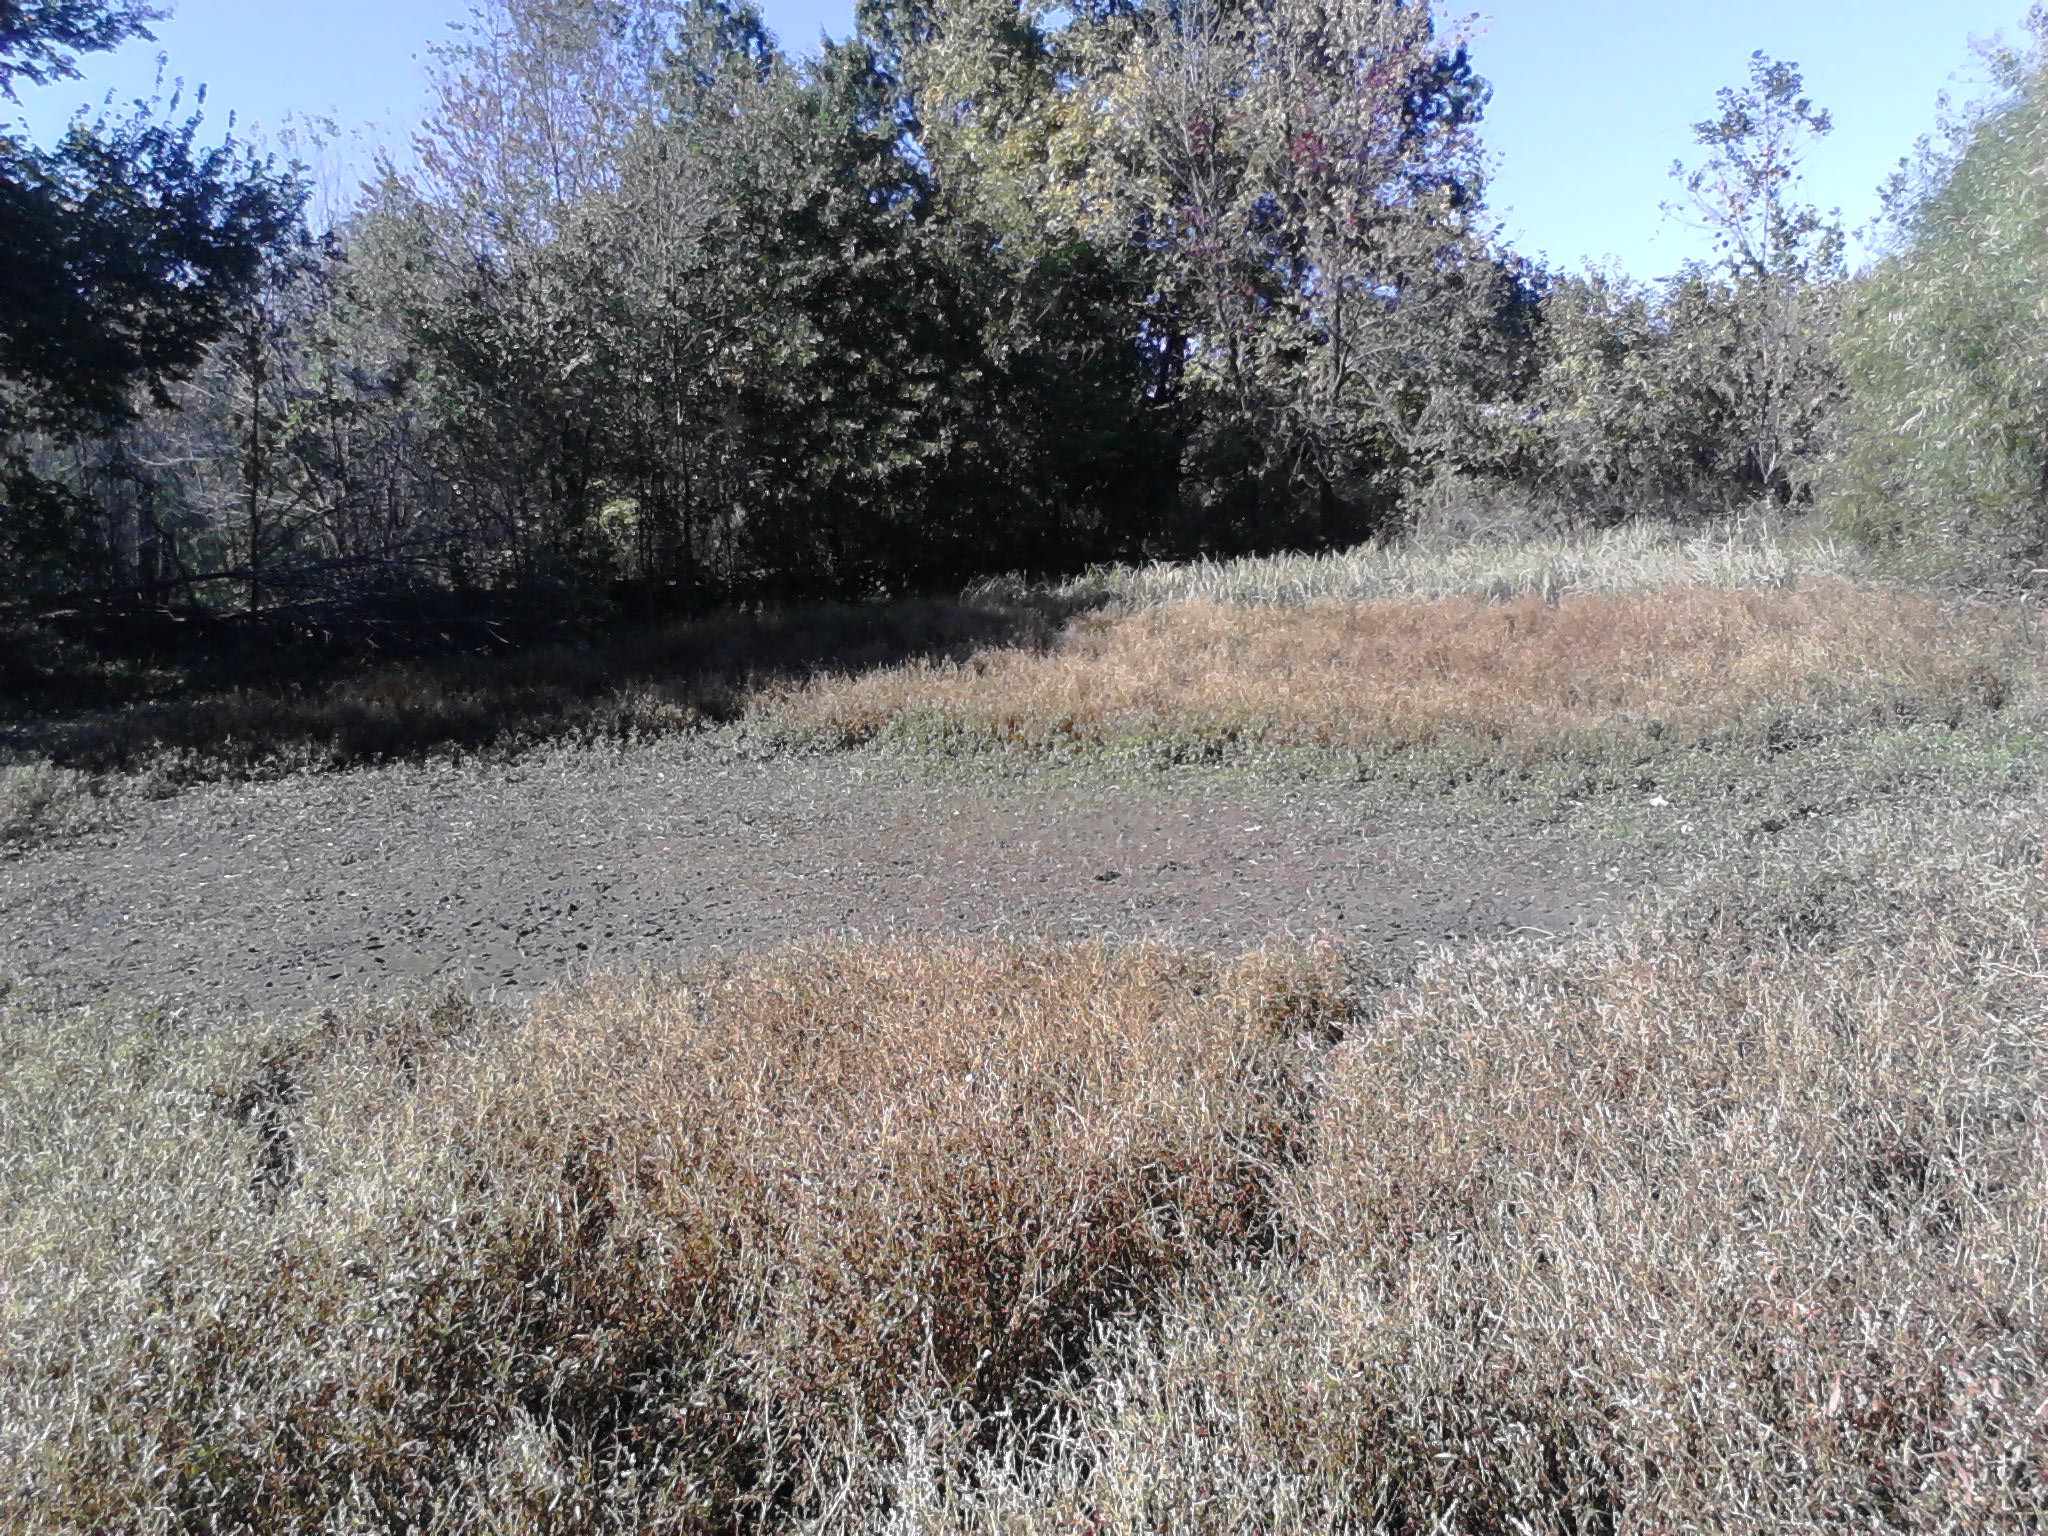
After building our own 3.5 acre pond and reclaiming a 40 year old farm pond on our own property recently, decided to tackle our son's old pond on his property. I think it was built about 50 years ago by the then owner with an RD7 Cat dozer. I'm guessing it is about an acre, maybe 1.5. It was basically dried up but very mucky in the bottom. The overflow pipe had been destroyed and washed out of the dam in one spot.
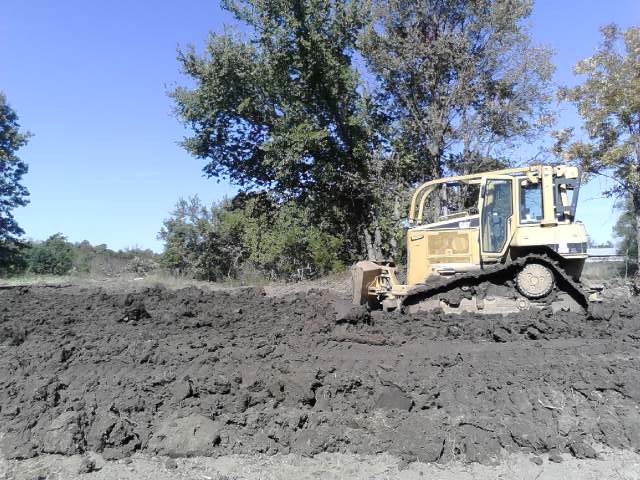
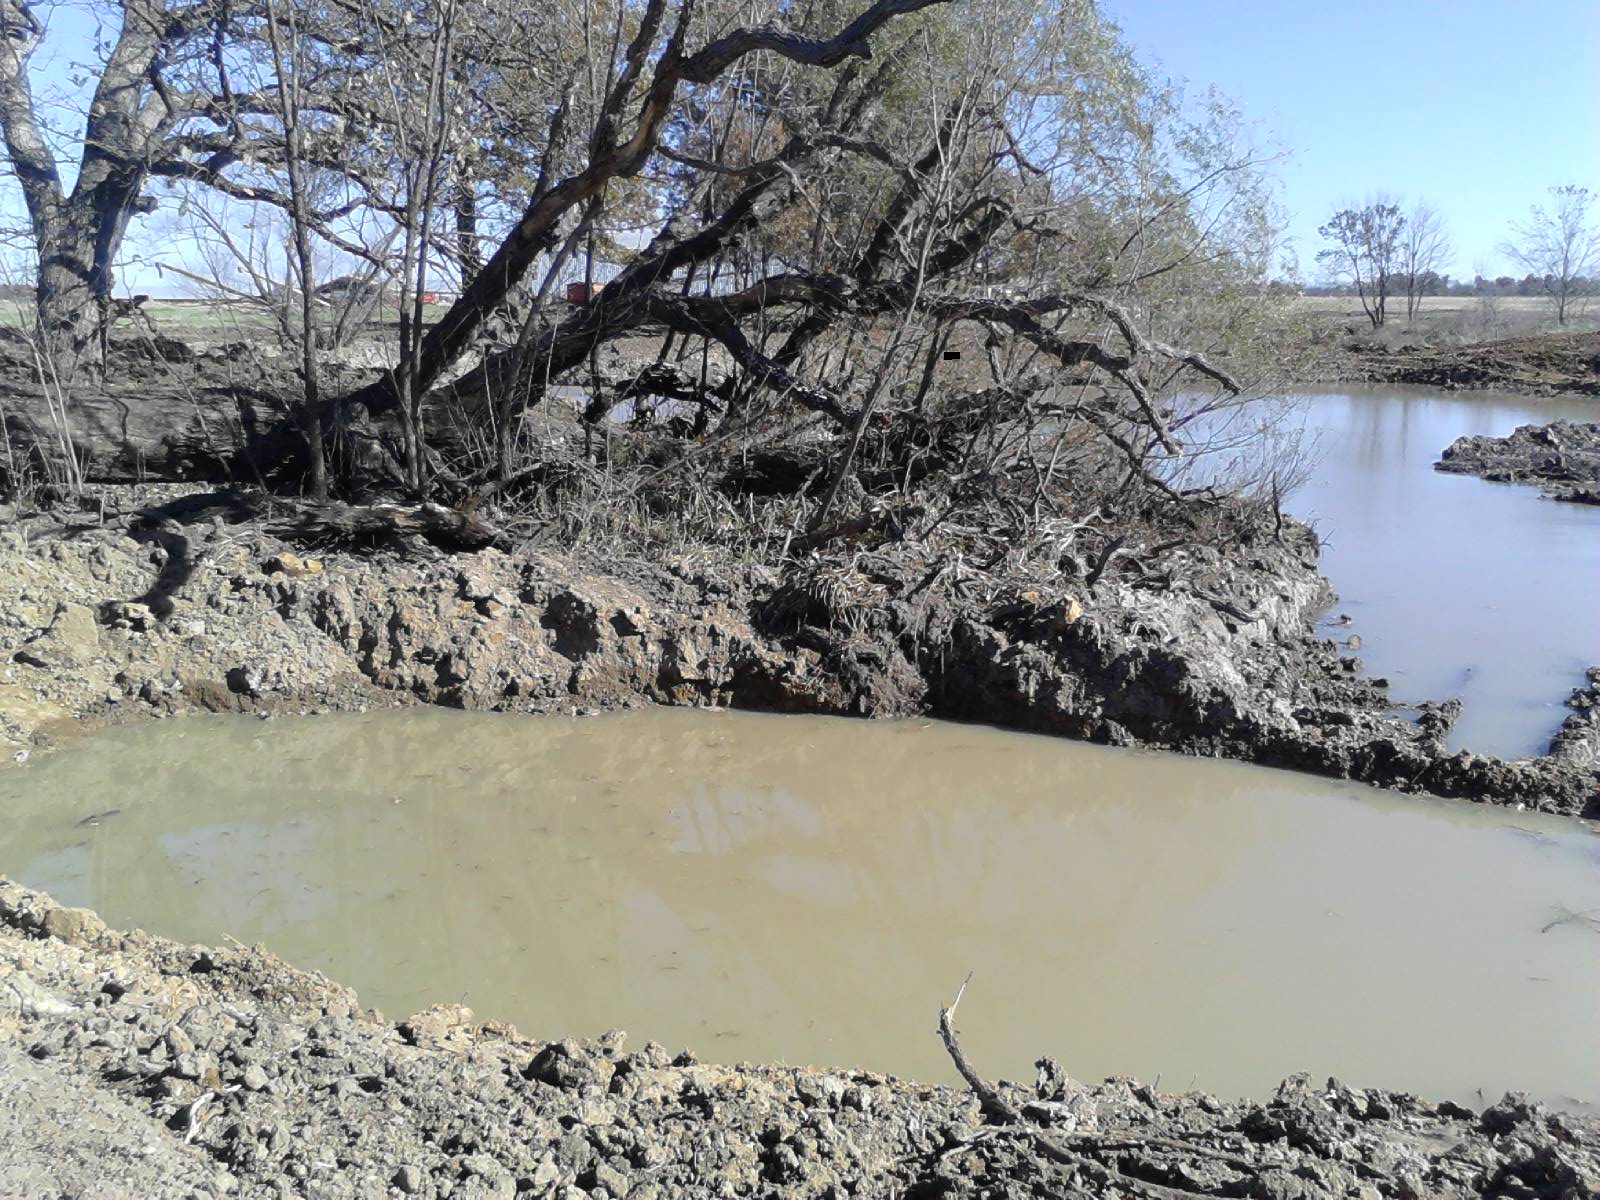
Very mucky in the bottom. Trying to work down to hard clay for enough traction to push it. The problem I run into on both this pond and the old one of my own I renovated is the deepest place is near the dam, the exact place I wish to push the material. But it is also the wettest so can not get traction to push that direction. So like on the other pond, I have to push the muck out the side of the pond, then again push it around to where I want it. Long slow process, but it gets there eventually. We used our 12 yard carryall dirt scraper pulled by a 65E Cat farm tractor on my old pond to move the muck from the side around to the back of the dam. Not sure on this one how it will work out. May just use the dozer for it all.
Luckily I am blessed with nice equipment to do the job. The D6N XL is our farm dozer that we use to patch terraces and waterways and make other improvements around the farm. We also have a 12 yard scraper and a JCB TLB along with an IT28 Cat loader. So one way or another, it the weather cooperates, the muck will get moved.
Only stuck once so far and the JD9300 4wd tractor and 4" diameter rope pulled it out easily. Decided I could not start on the lowest point. Have to work my way to it. May have to leave a spot in the middle. That is what I did in my old pond. So shallower water near the dam and the deep end opposite. You can see the old dam in the top of the "stuck in mud here" picture.
I guess this will be my Christmas present to my son and his young family.
snrub
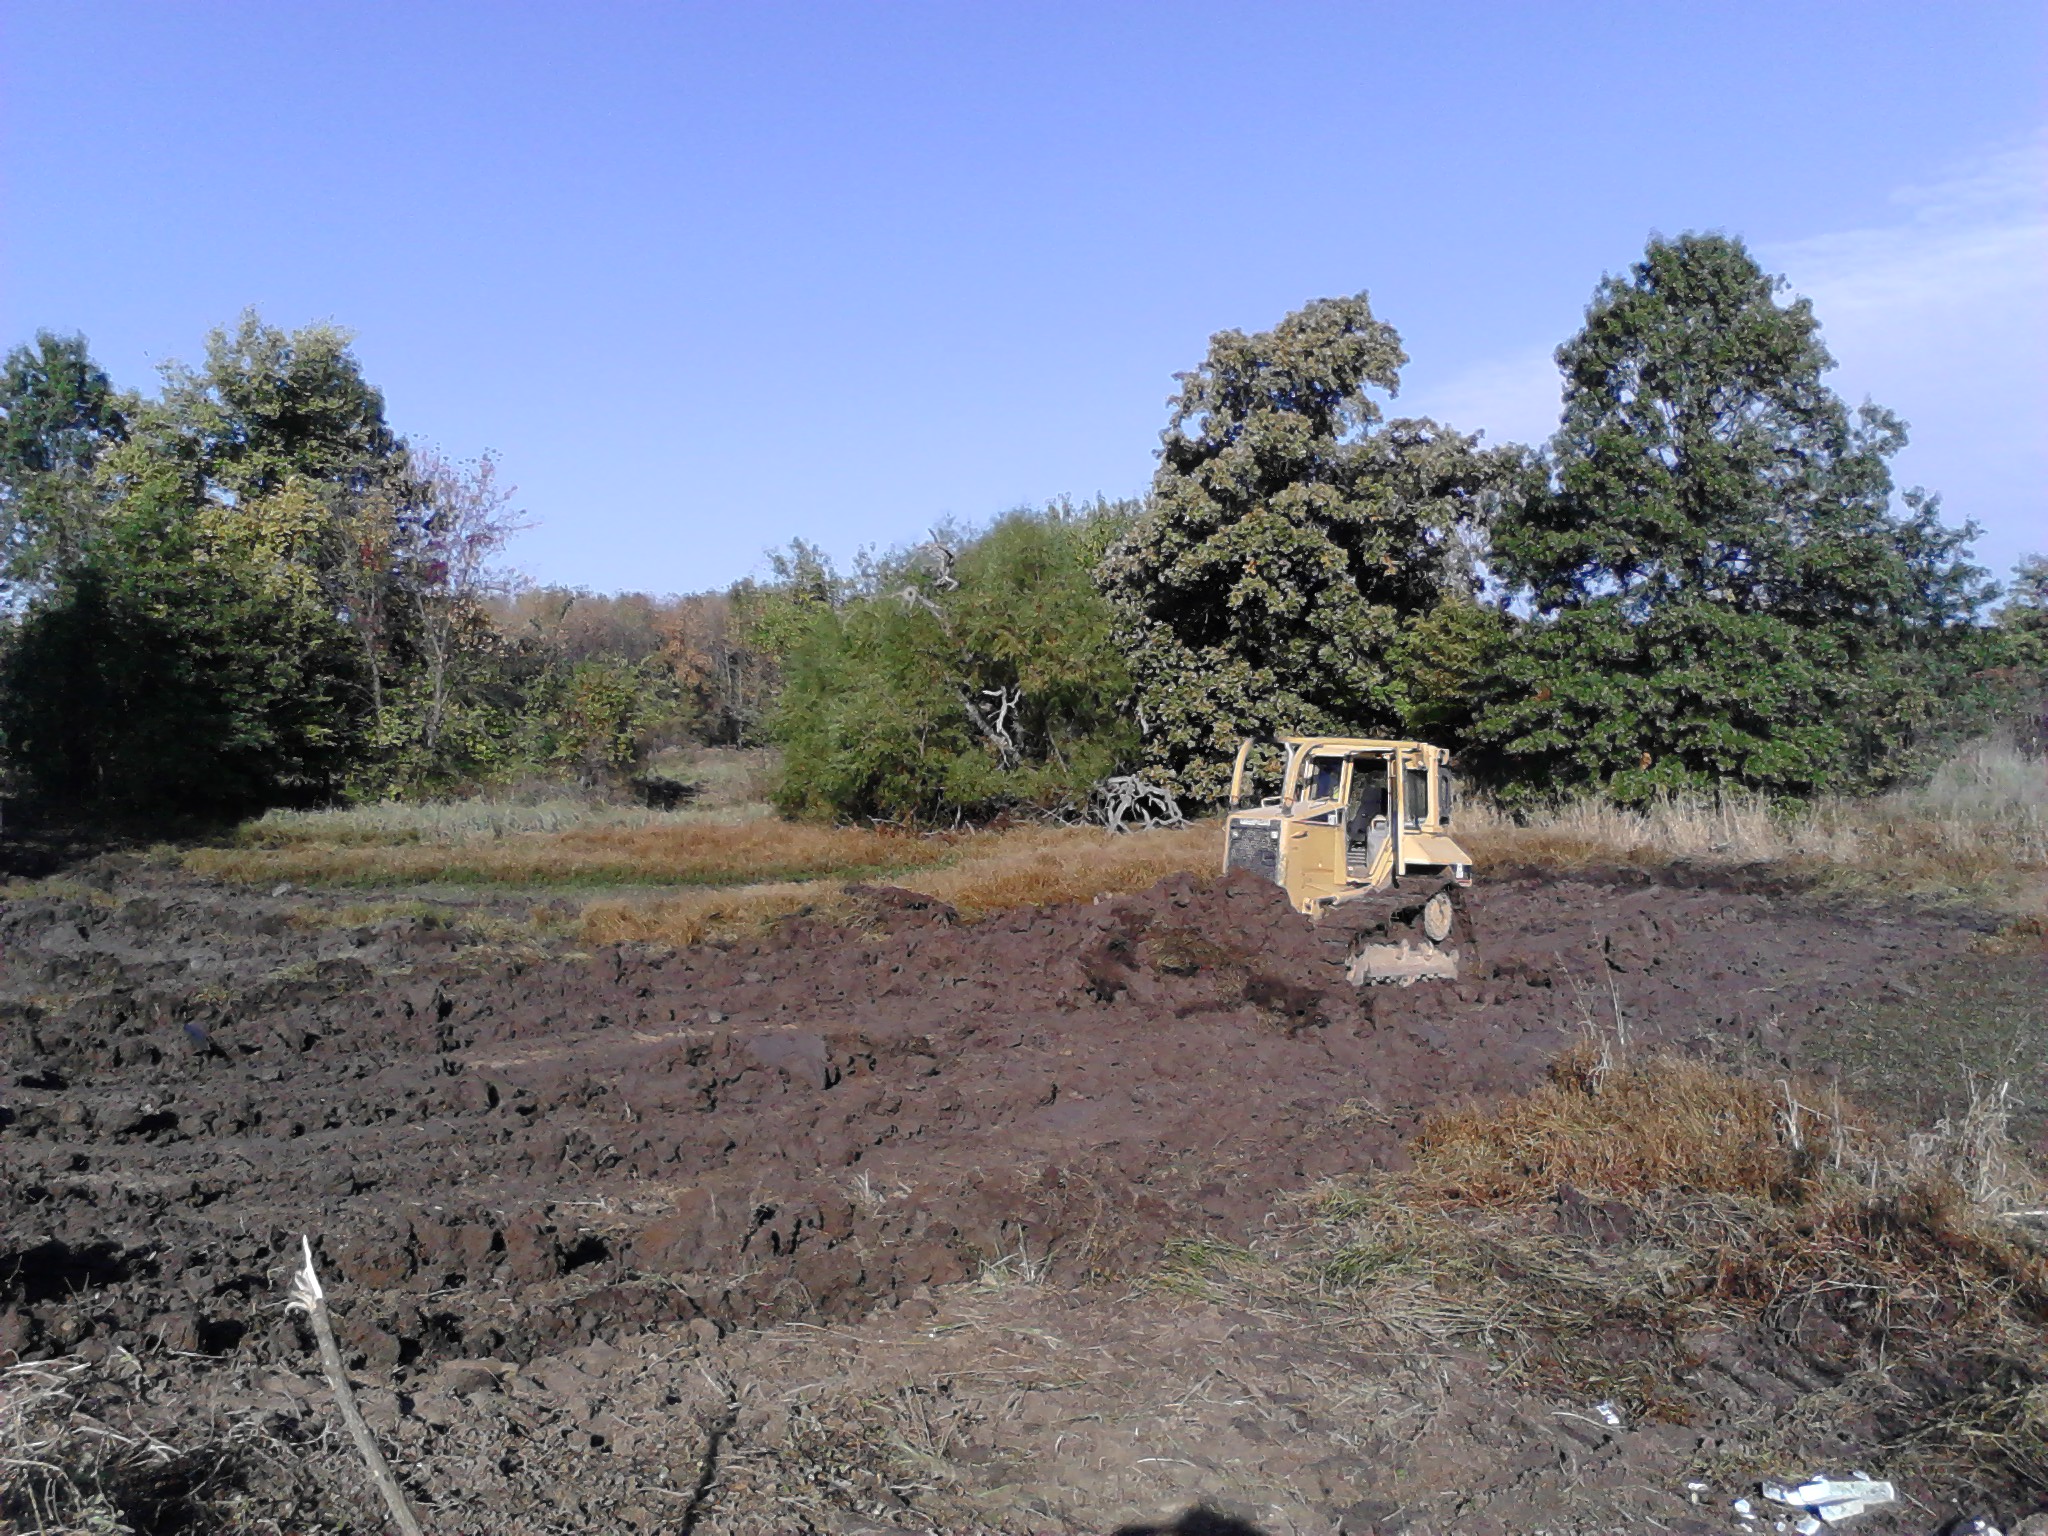
Description: First (but probably not last) time stuck in the mud. 4wd tractor pulled it our easily
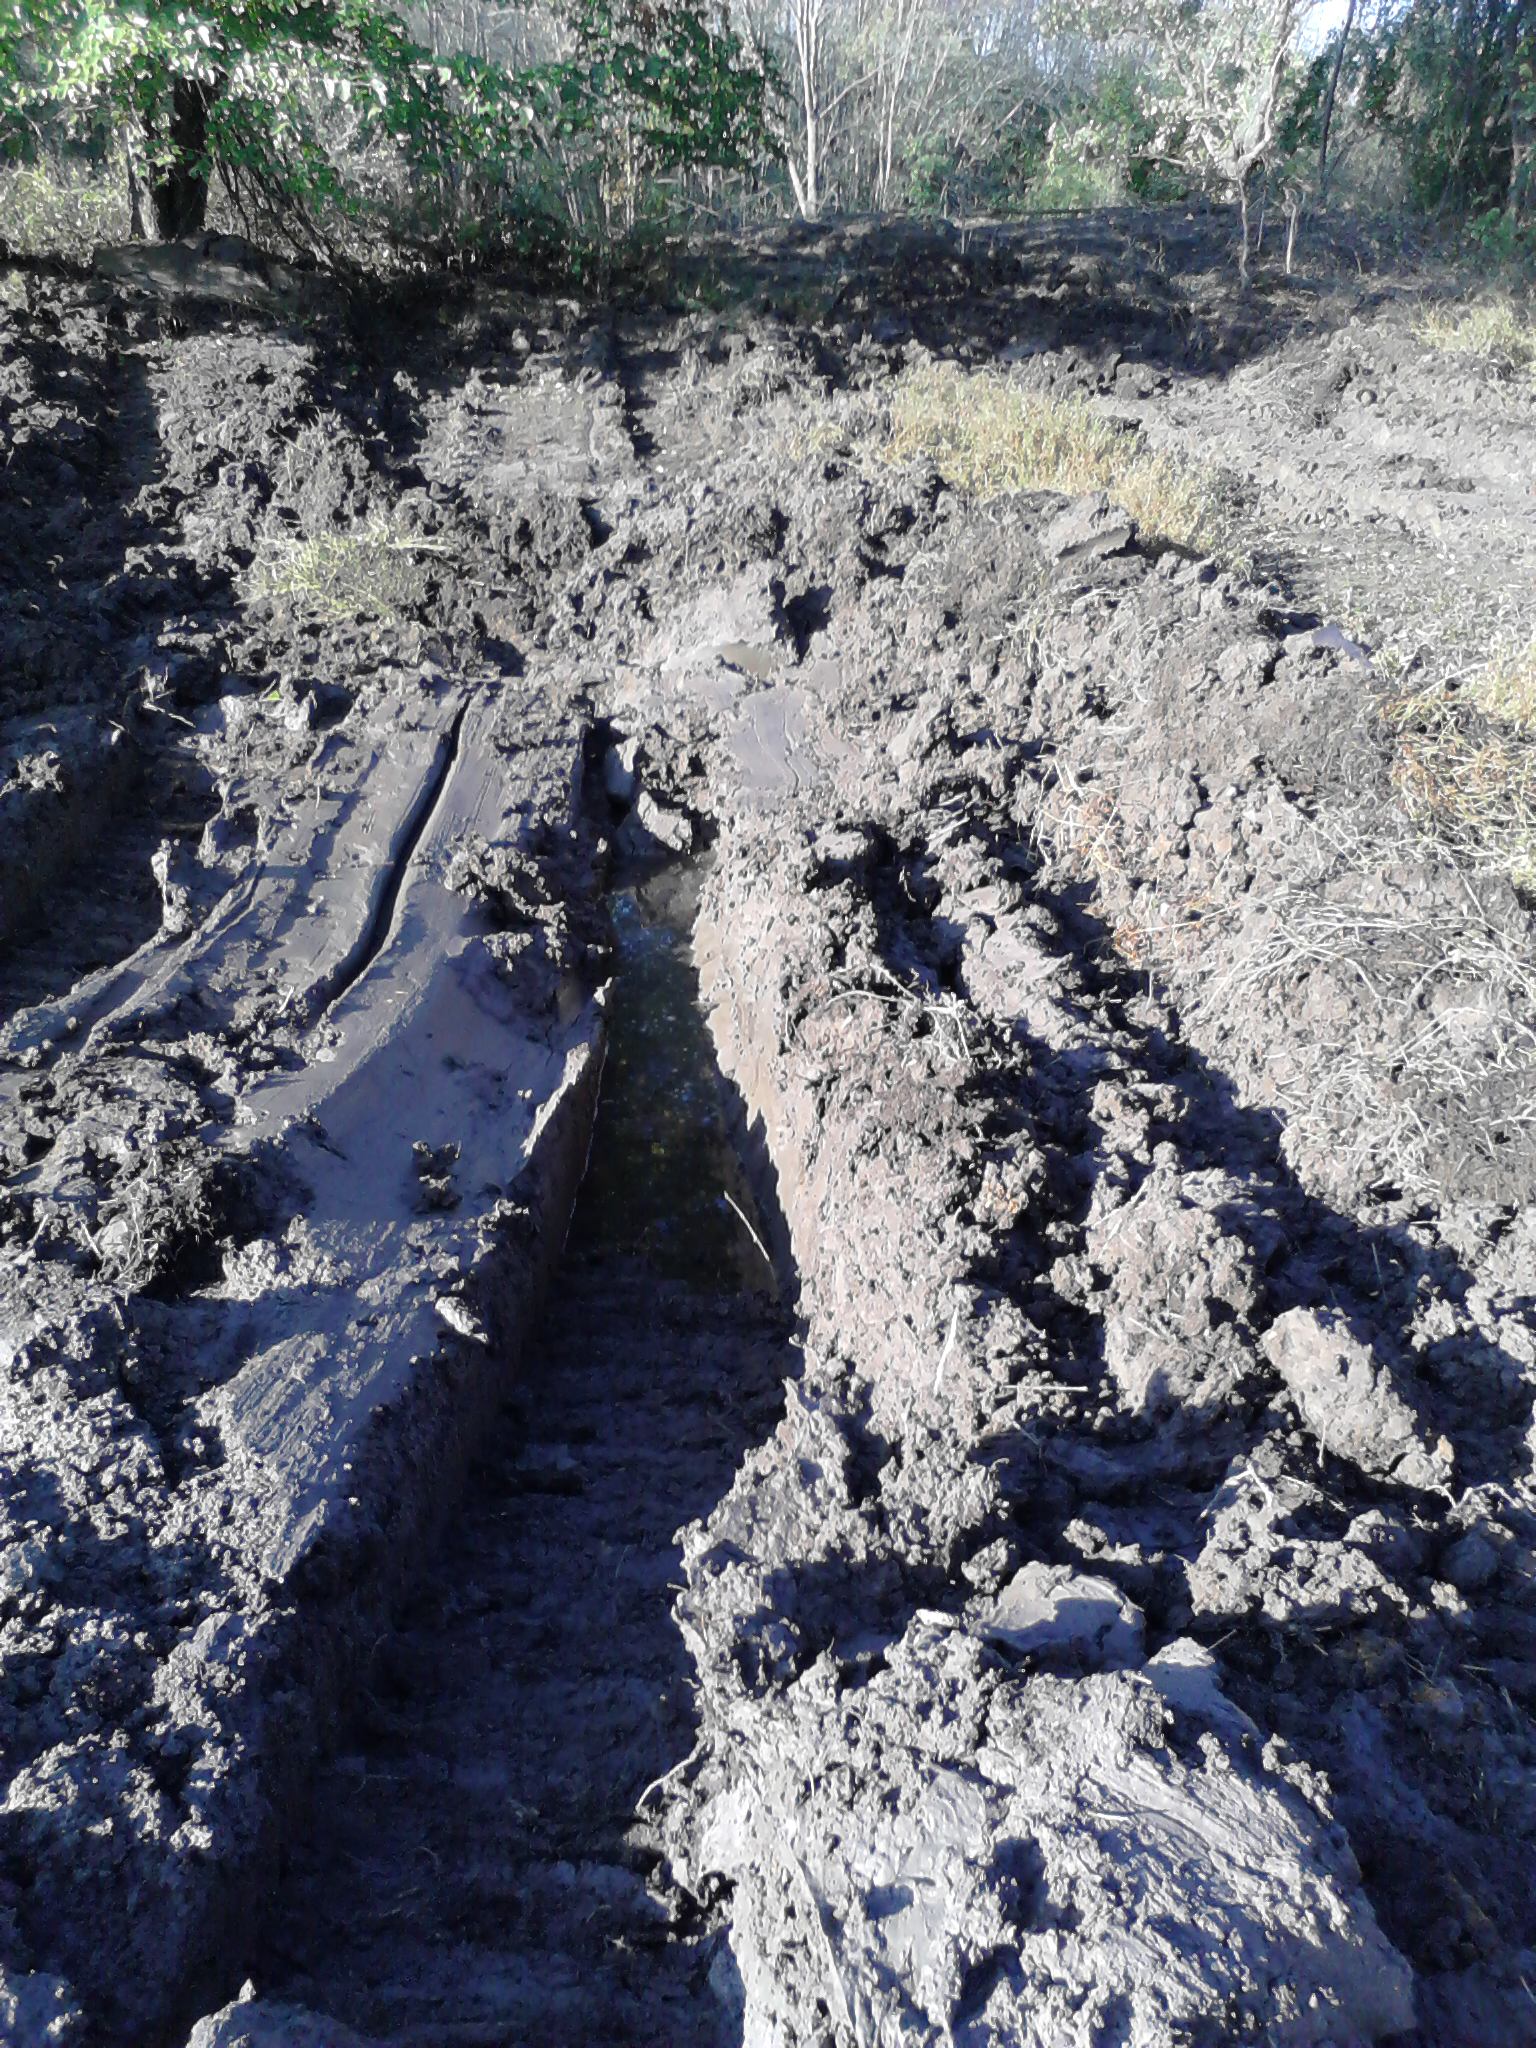
I only put in 4 or five hours a day so progress is slow. Still pushing muck. Got down to clay and thought I had it made. Pushed really well for about an hour then hit pocket of muck and was back to pushing muck.
Taking the spoil around to the back of the old dam. Not too worried about leaks as the old dam seems sound except for the break in the overflow. Will look for some good clay for that repair. I'll have a lot of excessive dirt to get rid of so the dam will end up really thick with a really nice gentle slope on the back side - maybe a 5 to 1. The old dam was typical of farm ponds of the day created primarily for livestock watering - thin and steep sides. Too steep to mow. A good place to get rid of all the old mucky dirt.
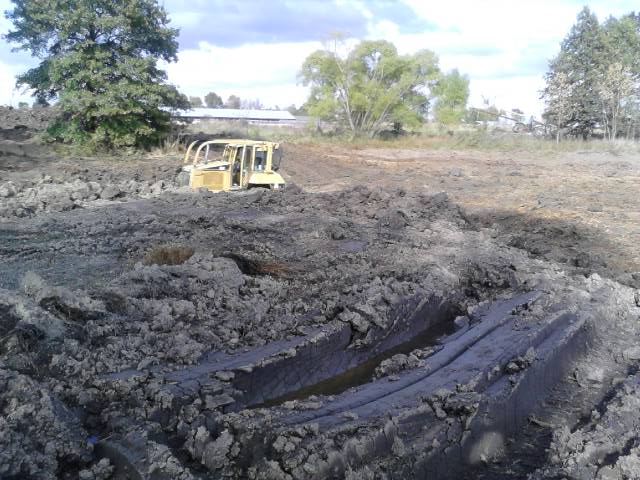
You can see how wet the dirt is by the dozer tracks.
There are two trees visible in the photo growing in the dam. I know trees are a no-no in a dam but am going to leave them anyway. Will add about a 20 foot pad on the front side about a foot above water level to make a nice spot for the grandkids to fish in the shade and to make some extra thickness in the dam to help prevent future problems the tree might cause. Along with all the dirt I am putting on the back side of the dam along with the fact that there will only be about 5 foot of water depth against the dam I don't forsee the trees causing any serious problems for at least twenty years. I debated on taking the trees out, but liked the shade and did not like the idea of destroying that portion of the old dam and worry about getting a sound patch there.
Rebuilding old ponds compared to just building a new one has advantages and disadvantages. The trees around the perimeter and the "character" that people spend lots of money to create in their new pond is already there. On the other hand, when built form scratch you know exactly what the core of the dam consists of and that old nutrients and whatever lurks in the old dirt of an old pond are not going to be a problem.
snrub
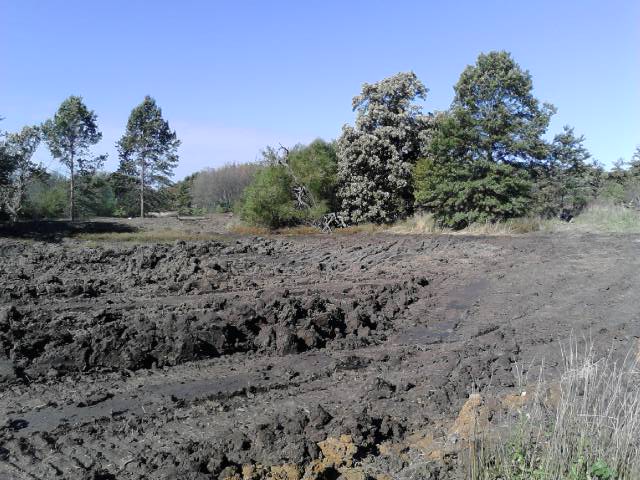
Where the dam washed out, can you cut a hole wide enough for the dozer and push the muck thru the opening?
Maybe by doing that it will allow more water to drain out, helping to make the muck more solid?
I did cut it wide enough to make sure I get some good material in there to bond with the old dam. The problem is it is just solid enough to drive the dozer on the material along that side of the pond where the break enters. I have been using that side part time to make a circle after spreading the material behind the dam to get back to the point of pushing material. I'm afraid if I start pushing through it I will just destroy my access point as I don't think it would stand up. The other problem is two nice oak trees are directly behind the area (which I want to leave) I would need to push material into before I could spread it behind the dam so would be very limited in any area to stockpile.
Plan A was to do all the work in the bottom of the pond and get as much material out of the bottom before rains came. The "plan" quickly went to plan B as I ran out of room to stockpile and the pile I created was getting tall enough and slick enough it was getting hard to get any decent amount of material moved. So I had to move the pile to its final destination to get room to work again. I imagine I will get about to plan L or Z before this is all done.
It is coming along. Just kind of slow where the push is considerably longer than I would like it to be. That said, on this smaller pond it is not any longer than the length I pushed material in my new pond although all the really long hauls were done with a scraper.
I'm taking some chances here. Chances that a contractor or perhaps someone paying good money for a contractor would not want to risk the investment. I just want to point this out to anyone following this thread should they decide to do something similar. The muck I am pushing out is going mostly behind the old dam to strengthen it and give it some "backup" should the old dam be not quite as sound as I think it is. After all, there is no easy way that I know to really know what the inside looks like without destroying it and starting over (and that might have been the better choice). But the material I am using is mostly sediment muck. Not what a person would really desire for the dam, were he building a new one, to be made of. I'm just going by the seat of my pants and what I have seen done for small cow ponds around this area for as long as I have lived. They seemed to have worked, although some of them with minor leaks. I am hoping that the sheer volume of material I will be putting behind the dam will be adequate should the old dam have some internal damages from old roots or rodents. If a person was paying good money to have his pond renovated rather than a semi-retired farmer taking some of his farm equipment and doing a freebie for his son and family I suspect they would not want to rely on "hope" that it would work out. That being said, I really do believe there will be enough mass involved to cure any weakness in "the plan". I just wanted to point that out as well as that I am not a professional contractor, construction equipment operator or pond consultant so should anyone try what I am doing like I am doing it they do it at there own risk, as I am. I will report if we end up with a leaky, undesirable pond though.
I don't know exactly what I am doing but that has never stopped me before. The new 3.5 acre pond we built we did "by the book" from a NRCS plan and it turned out very nice. The old pond we renovated an eighth mile away I went by the seat of my pants quite as an afterthought (the dozer ran out of anything to do on the new pond while the scraper was working on long hauls so I thought, what the heck, Ill push around in this old dried up pond for a half day. A half day of projected work turned into many days over a period in spits and spurts of a year but it turned out nice).
I welcome suggestions (thanks for yours) and even criticisms and pointing out what might not work as I progress. I already know the trees are problematic for longevity. It is somewhat of an experiment that I think will turn out ok but lots of things I have tried have not over the years, so this might not either (no risk, no reward).
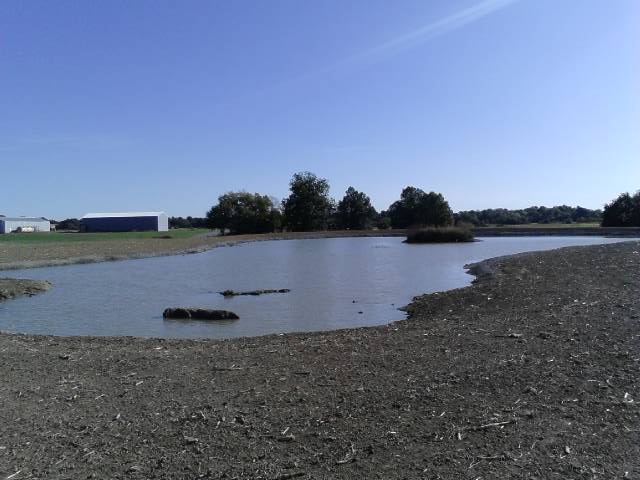
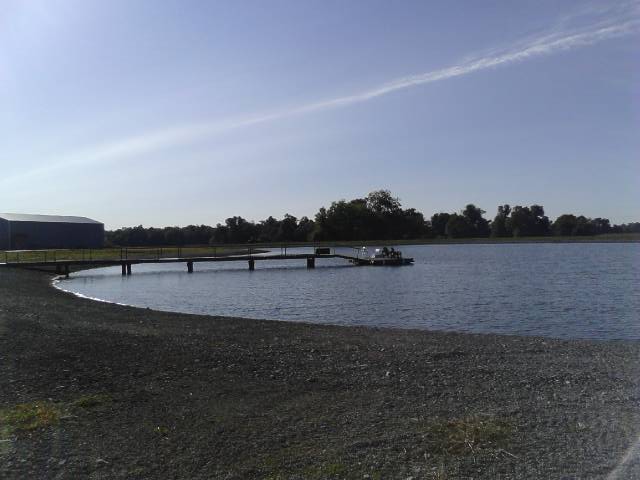
I have never got around to doing my profile so here are a couple pictures of the new 3.5 acre pond and the old renovated pond not far from it. I just got the old pond dam smoothed down and seeded before starting on the son's pond. Both ponds are about a foot below full pool because of extended dry weather, although they have both been full to the point of overflowing.
John
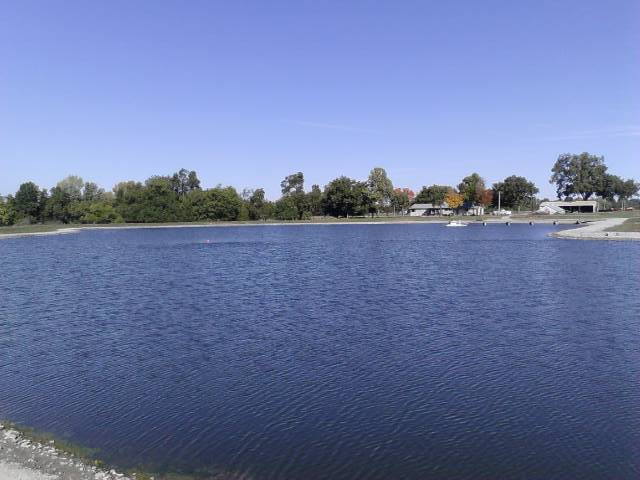
Looks like some fun projects! And great looking pond. I have been trying to hire somebody to renovate my pond in LaGrange, Texas for 2 month, all are too busy, and now the rain has FINALLY started? It is in need of a demucking just like yours.
Rob C
It is starting to look like a pond.
FINALLY got to the bottom and got the dozer on semi-solid ground so I can get something done. Probably have 2/3 of the deepest part of the bowl cleaned out. If I can get the lower portion all cleaned out even if it rains and water accumulates in the bottom I can work on the shallower portions with runoff contained on the deepest portion.
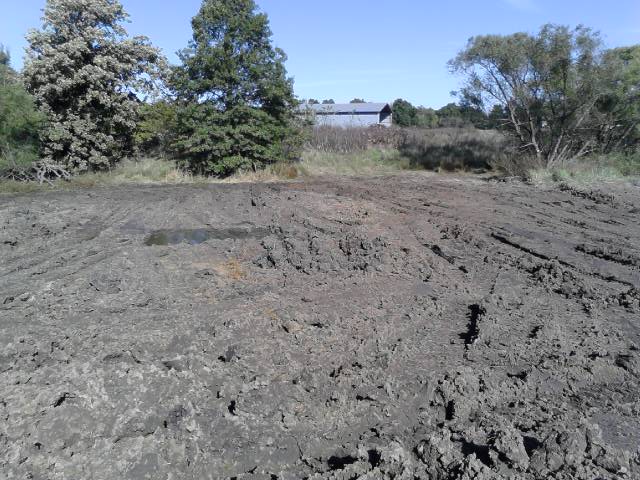
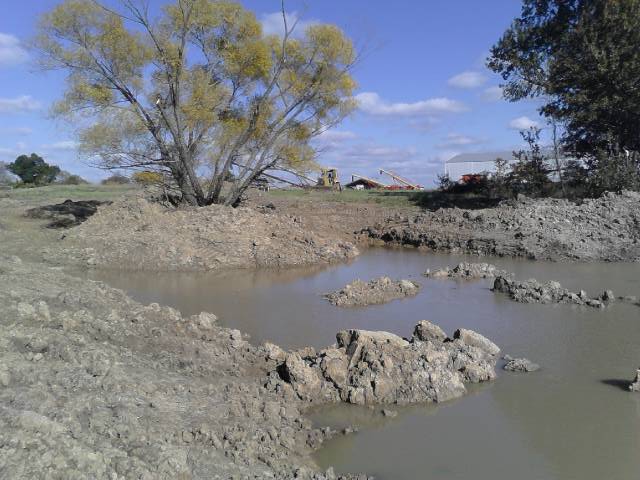
You can see in the photos what 50 years of muck accumulation looks like in a pond. Raining today so wish I could have got another day in and would have had the deep part done. I did get a deep hole made away from the remaining muck and if we get only a little runoff it should accumulate there and not bother the process too bad. If we get a gully washer what you see in the pictures may be what the bottom of the pond looks like going forward.
I am in that tiny portion of SE Kansas that gets something like 42" rainfall annual average and sometimes it starts raining in the fall and does not dry out till spring. Hopefully not this year. They are only calling for small rainfall amounts this event. Made to to about 10' depth max and that is where I will quit.
snrub
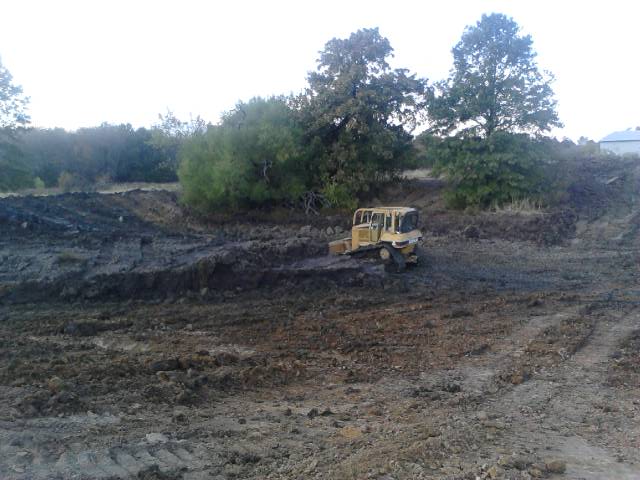
Description: 50 years of accumulated muck
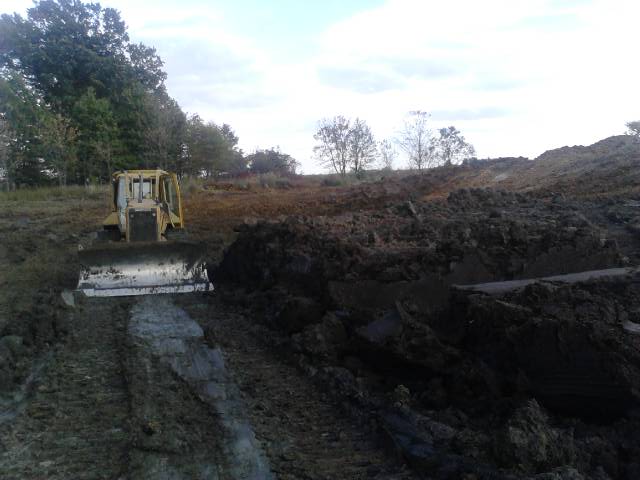
Description: Where I got stuck the first day in the foreground where the water is standing. Interesting thing, the water in the tracks is very clear
I would be very curious to get the soil tested just under the muck line. I have seen a few folks on here who have renovated a pond like this but had problems with clarity and algae blooms after it filled back up. I am wondering if a high degree of nutrients leaches out of the muck into the subsoil being exposed, and if so, how to remedy that nutrient load so it doesn't return to the water too fast. Now would be the opportunity to check it out.
If high in nutrients, perhaps line the pond with a fresh layer of clay before filling? Perhaps dig a little lower and see if there is less down below?
Good ideas but not going to happen. Rained last night and with whats in the forecast the last fourth of the muck may have to stay in the bottom of the pond. So nutrients could be a problem. About two feet of water in the bottom hole now. I was able to work 4 hours in the mist & rain today and clean out most of the rest of the upper part of the bowl but was unable to get back to the muck in the bottom.
What is interesting is that most newly dug ponds around here (unless lined back with top soil like my new pond) are a muddy brown caused from clay suspension in our typical clay subsoils. Often so muddy hard to get a plankton bloom. Old silted in ponds are usually clear. They are likely overgrown with lily pads and other pond weeds but the water is clear compared to a newly dug pond. The only time I see a pond with a blue-green algae problem is if there are lots of cattle with manure runoff and cattle standing in the pond. Or if a lot of poultry litter gets spread on the pasture (high nutrients).
I do not really understand the results I am telling you about. Just what I have observed over the years.
The owner of this pond will not spend a lot of money on it. I will help them stock it with fish from my pond and otherwise it will be a typical farm pond - not much management. They do like to fish (mostly in the creek that transverses their place) so I think they will be able and interested enough to manage the fish population through harvest management. They eat fish out of the creek so I'm sure they will enjoy the pond fish.
Maybe I will get lucky and the fourth of the muck left behind will be the perfect offset to the barren bottom in the rest of the pond and will find a perfect balance. I can dream can't I? LOL
Thanks for the recommendations.
snrub
Lacked one day of getting all the rest of the muck out of the bottom. Has rained twice since and quite a bit of water in the bottom so looks like the remaining muck will remain. Got most of it out at least and even after the rains was still able to work on some of the upper part and got a lot more dirt moved and more deep water area.
Left one willow tree in a shallow area at request of daughter-in-law (removed a couple others). After digging around it to make the surrounding area deeper, decided to make an island out of it. Then after completing the island thought about "island" discussions here on PBF and decided it would be very small it would just grow up to weeds. So pushed a dirt bridge across to it so now the island is no longer an island but a key hole shaped peninsula. I think it will get much more use in that format.
Turning out very nice. Too wet to work on any loose dirt now but still able to do some stuff in new undisturbed ground. Another day and I will have everything done that I want up to full pool level. Then it will just be a matter of waiting till it is dry enough to finish the upper part of the dam and move piles of dirt around and do the finish work.
Still a lot to do, but getting there. Pictures listed below.
snrub
Description: The island turned peninsula. Small but should be a good fishing spot. Finish work will have to come later because of recent rain and more in the forecast
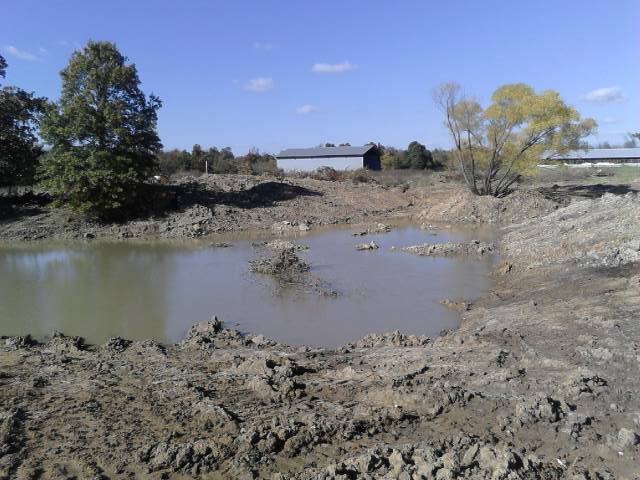
Description: Probably 3-4 feet of water after about 4" total rainfall
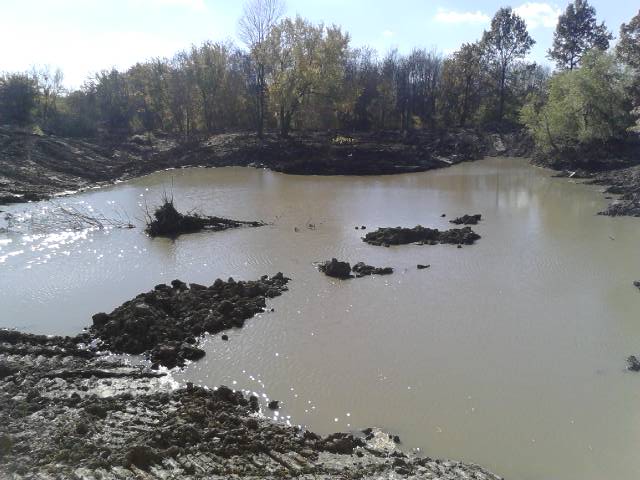
Description: Right as I got rained out dug some deep holes and made mounds with the dirt to give the bottom and sides some "structure". Also pushed a couple trees in with the rootballs attached that will hopefully keep the trees submerged long enough for them to water
Get a 3" or 4" semi-trash pump and pump the water out! Float the suction hose on an inner tube so the end isn't sucking up junk from the pond bottom. You'd be amazed at how much water those things will move if run for a long time. I changed the gas tank on mine so I can use an external 6 gallon tank. Oh high it'll run for 12 hr, on low, 18 or so.
If it was spring or summer I might consider it. This time of year for us it can turn wet and stay wet the whole winter. That and the fact that ground does not dry much in cold weather makes it a low probability of success that once it was pumped out the ground would dry enough to work before the next rain came along.
We had to pump our new pond once but we had warm temps heading into a more dry period and still could not get to work the very bottom (before the next rain) but was able to work all the areas we needed to.
If it was important enough or if time and money were no object it could be done. Just do not figure it worth the effort. The days I could not work on the muck I was able to work on the other end of the pond, so all in all, will have just as much deep water area (probably more actually) as if I had spent the time cleaning the remaining muck. The deep area will just be in a different part of the pond than originally intended. The surface area is only slightly bigger than the original, but the original had a lot of shallow water near the inlet ravine. I have deepened all of that area.
The only issue is not being able to get the nutrient load out. Might actually end up being a benefit as about maybe only 10-15% of the total bottom will be exposed to it where the rest is bare clay. Will not need to fertilize the new pond.
I still should be able to use the backhoe and deepen the area directly adjacent to the dam, unless the rains predicted Tuesday completely fill the pond, which would probably take a 12" rain event which is unlikely (but not unheard of for us, but usually associated with a Gulf hurricane).
I think it will be fine. If not, at least it has to be better than what was there before.
Thanks for the suggestion. I think we had to run a 3" pump about 10 or 12 hours when we built our new pond to get a few feet out of the bottom.
snrub
I just finished re-contouring a couple of ponds, using the sand for pole barn and house pads. We had 2.5" rain in 24 hr that made a sloppy mess; I had hoped it would hold off for another day or two but it didn't. Prepping the ground for grass seed is the job Monday/Tuesday, as it wanted to ball up when back drug Friday morning. Hopefully it will dry out enough today that I can use a harly rake to finish it tomorrow. We were able to get a tri-axle dump truck at each pond and installed a truckload of limestone rip-rap in each for papershell habitat. Roughly 2 rocks thick, from waterline to about 5' depth.
The ponds are groundwater ponds, so I had to run a 3" pump pretty much 24/7 to keep the water levels down so we could see what we were doing.
They're predicting another 2"+ rain on Wed/Thurs so we have to have the erosion matting installed before then.
Shorter days, cooler weather and low sun angle aren't helping!
Wow, sounds like your pond conditions are about opposite of ours. We have no groundwater at that depth and the most common is red or gray solid clay. Occasionally we might run into an old creek bed, some shale, or a sandstone outcrop that can cause leakage problems in certain areas, but mostly clay, clay, clay. So we rarely have problems with the bottom of the pond sealing and in fact our NRCS guy told me that most of our topsoil actually had enough clay content to seal water up but to always put our best material (clay) in the middle of a dam for structural strength and extra sealing.
A lot of the old quarter or half acre cow ponds around here are nothing more than the topsoil scuffed off to the clay (about 6" to 24" down usually unless in a silted in area) and the dam pushed up to dam up an old wash. They held, although it was not uncommon to have an occasional slight dam seep. Quite a different deal than building a bigger pond with higher dam heights and length. We had to go down to six feet in our core to get to clay in our new pond because the dam backside is up against a small seasonal creek and the area undoubtedly had silted in for eons.
We are all surface water.
Interesting the different problems and positives different areas of the country run into building ponds.
snrub
A while has past since last post so will update. After a couple of rains, working as ground conditions and time permitted, quite a bit was accomplished.
Ended up doing quite a lot more than I originally intended but that is ok. I think my son and his family will enjoy it for a long time, so what is a little extra of my labor and Diesel fuel for something so worth while? As I progress on one part of the pond I think "well this would be nice" so several changes and additions have been added while some things like the last portion of the bottom muck removal had to be abandoned for several reasons.
Spending more time than I originally anticipated but isn't that the way most "projects" go?
Here are some pics of the progress with explanations with the them.
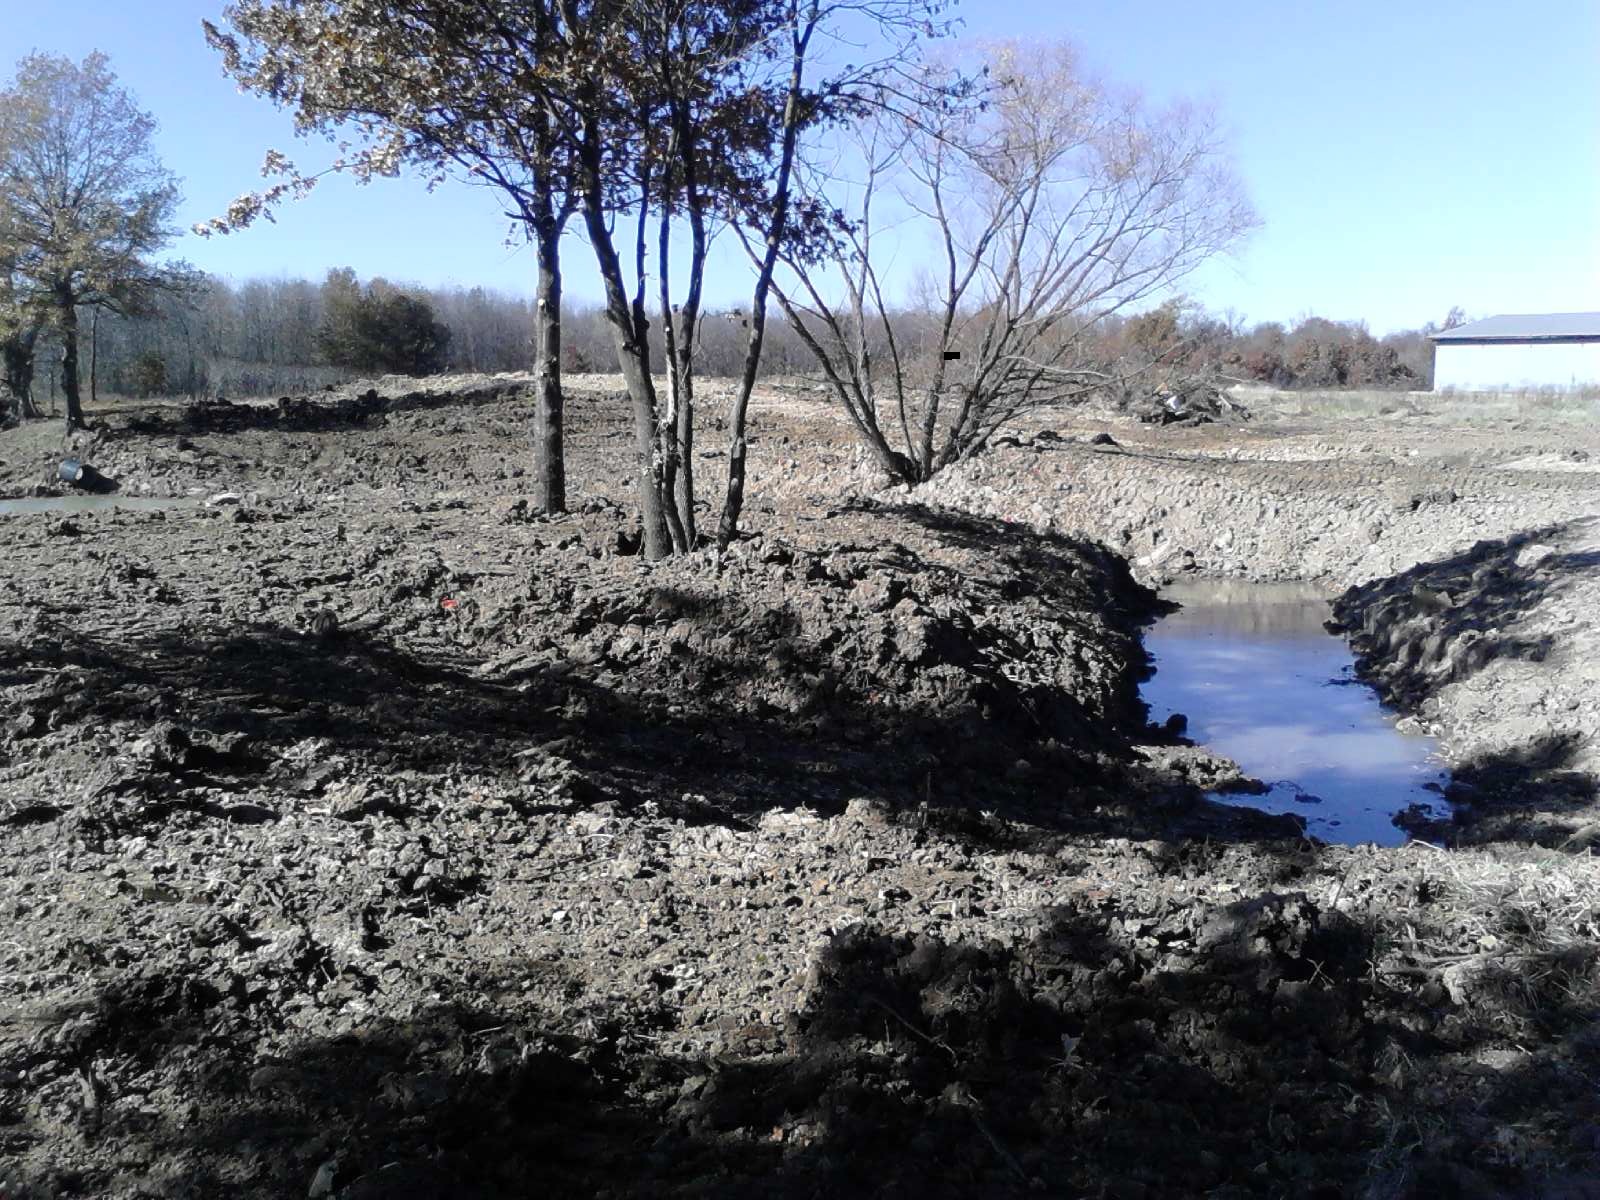
Edit: I see some of my explanations were too long for the pictures. The look from east to west was from the small grove of oak trees. The area was rough and overgrown and a portion of the area would have had about 6" of water in it. Deciding it would be a wonderful little spot for a picnic table I took some fill dirt and filled in where needed, trimed the trees up high enough so I could work in close with the dozer (Ryobi 14v pole saw worked nice on the high limbs)and cleared out the underbrush.
On the "muck" portion that will be shallow a weedy area was not at all a problem with the son. They are the outdoorsy type and this pond will never become the "manicured within an inch of its life" type pond one might see and desired in a semi-urban area. The daughter-in-law even likes cattails and lilly pads so the more "ala natural look" would be fine with them. I have a TLBackhoe so I think we can keep them in check should the need arise.
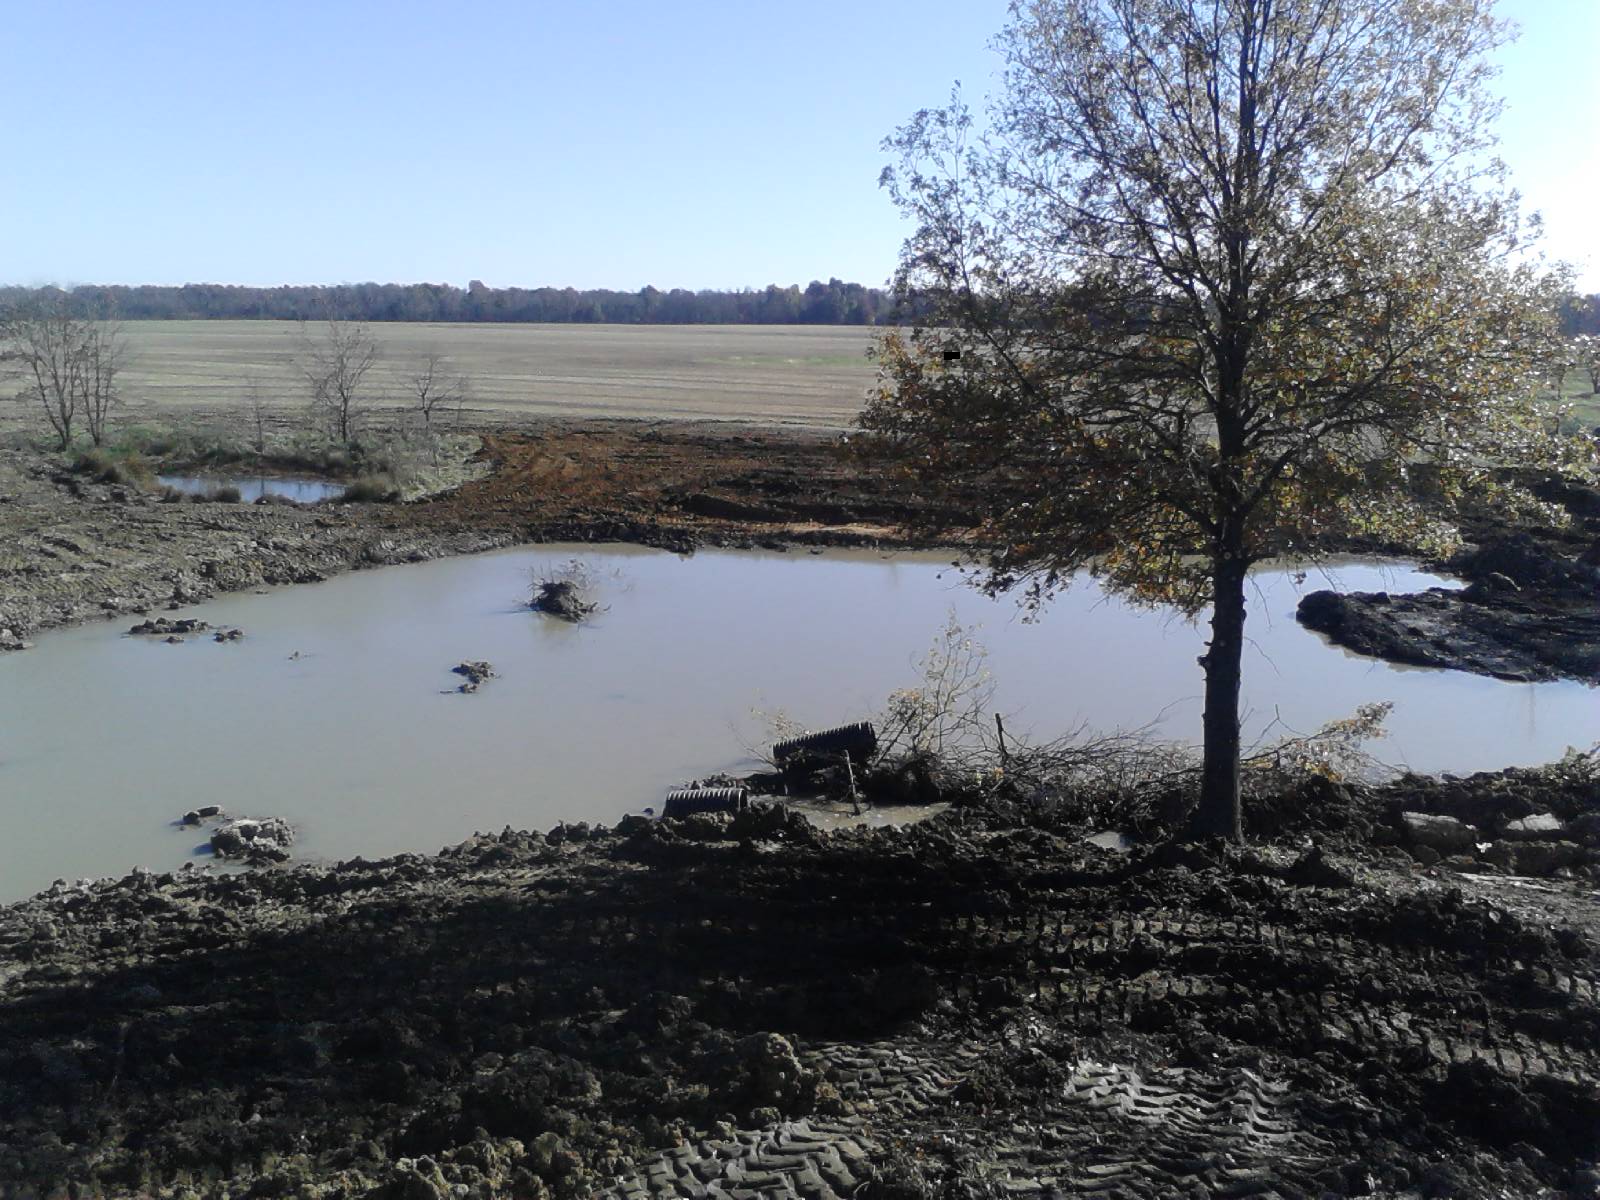
Description: view from the SW corner of the pond looking NE. You can see the muck I was not able to get out (because of rain) on the left. It will end up a shallow area about 4' depth with piles pushed up only a foot deep so will grow up to weeds and cover most likely
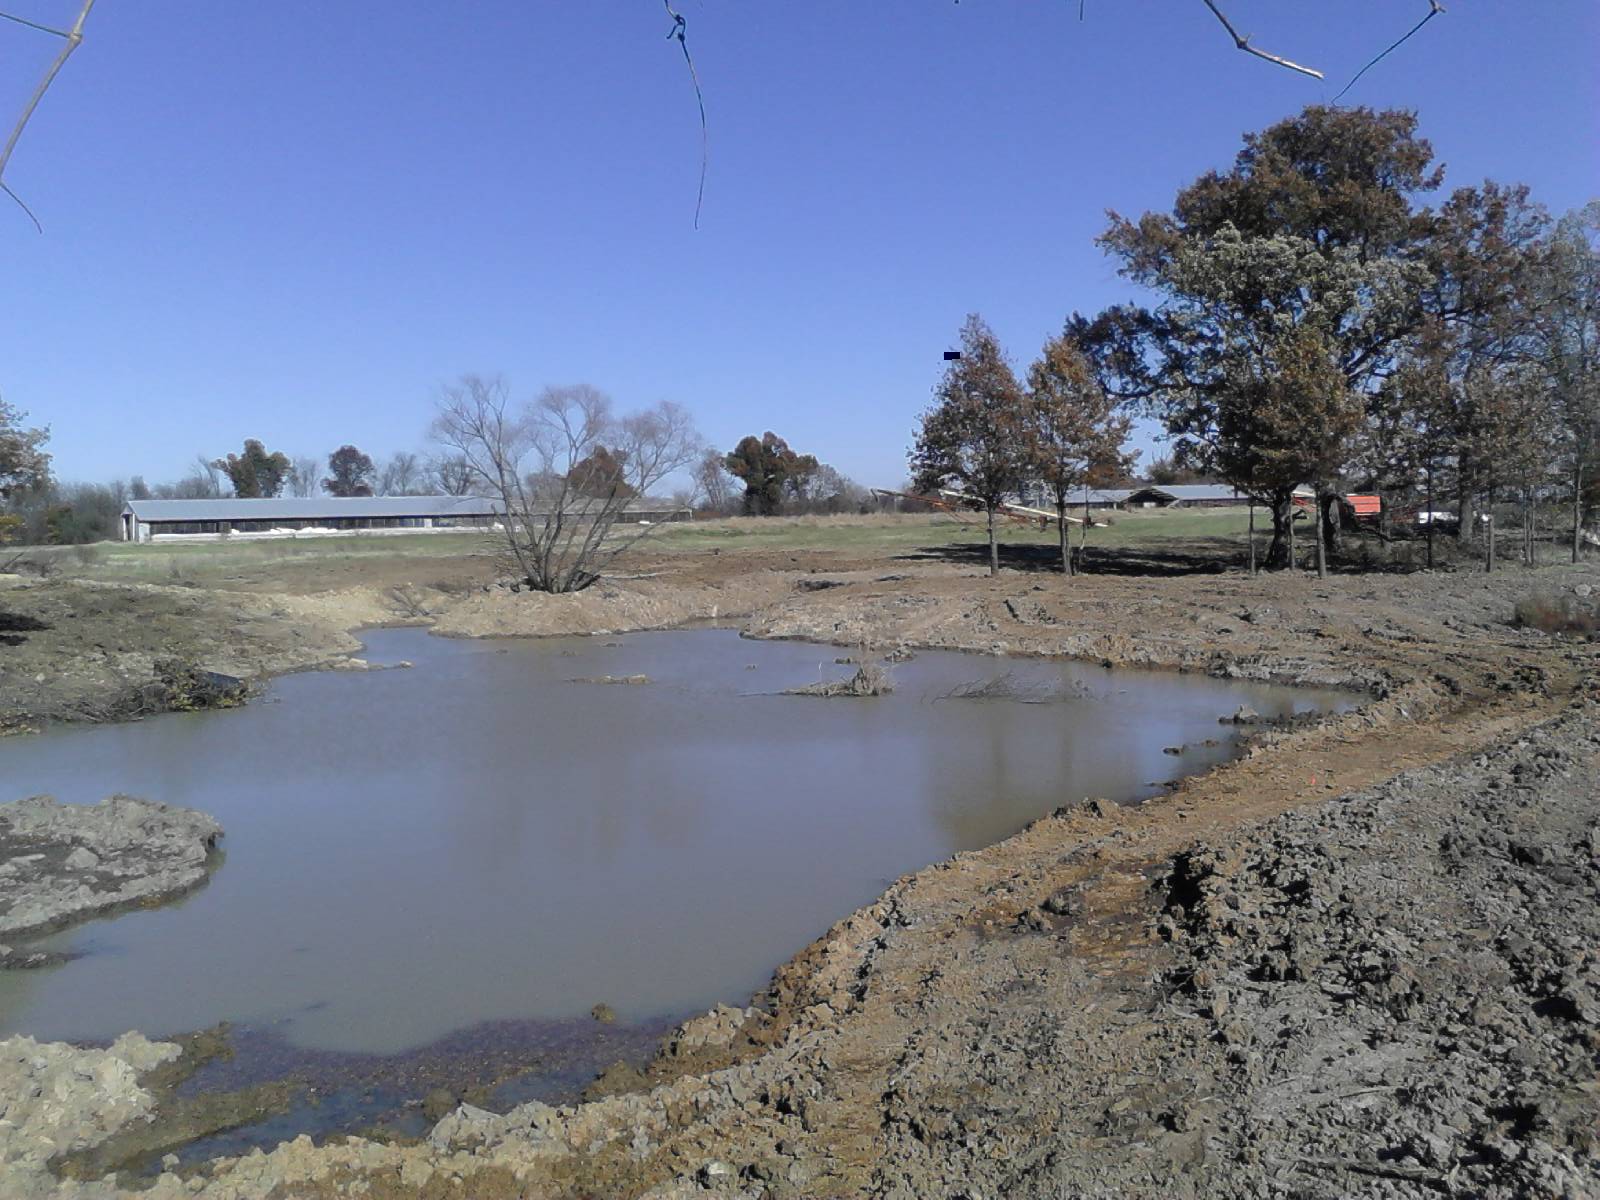
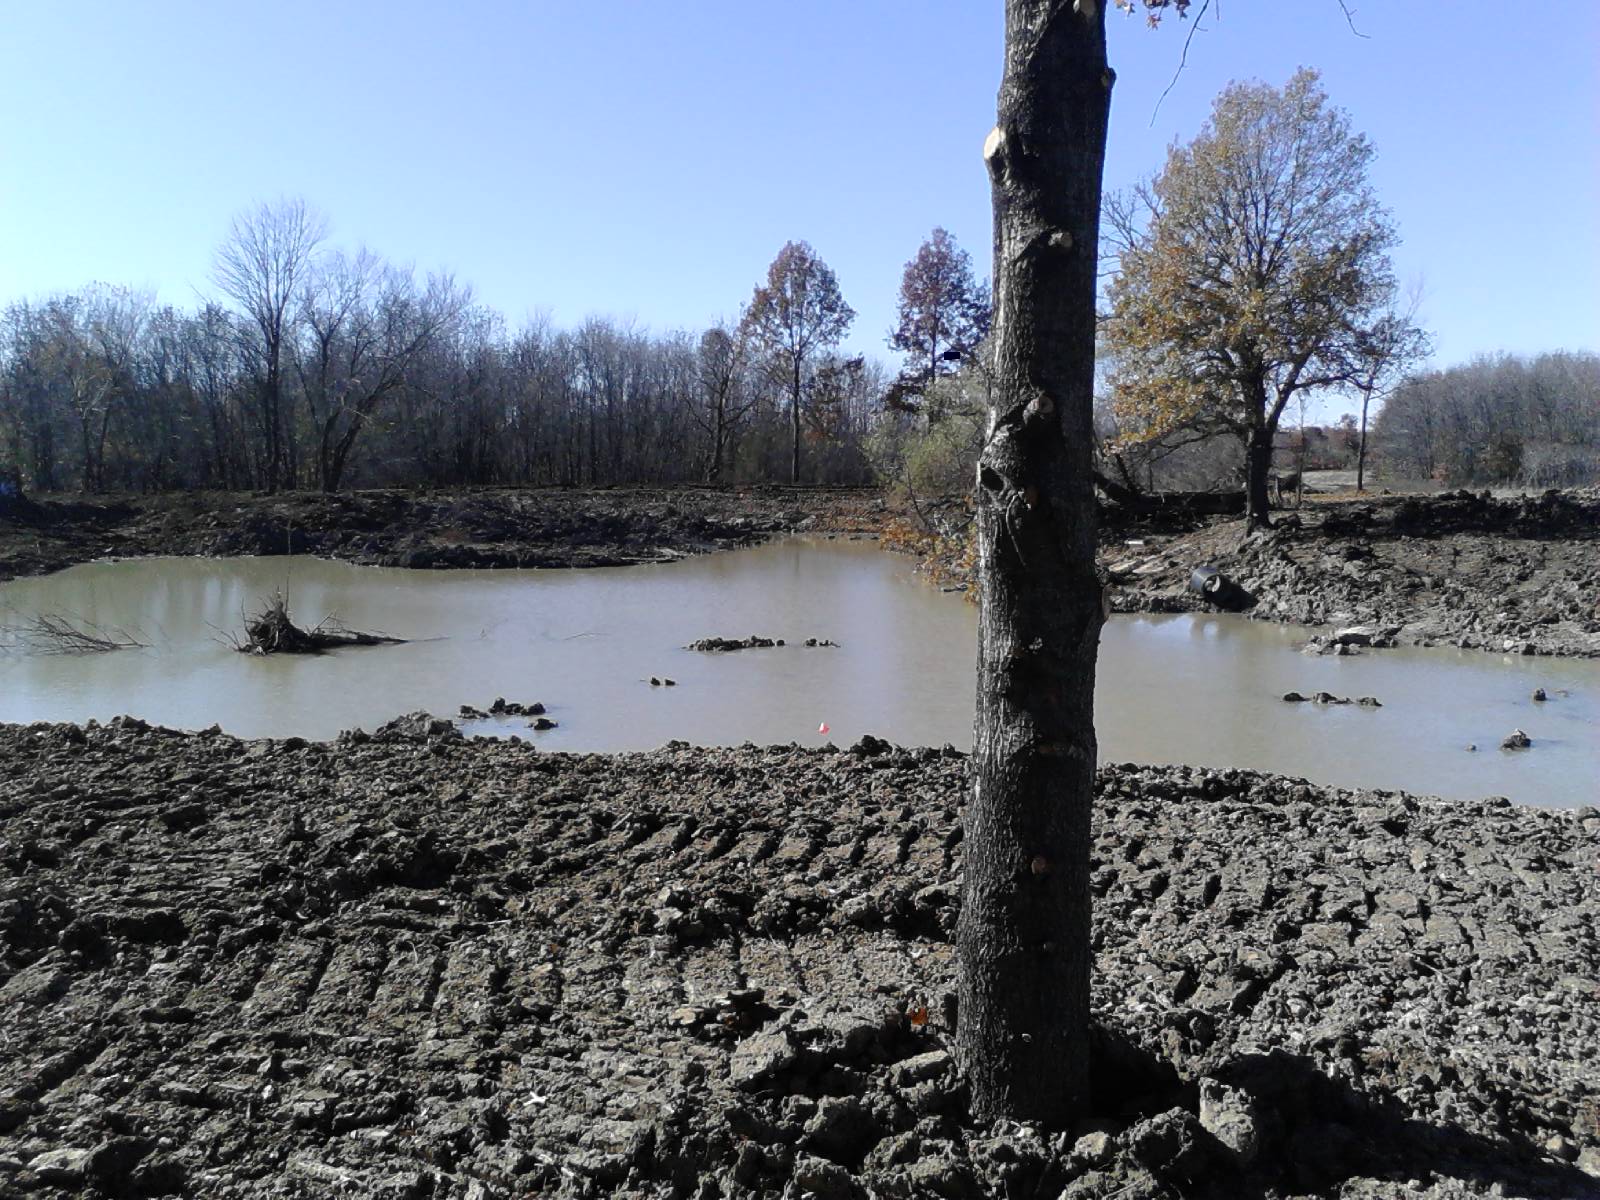
Description: Looking from the north to the south from atop the dozer cab atop a dirt pile. Not the best pic because shooting into the sun but shows some fish structure in the way of dirt piles I pushed up last minute during a rain (rained me out of the bottom of the p
Description: Looking from the east to the west from one of the small oak trees in the grove. Trimming up these trees and filling in an area what would have been 6" of water was not part of my original plan but just seemed like such a nice little grove and did not want
Some more pics with details of the pond.
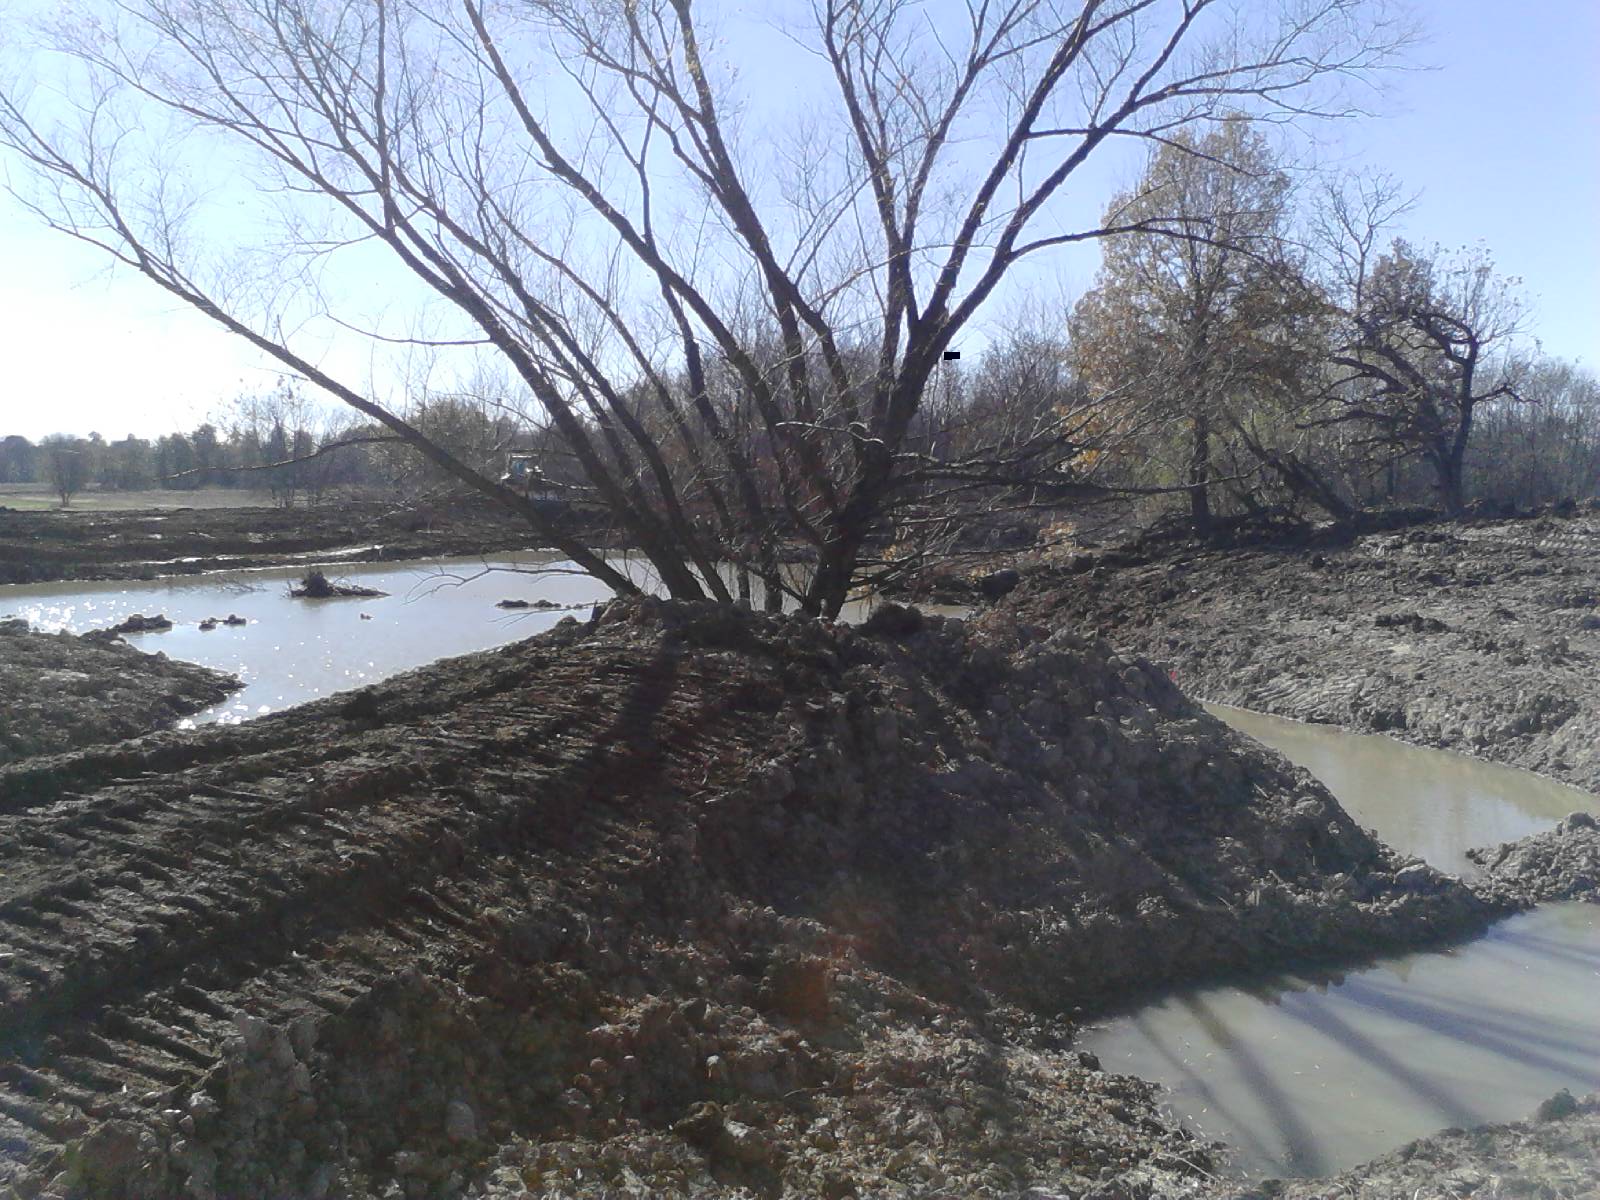
One picture will show what was the island turned keyhole shaped peninsula. The water area around it will be about 5' deep which eventually will become a problem with weeds at some point in the future. Hopefully I can reach enough of it with a backhoe should it need cleaned out. In the mean time I think the small kids they have will enjoy it and it should stay clear at least until they are in teenage years. I hope the tree will survive having that much water around it but it is a Willow so think there is a good chance. This area would have been about 18" deep had it been left "as is". When I got rained out of cleaning all the muck out of the bottom the water had not came up enough to prevent working here so I made more deep area directly in front of this area. Should be a pleasant site to fish out in the deep water area of the pond.
The small nook of water picture was an afterthought. There was quite a bit of area that would have been 6" to a foot deep water around the small oak grove. I needed fill dirt. Originally my idea was to just haul some in from the stock pile of dirt on the other side with our 12 yd scraper. Problem was scraper tractor was tied up on grain buggy for bean harvest and I had a dozer in hand. Solution was to make part of the shallow area deeper and use the dirt right there to make the rest into land. Worked out well but it does leave a very narrow BOW which will eventually likely have weed problems. At least I know in this area I can reach the whole thing with the backhoe from both sides if it ever needs "cleaned out". Owning equipment gives a pond owner options that others might not consider. The nice thing about this small neck of water is it puts the small oak grove with water surrounding 2/3 of it and makes a nice peninsula jutting out towards the island. I think it will be a very sweep spot, at least until the weeds become a problem which should at least be five or ten years (I hope).
The big dead tree area was left on purpose for a fish nursery and to add some "redneck" flavor. The family is very outdoors in nature and camps out on the nearby creek quite a bit as well as hunts deer and turkey as well as fishing. This is definitely not a citified pond. Also the tree was probably a century plus in age Burr Oak when it went down after my wife and I originally purchased the place (son owns it now) and it just seemed fitting that something with that magnificence be allowed to spend its afterlife where it laid down to die. Just seemed sacrilegious to move it. The baby fish will love the 18"-24" water it sits in and cattails around it along with the willows that have sprouted up. (about a third the way up the big portion of the trunk if my laser level is not lying). Leaving it there was just the redneck right thing to do.
I am still in the building process so blast away with what I am doing wrong or should consider doing different. I know there will likely be nutrient problems because of the left behind muck. I know there will be some weedy areas because of shallow water or narrow inlets. Criticisms are fine (I can take it), suggestions of alternatives would be welcome, ways to manage around the problems that will arise because of my shortcomings in pond design would be priceless. Thanks in advance.
Description: Small neck of water that would have been shallow water. Peninsula on left, oak grove behind, island peninusla with willow tree ahead
Description: Island turned peninsula. This willow tree would have been in about 12-18" of water. It may eventually die, I'm not sure.
Description: century Bur Oak that sits where it laid down to die. Was able to dig out a deep hole beside it but left it undisturbed.
They should be happy with all that you are doing for them. Looking good.
Here is a link to Shutterfly with all the pictures I have taken to date. There are a bunch of them but it shows the progress as they are in the order they were taken.
Shutterfly link with all photos
Snrub, when you're through ... I'm available for adoption. Thanks for sharing the photos! Amazing what you've done in a couple of months.
Any photos of your own 3.5 acre pond? Have you stocked it, yet?
Thanks. Being semi retired with a younger generation to take care of the day to day farming activities gives me time to do those things I would have never had time while trying to make a living.
Photos of my pond in my new forum members post.
My new forum member post Will add the stocking information in a follow up post to that post so it will be a permanent part of my introduction.
Have enough kids already but thanks for the offer.........unless maybe you are female, about 25-30ish and good looking........ never mind, wife says no.
Started on daughters pond a few days ago to refurb and expand it. Still have to work down and seed sons pond. Will sow wheat seed along with fescue grass. Hopefully tomorrow.
I am amazed at the water. Clearing up nicely and even with a little ice cover in shallow areas the water is getting a nice green tint indicating a recent algae bloom. My refurb old pond at home is staying muddy color much worse than this pond so far. Maybe a difference in the clay.
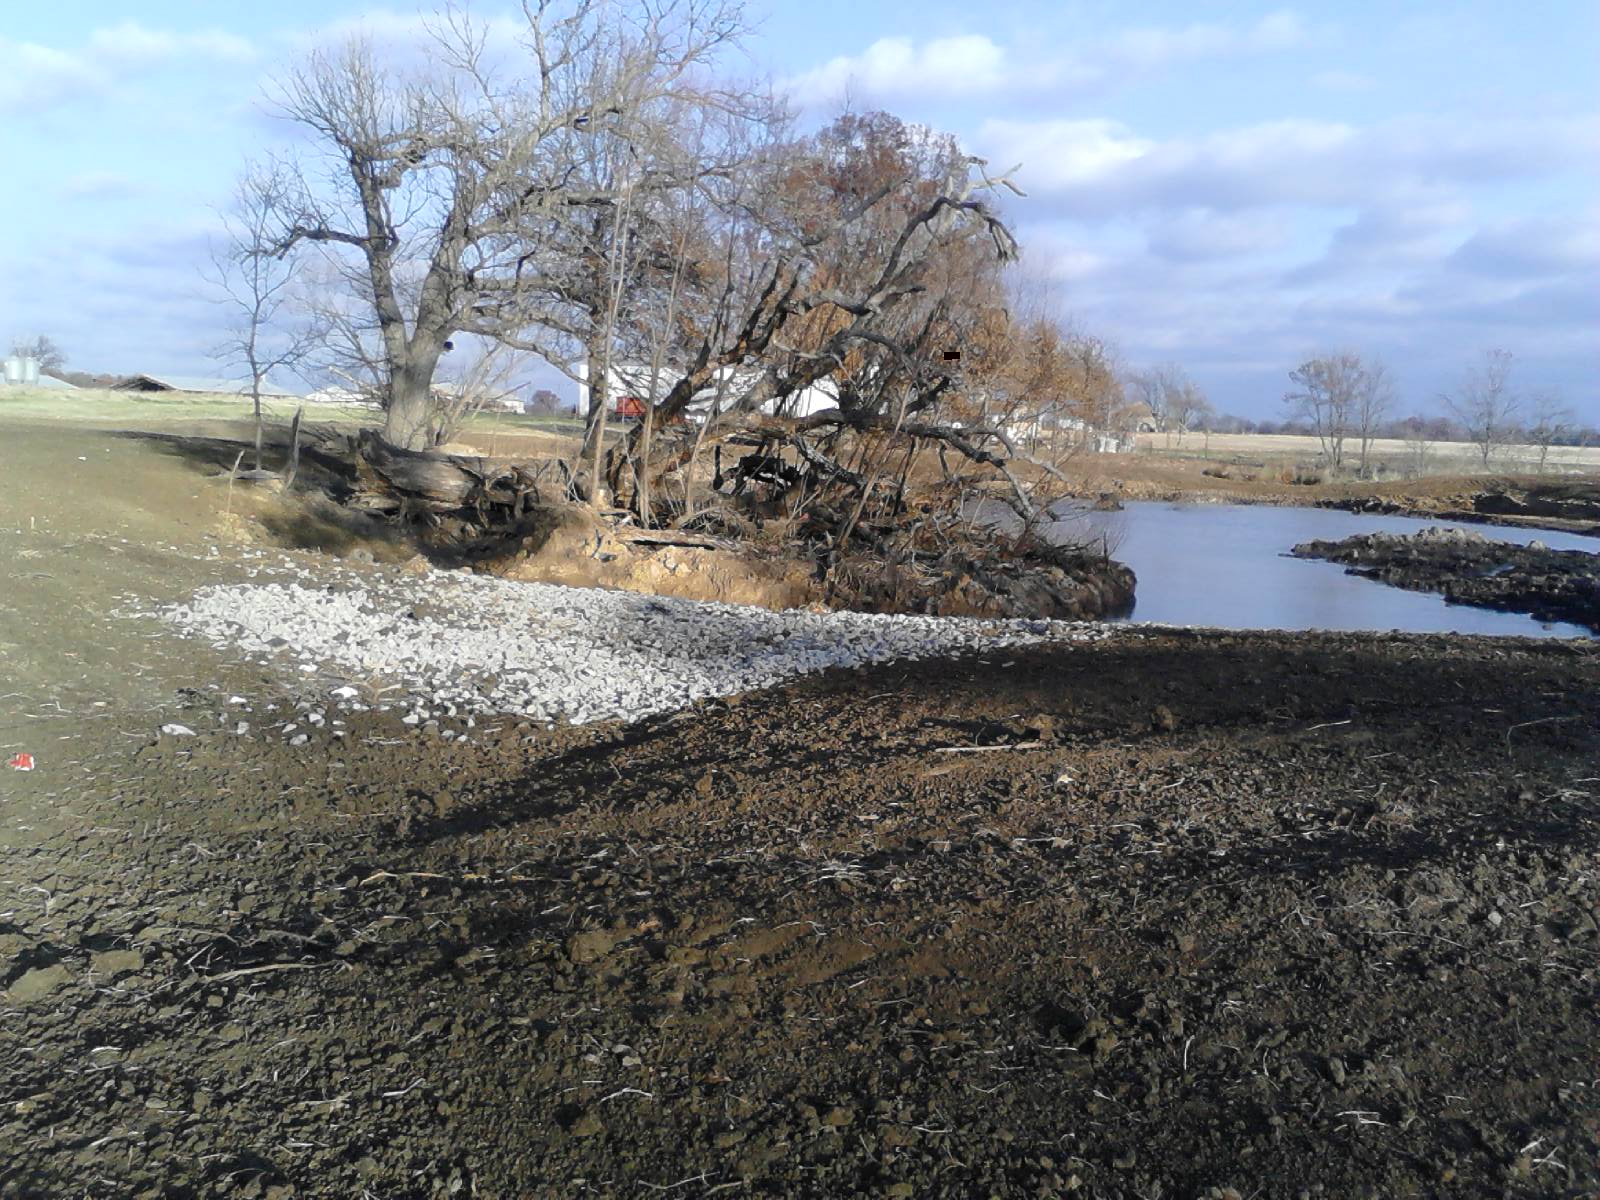
Rocked the spillway today and did some harrowing to smooth things out. Some worked great, some still a little wet and leaving tractor tracks. Will let it dry a few days and try again before seeding to try and get it more level with no tracks.
Think I am going to skip planting grass this late and just broadcast some wheat to give cover till next year. Then it will have had time for multiple rains to help everything settle, I can work it again and get it smooth as a baby's butt. Nicer for mowing.
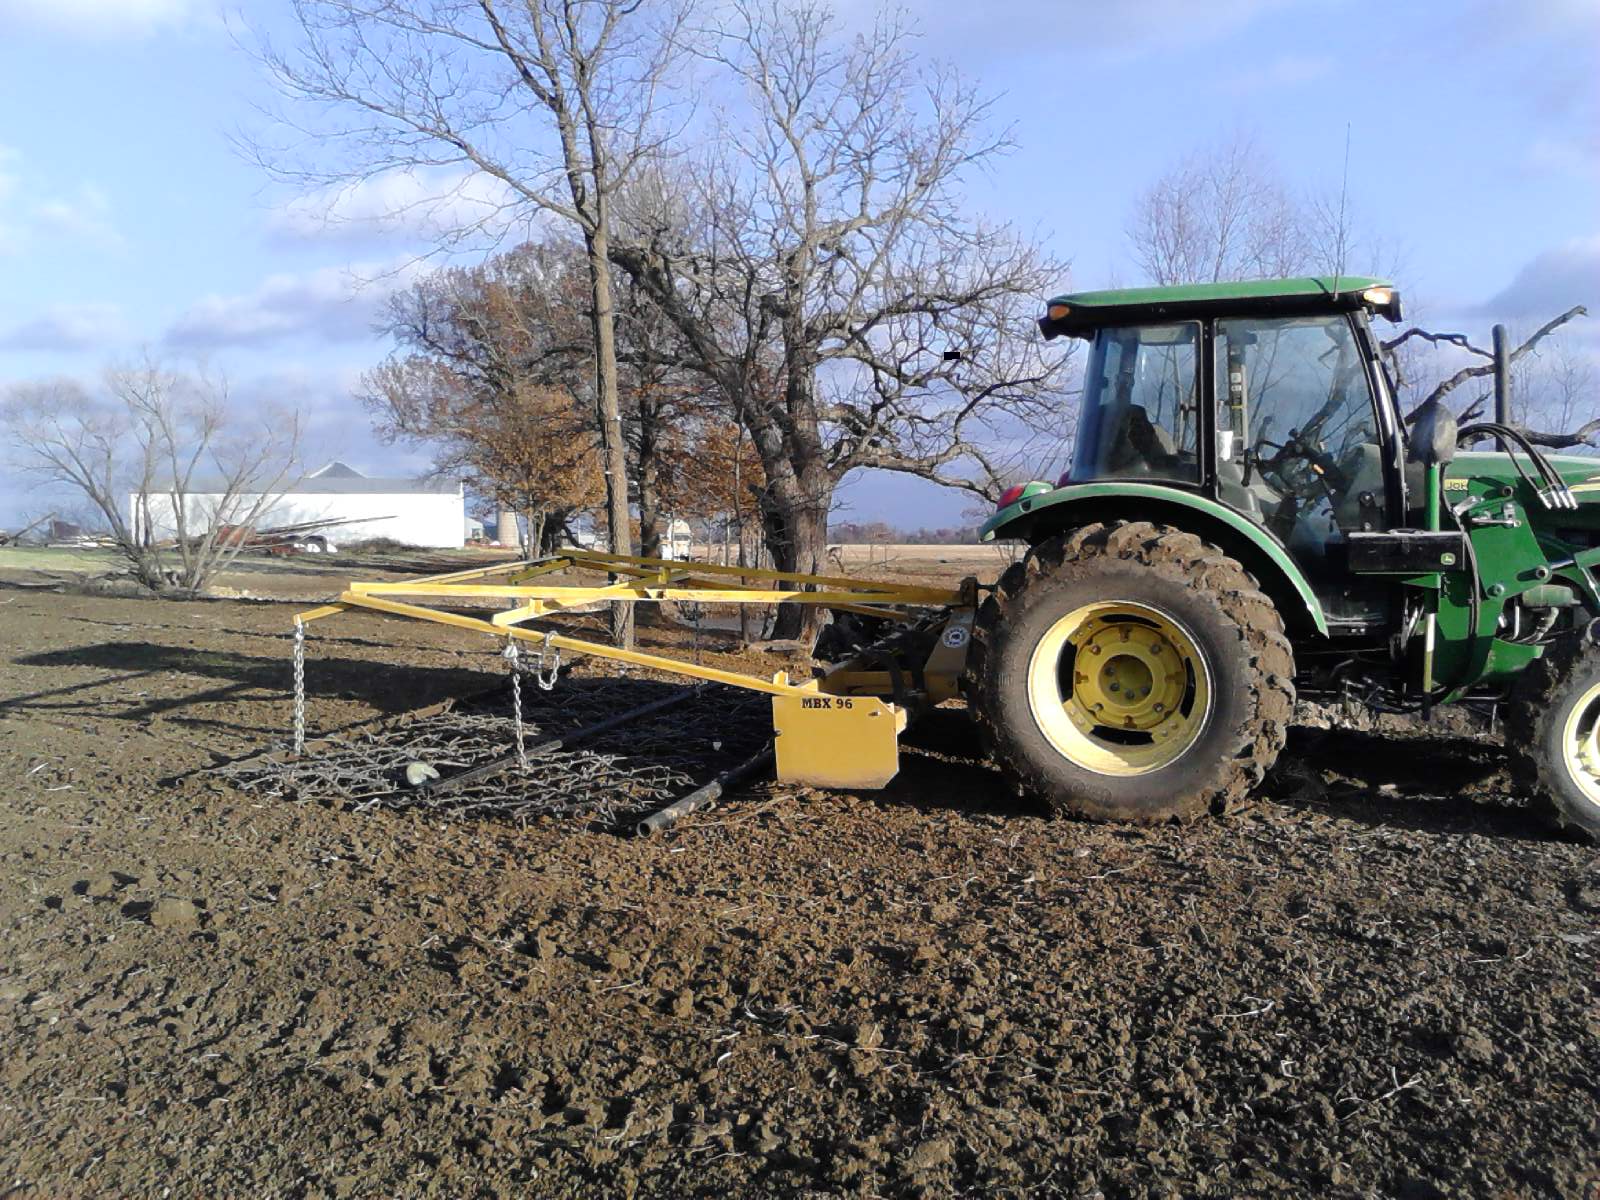
Using a pasture harrow to smooth things out. It was a drag type but needed to move it from my place to sons place. Decided rather than loading on a trailer to make it portable with the tractor. Also on sons pond needed to back into tight places and can't do that with a drag harrow. Thought about making it a 3pt hitch but it worked so good pulling it behind the box blade as I could easily knock off high spots with the box blade so I decided to incorporate the box blade as part of the 3pt attachment mechanism. Three bolts and the harrow comes off the box blade. Oldest grandson helped me weld it up and he painted it.
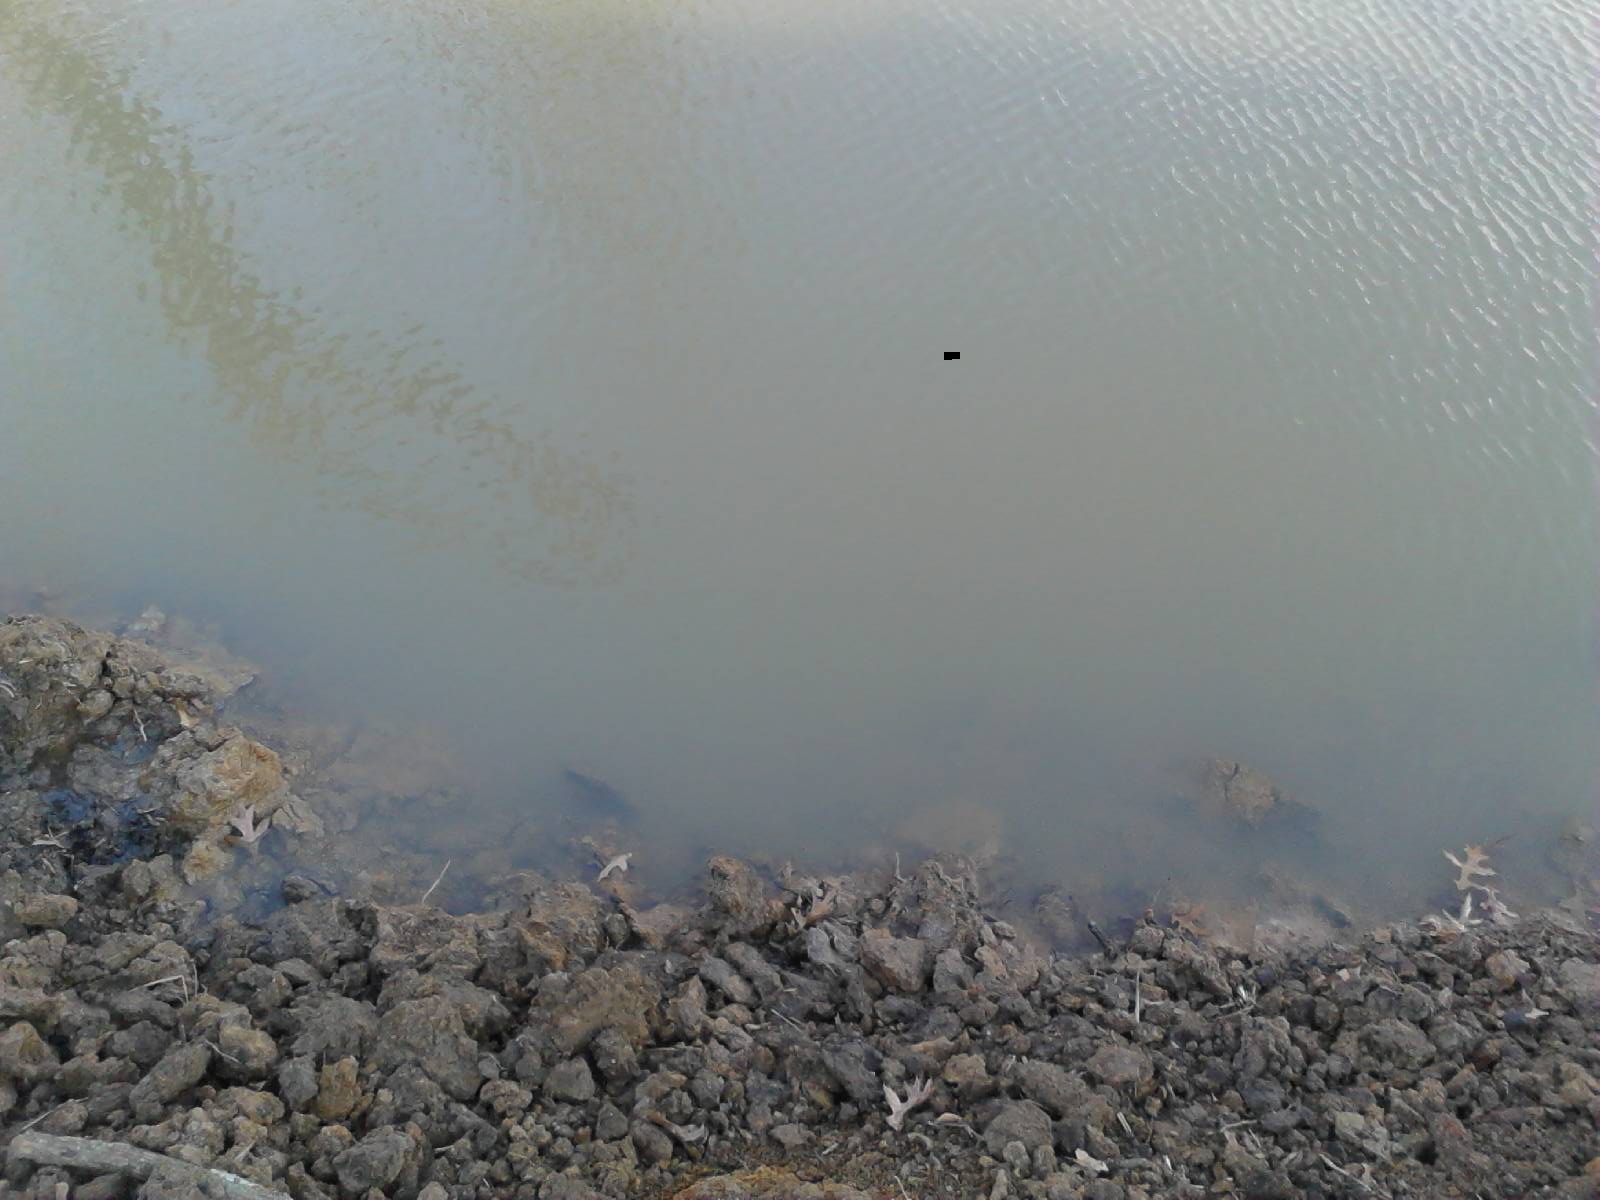
Description: water clearing up and geting a nice bloom for the water being so cold. Thin ice on some shallow areas.
Description: spillway
Description: pasture harrow
Looks like great progress! It is going to be FINE in the spring!
Rob C
Will add the "after" later when available.
The only standing water is the small hole about 25 feet indiameter shown in the lower right portion of the picture. The rest of the area was damp to mucky but no standing water. Only pond weeds growing.
Description: Picture of the old 50+ year old pond before renovation started Google Earth
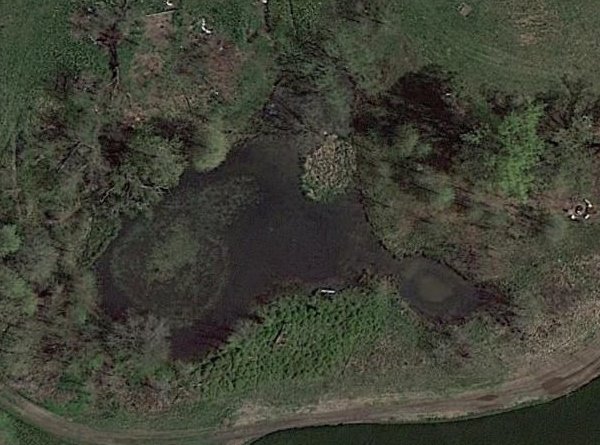
snrub, that will be awesome when it's filled. Pretty awesome now compared to my bare Texas pond! Speaking of rain, are you getting any?
I really like the chain harrow setup. I might just steal that idea!
I think we are pretty good on moisture for right now. Our portion of the state really likes a dry fall, winter and spring. Unlike the central and western parts of the state, we do not have subsoils that can store the water (clay pan) and we generally get a lot more water than they do. So it is not uncommon for us to be too wet in the winter and spring to get any field work done. So right now, a little dry is a "good" thing for us. I go south for the winter, so the younger generation at home takes care of the home front, but right now I know they are not in the fields so they have plenty of moisture.
Thanks for the compliment on the pond. I started work on my daughters pond right after finishing that one, and I have pictures. Just have not got around to posting a thread on that particular renovation. Don't know what got me started off on the "pond renovation" mode, but being semi-retired guess I just needed a "project" and I always have liked running a dozer. Just seemed like a fun thing to do and something the kids and grandkids will remember and use long after I'm gone from this world.
I think this one turned out well for the time frame I had to work in. I think they will enjoy the pond and I will enjoy taking the three young grandkids and fishing for some adult BG to stock it with next spring out of our own pond.
The harrow really works pretty well that way. At home it was just on a drag drawbar and it was ok, but when I needed to move it down to son's decided just to make the adaption to the box blade. I could have just put a 3pt on the harrow, as they are available that way commercially. But after thinking about it, I already had the box blade that hooked to the three point, and I nearly always pulled the harrow behind the box blade anyway so I could take off high spots and fill in low spots. Only takes three bolts to remove it, the way I built the quick-tach part.
If you get around to doing the same thing, let me know and I can take some close up pictures of the way I attached it. Not saying I did it the perfect way, but do think I came up with some ways that makes it easy to attach and take off when I just want to use the box blade by itself. At least they are ideas, then you can tailor them to suit your own needs.
Thanks, I'll remember to ask for those pictures when time comes. It seems like there is always more that I want to get done than there is time to do it.
I know what you mean about the desire to build something (ponds) that bring so much joy to the young'uns, and has the potential to do so for generations hence. My little pond has matured to the point that I'm very happy with maintaining it, and it is sort of a focal point when friends and family visit...especially the grandkids!
Right now the big pond is a source of awe in that it is a big hole in the ground. But, Lord willin', one day it'll be full and mature like the small pond. One thing that working ponds does is to teach patience, and cultivate hope. I think when others are part of the journey from beginning to that first catch, a great deal of the lessons we learn in building the pond are passed on. Keep up the pond building/renovations...I think you're making a great impact on this ol' world.
One heckuva job. But, the one thing that sticks in my mind is still the size of the 4wd tractor it would take to drag a stuck d6n out of the mud.
We use several of the 4wd tractors in our farming operation as well as large rubber tracked tractors. The dozer is really not too bad to pull out of the mud unless it sinks down too far and becomes a dead weight. Years of experience has taught me that once I'm stuck, stop spinning and get a tow. As long as the tractor will move back and forth in the rut it doesn't take too much to give it a little boost to get the tracks to get some new traction and lift itself out.
What I see novice operators or duffless operators do is long after there is any chance of getting unstuck without help they just keep spinning it deeper. Once the mud is up to the top of the tracks and sitting on the belly pan and will not budge, then getting it out becomes a serious un-fun job. That goes for any type of tractor. Most very young farmers (I was probably ten at the time) get a severe butt chewing when the first time they get stuck they manage to continue spinning the tractor down and get it seriously stuck.
Getting a dozer unstuck the first time is what I call a character builder.
Then there is cleaning the tracks out.......................

The real joy is when you throw a track and find that 2 objects really can't occupy the same physical space. That's when you start hating everything colored yellow.
to get a dozer unstuck is very easy, I have a d6c, 10 k model and its been stu ck a few times but what u do is cut a tree about 18in to 2 foot around and long enought to go from track to track chain it up to the tracks one chain on one track and the other to the other track put in gear and the tree will give u tracken dont let it hit the hitch on the back of dozer its a ride u will never forget
Good tip Brian. That works for tractors as well.
Good idea, I've also done it on a tractor.
This is an update to this thread. It seems like its taken forever for this pond to fill up. It has adequate runoff area but this year has been a year of little runoff. We have had just enough rain with good timing that the crops are great but not much water added to ponds until recently.
Well finally it is full, and has turned out nice. A little ragged looking around the edges because son does not have a tractor and mower yet to maintain the grass/weeds but he will.
Their kids swam almost daily all summer even without it being full. It definitely has been a worthwhile endeavor and their family is getting great enjoyment out of it. Stocked it with BG and FHM out of our pond and some RES from a fish truck. A few CC out of our pond. I think he probably will put LMB in next year.
Below are the updated pictures of what it looks like full. Guessing about an acre but will determine when google earth updates.
It is kind of a redneck pond, but hey, if the shoe fits?........
Description: looking northwest
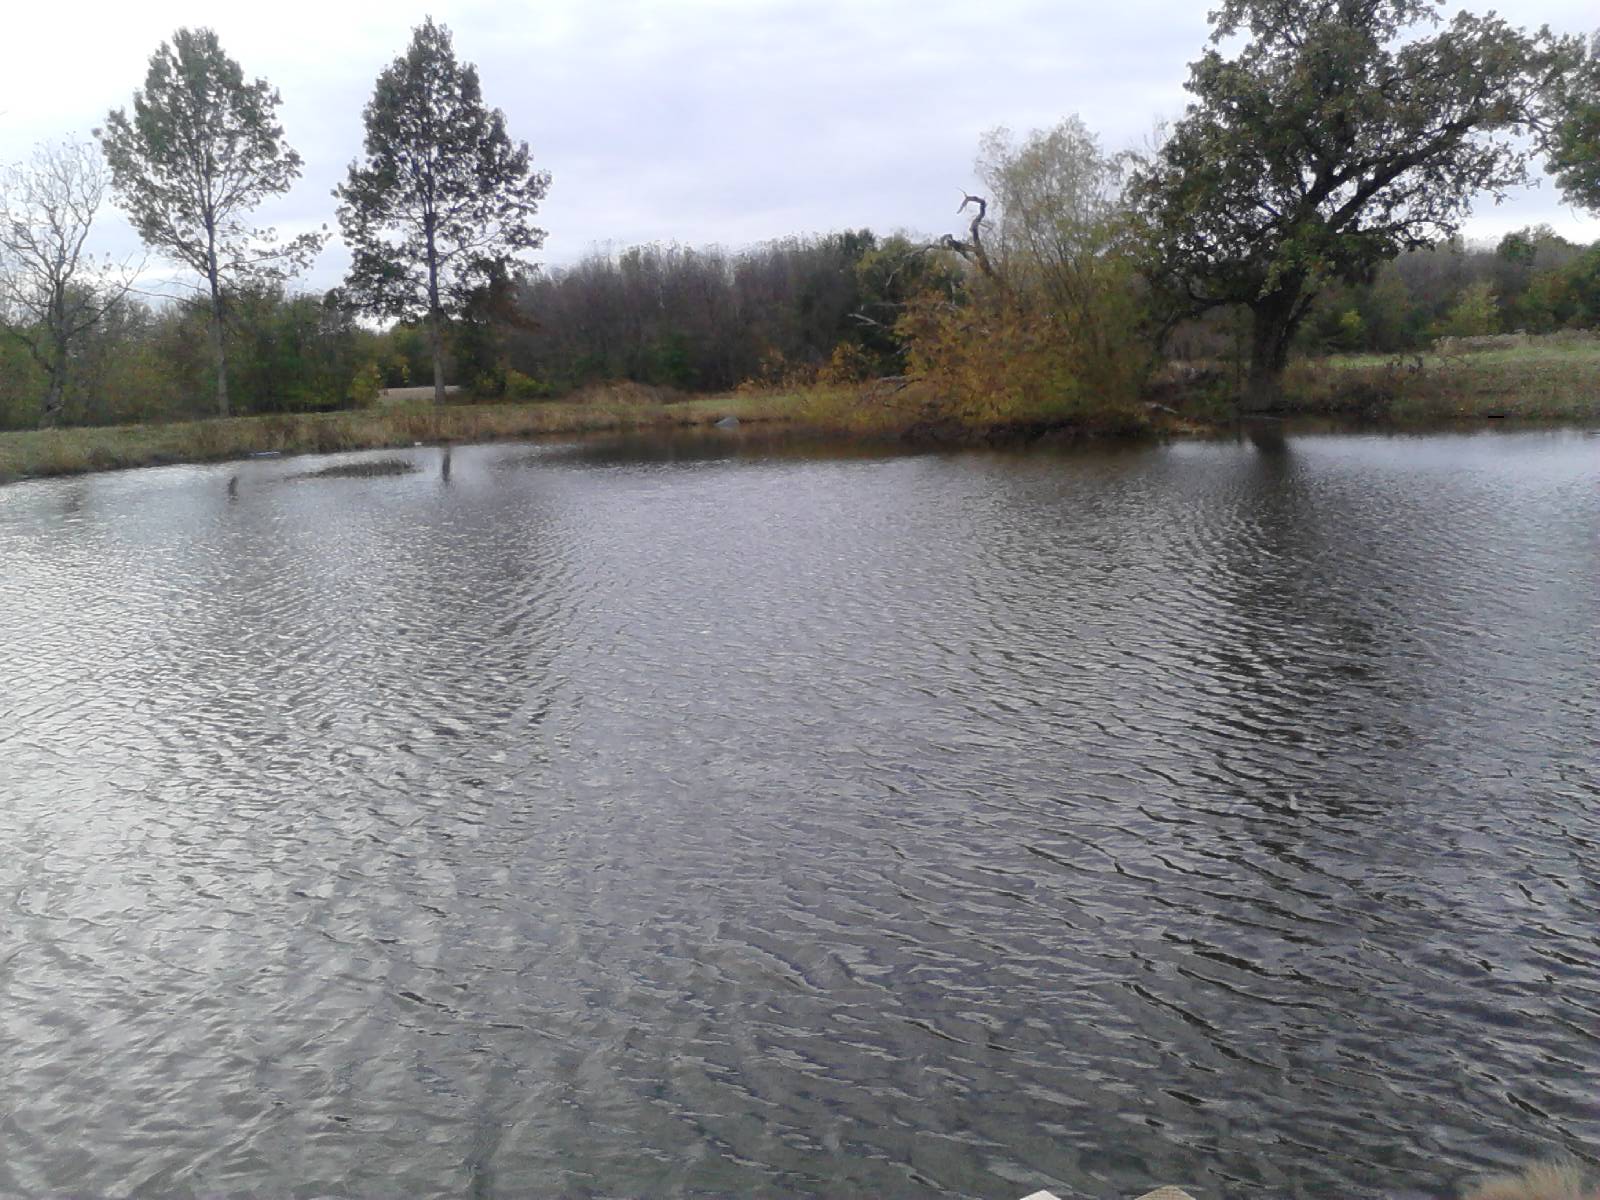
Description: Looking west along south shore line
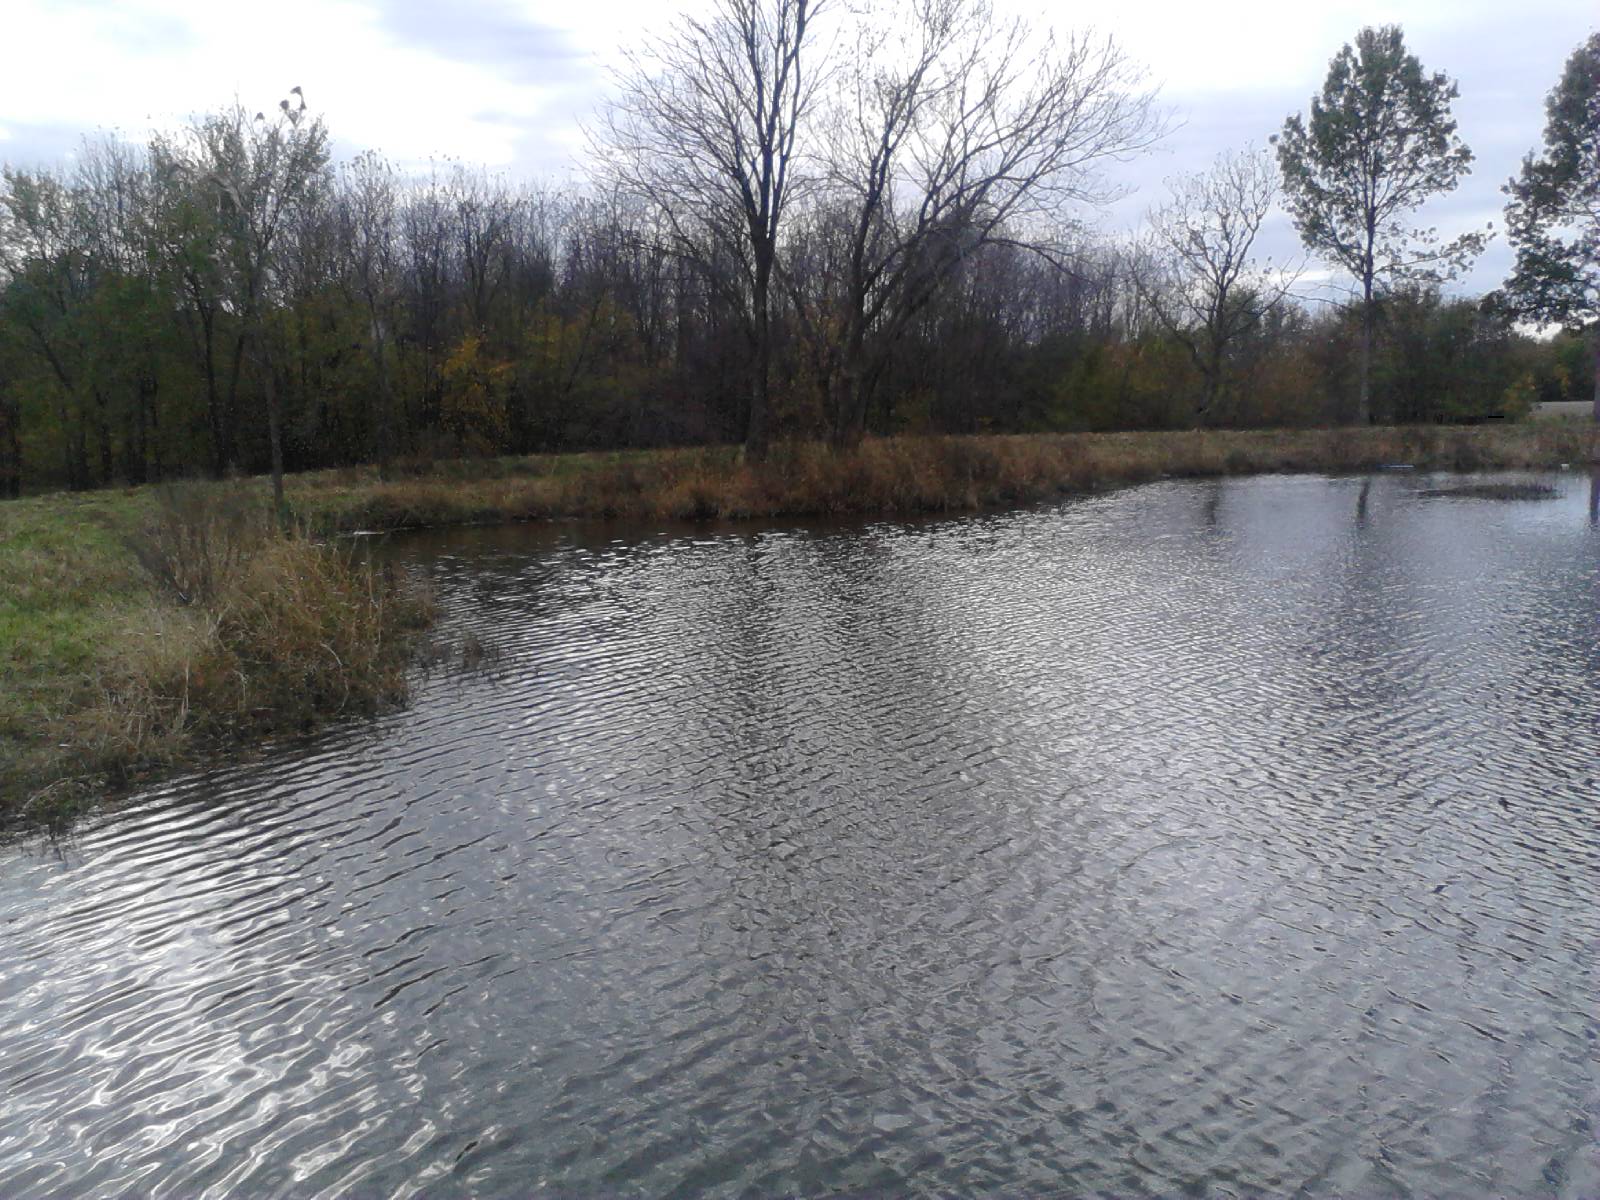
Description: looking NE at the keyhole shaped small peninsula with willow tree
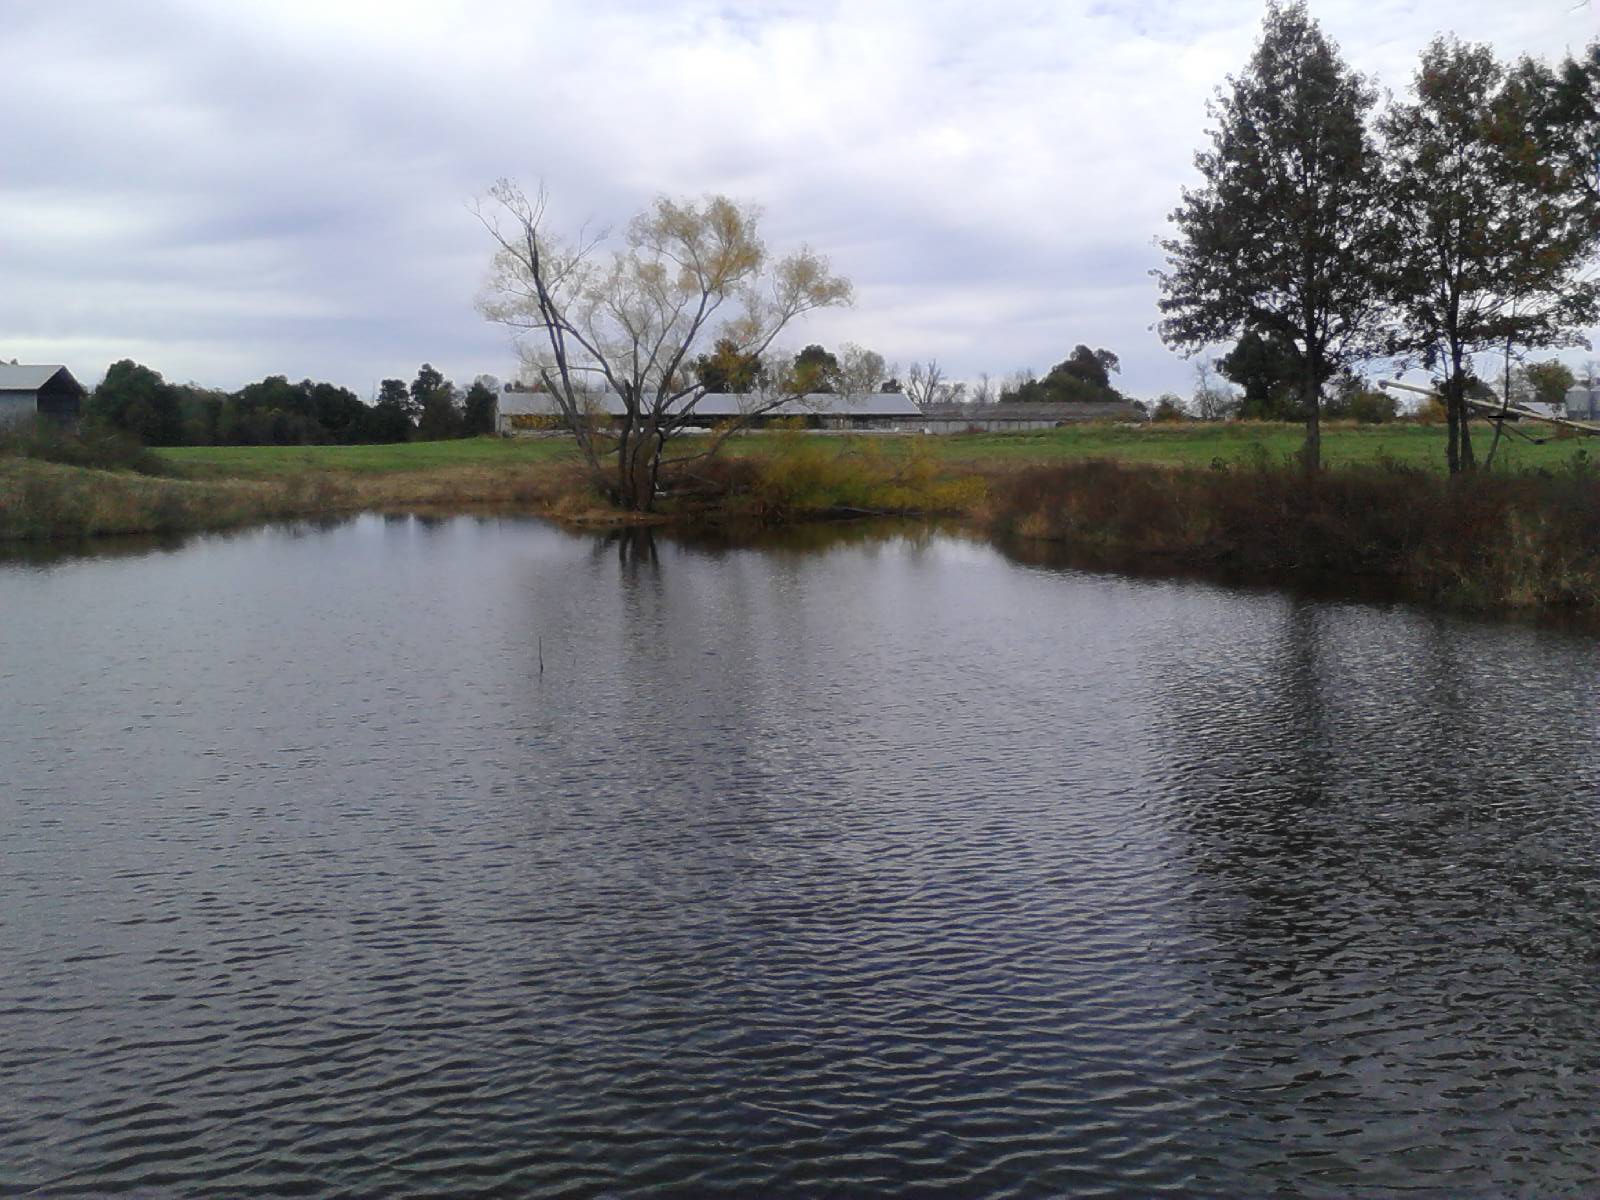
Description: looking east old dead oak tree left for fish habitat in shallow area
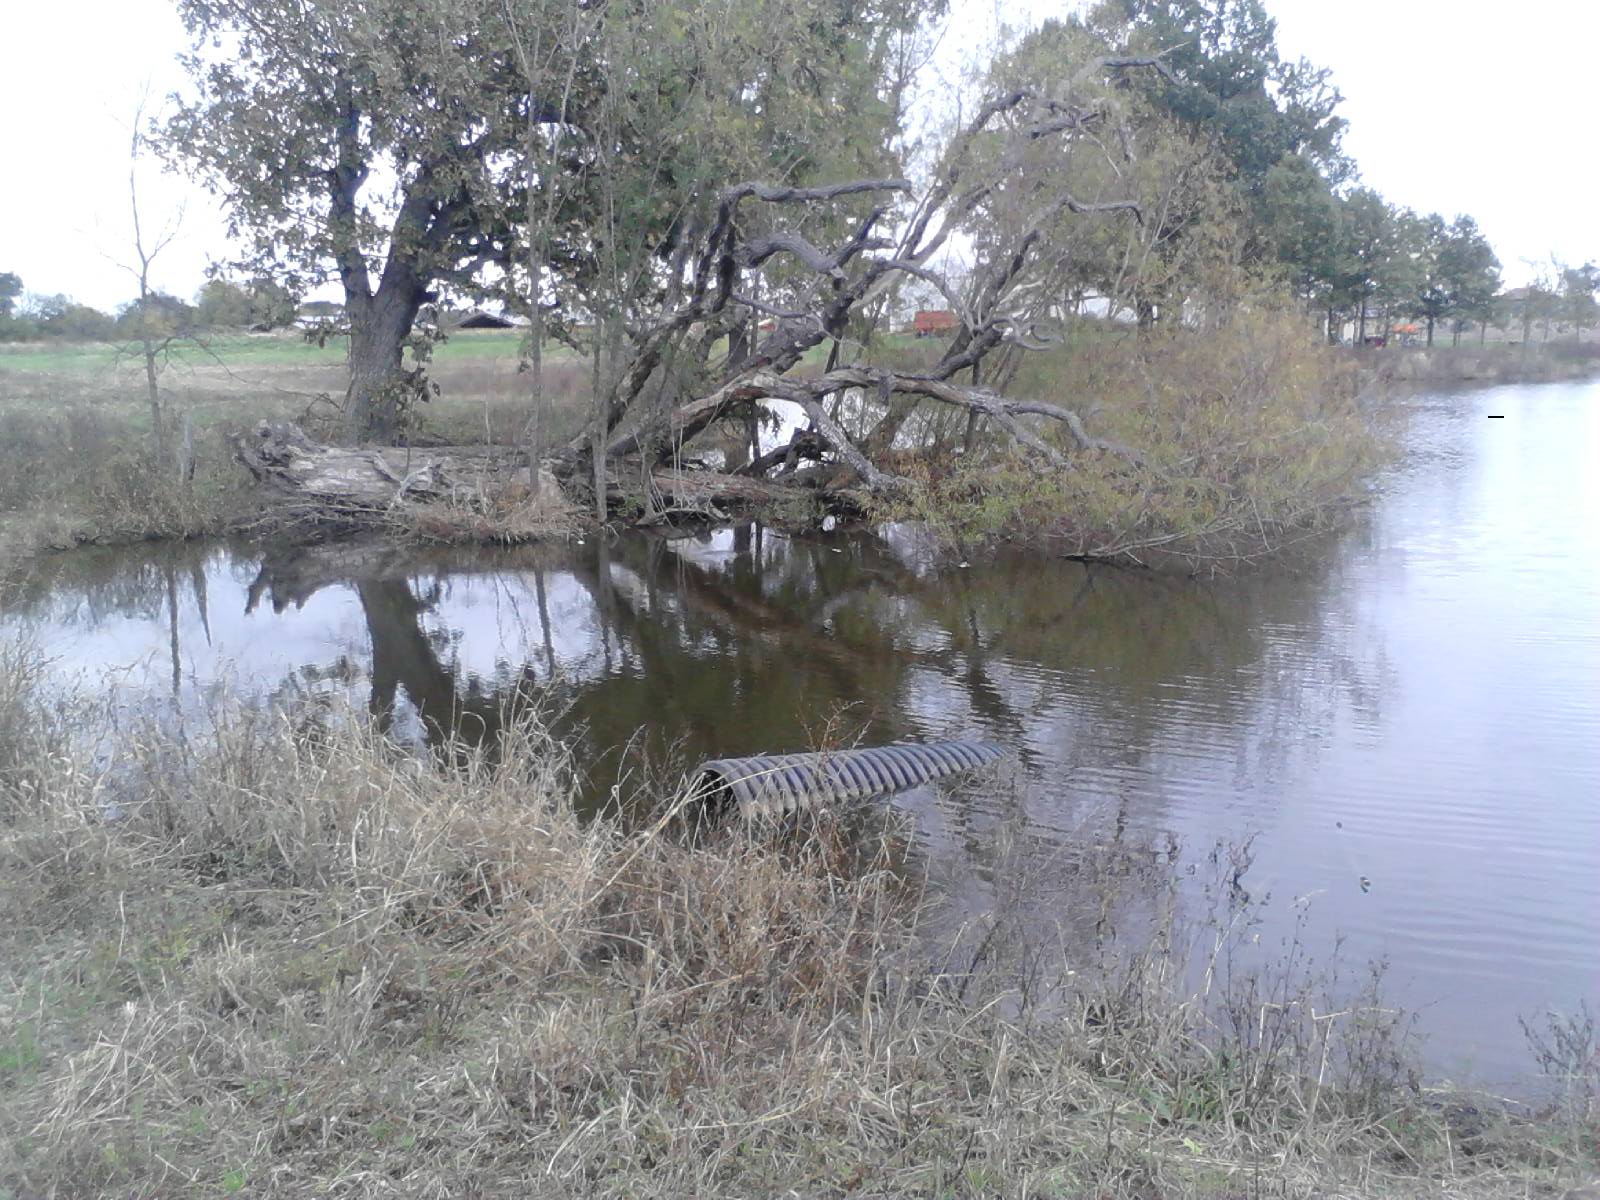
Description: Looking SE from dam at dock son & family built
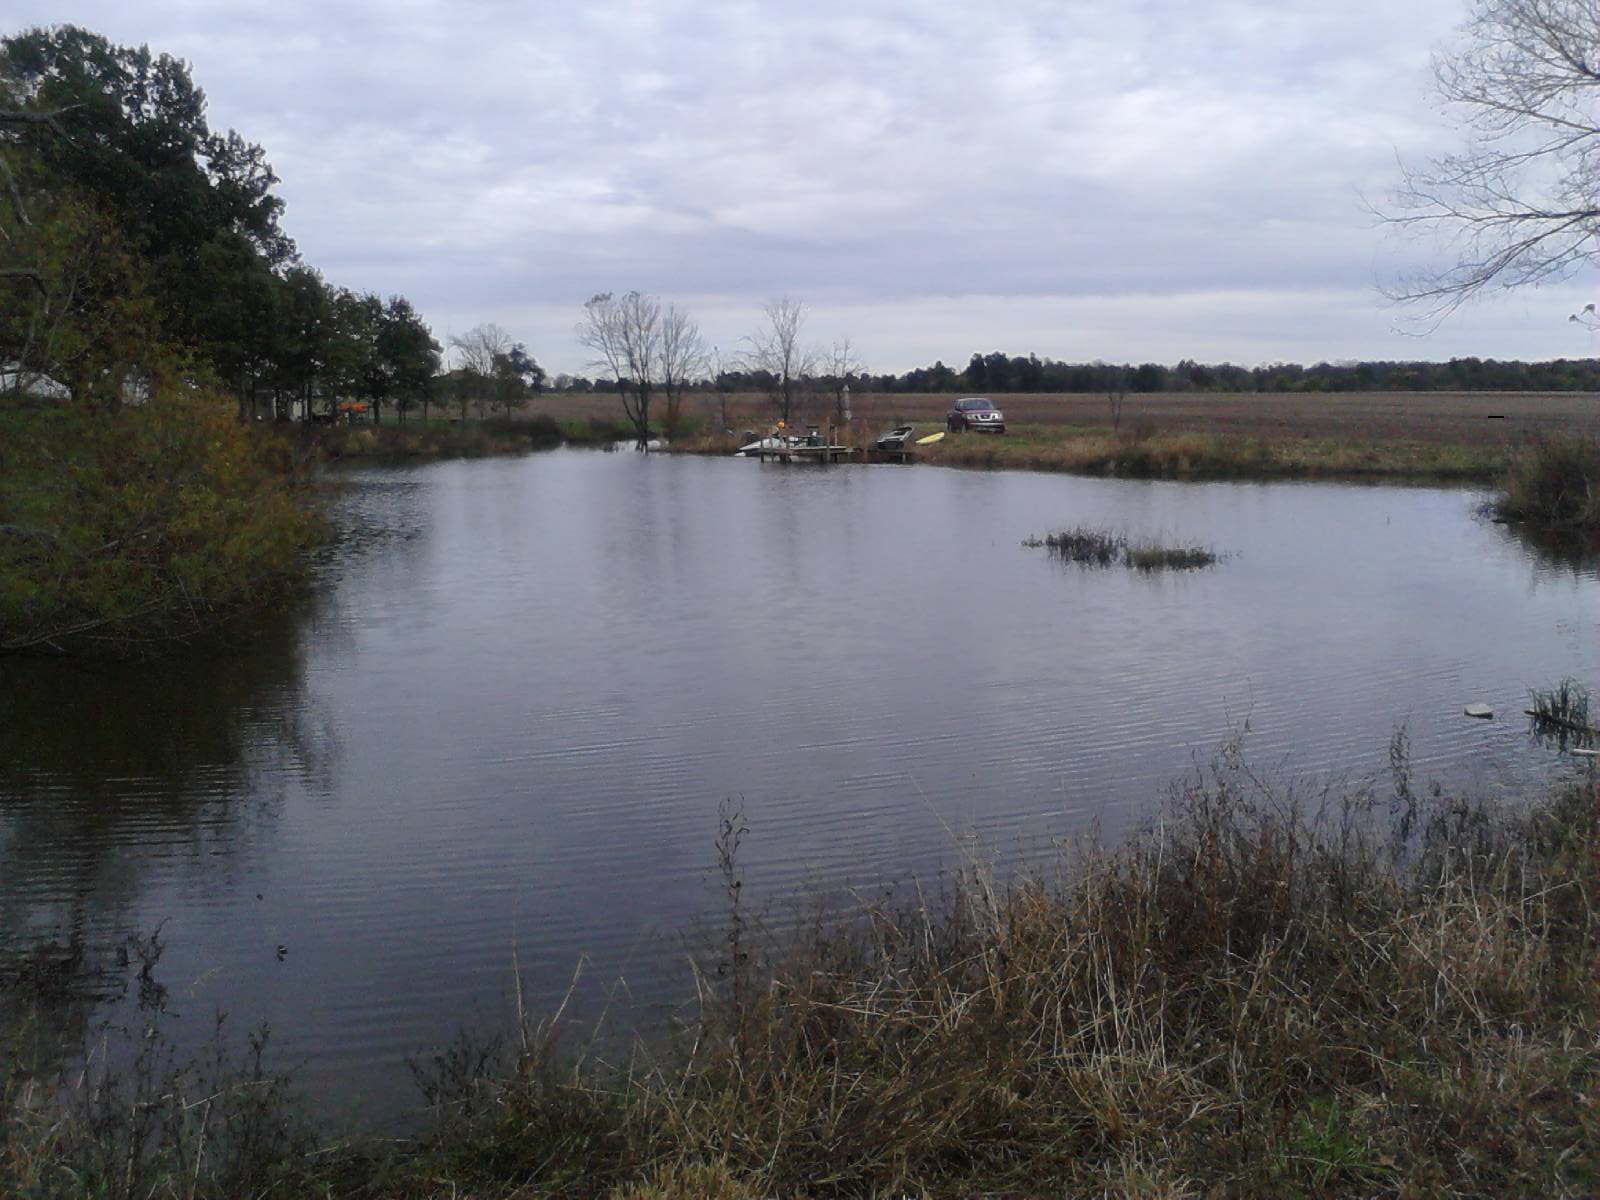
Description: looking SW. Keyhole shaped small peninsula in left of picture
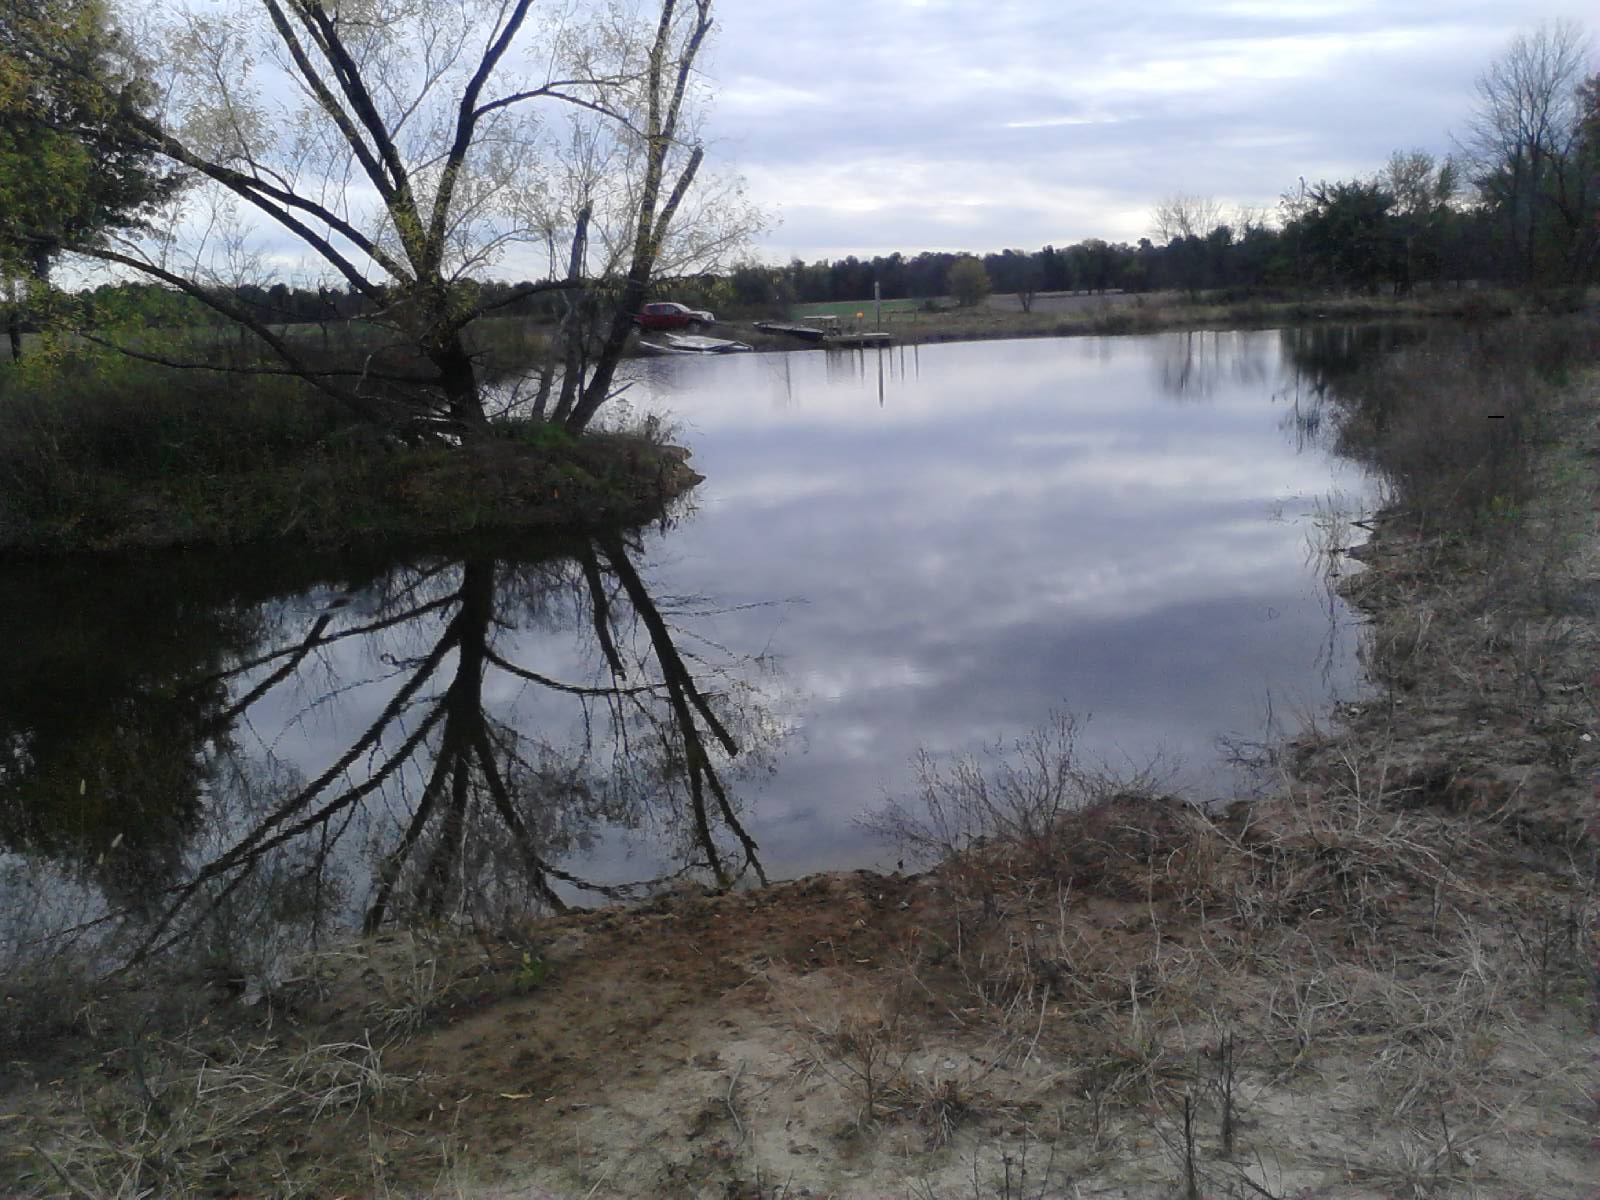
Description: looking west at dock
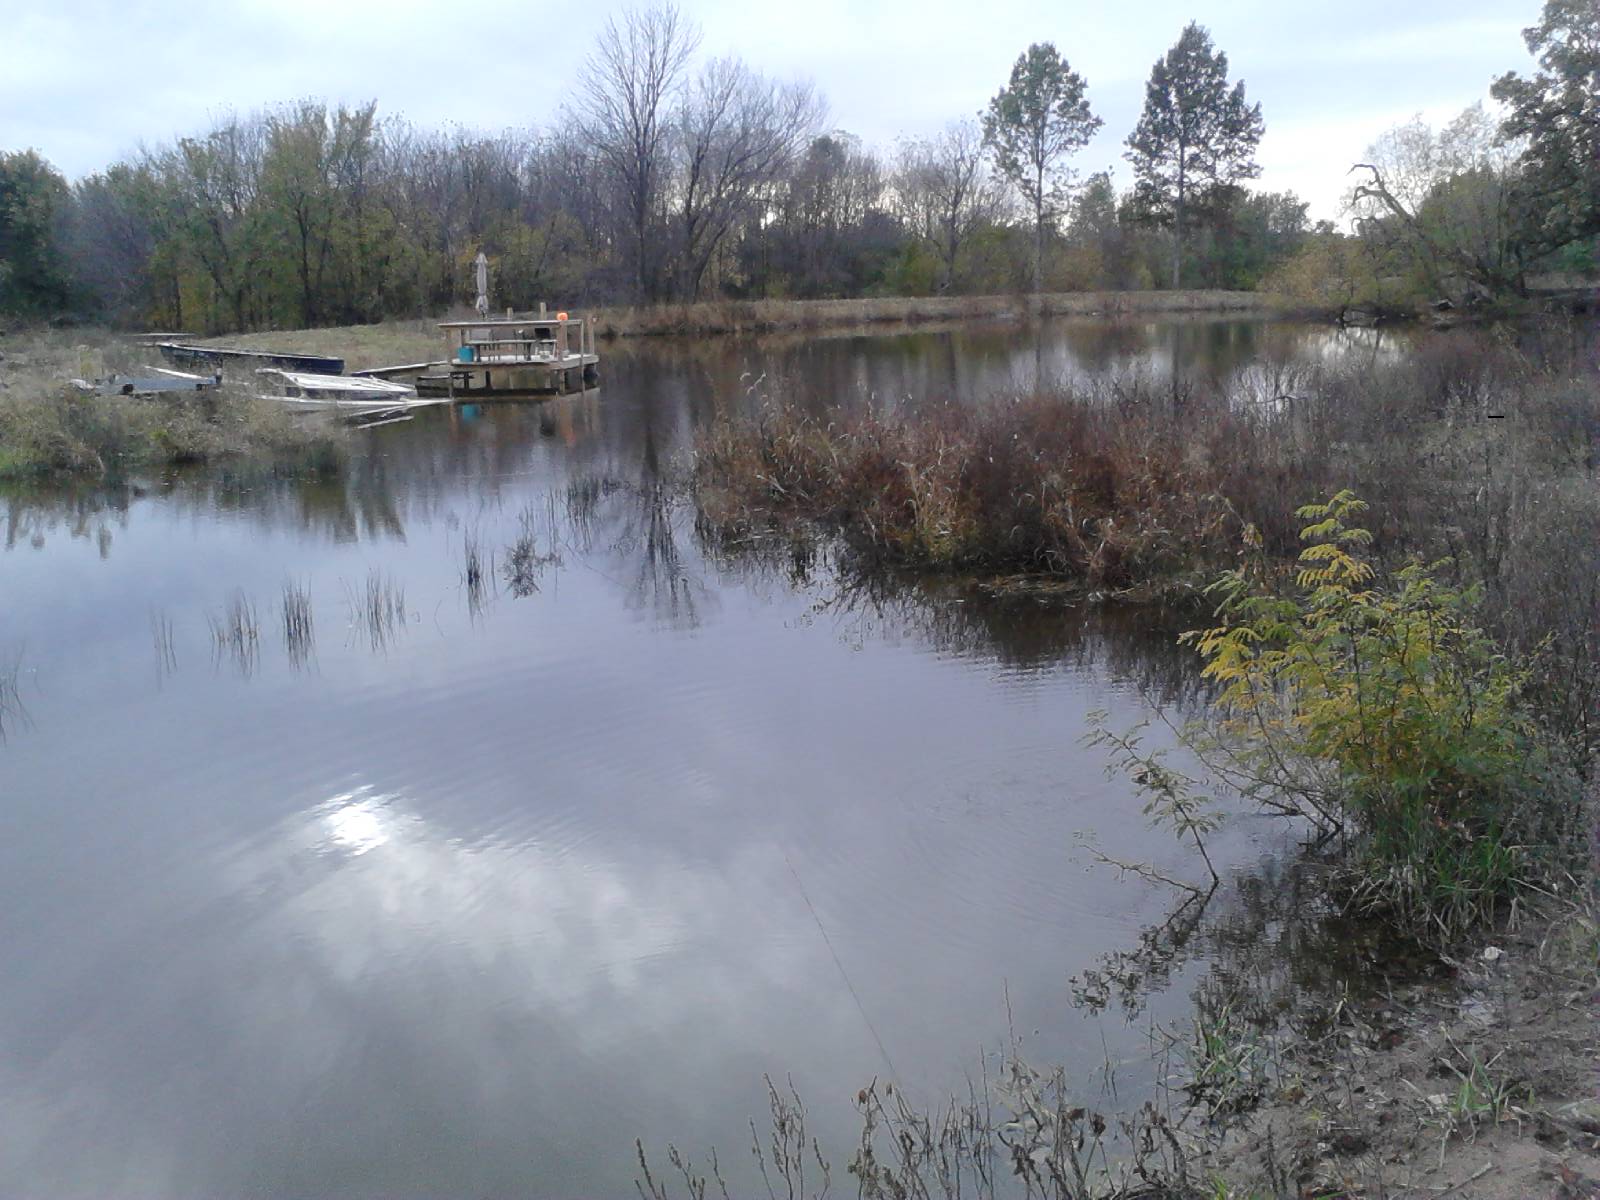
Description: looking straight west from east shore
I'm guessing it at about an acre or slightly under.
My old pond is an acre and big pond 3.1 acres, so based on what I know about them I would guess it is about an acre.
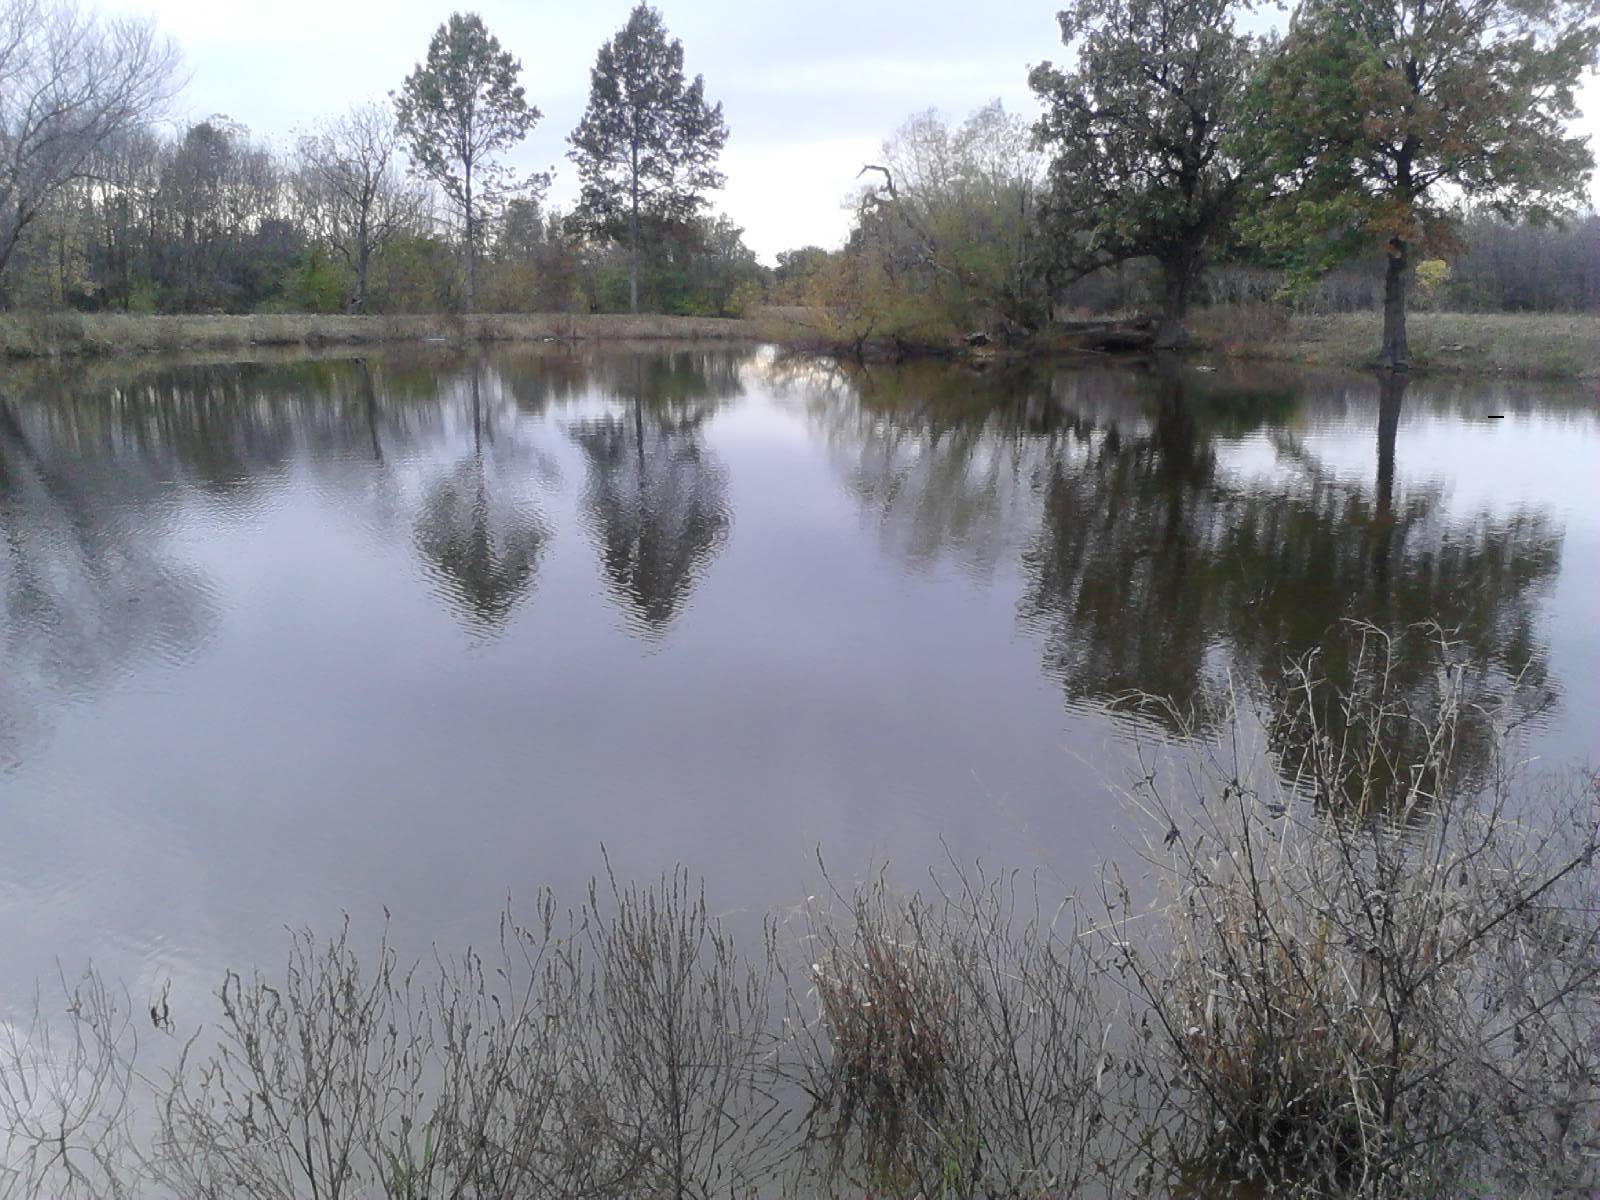
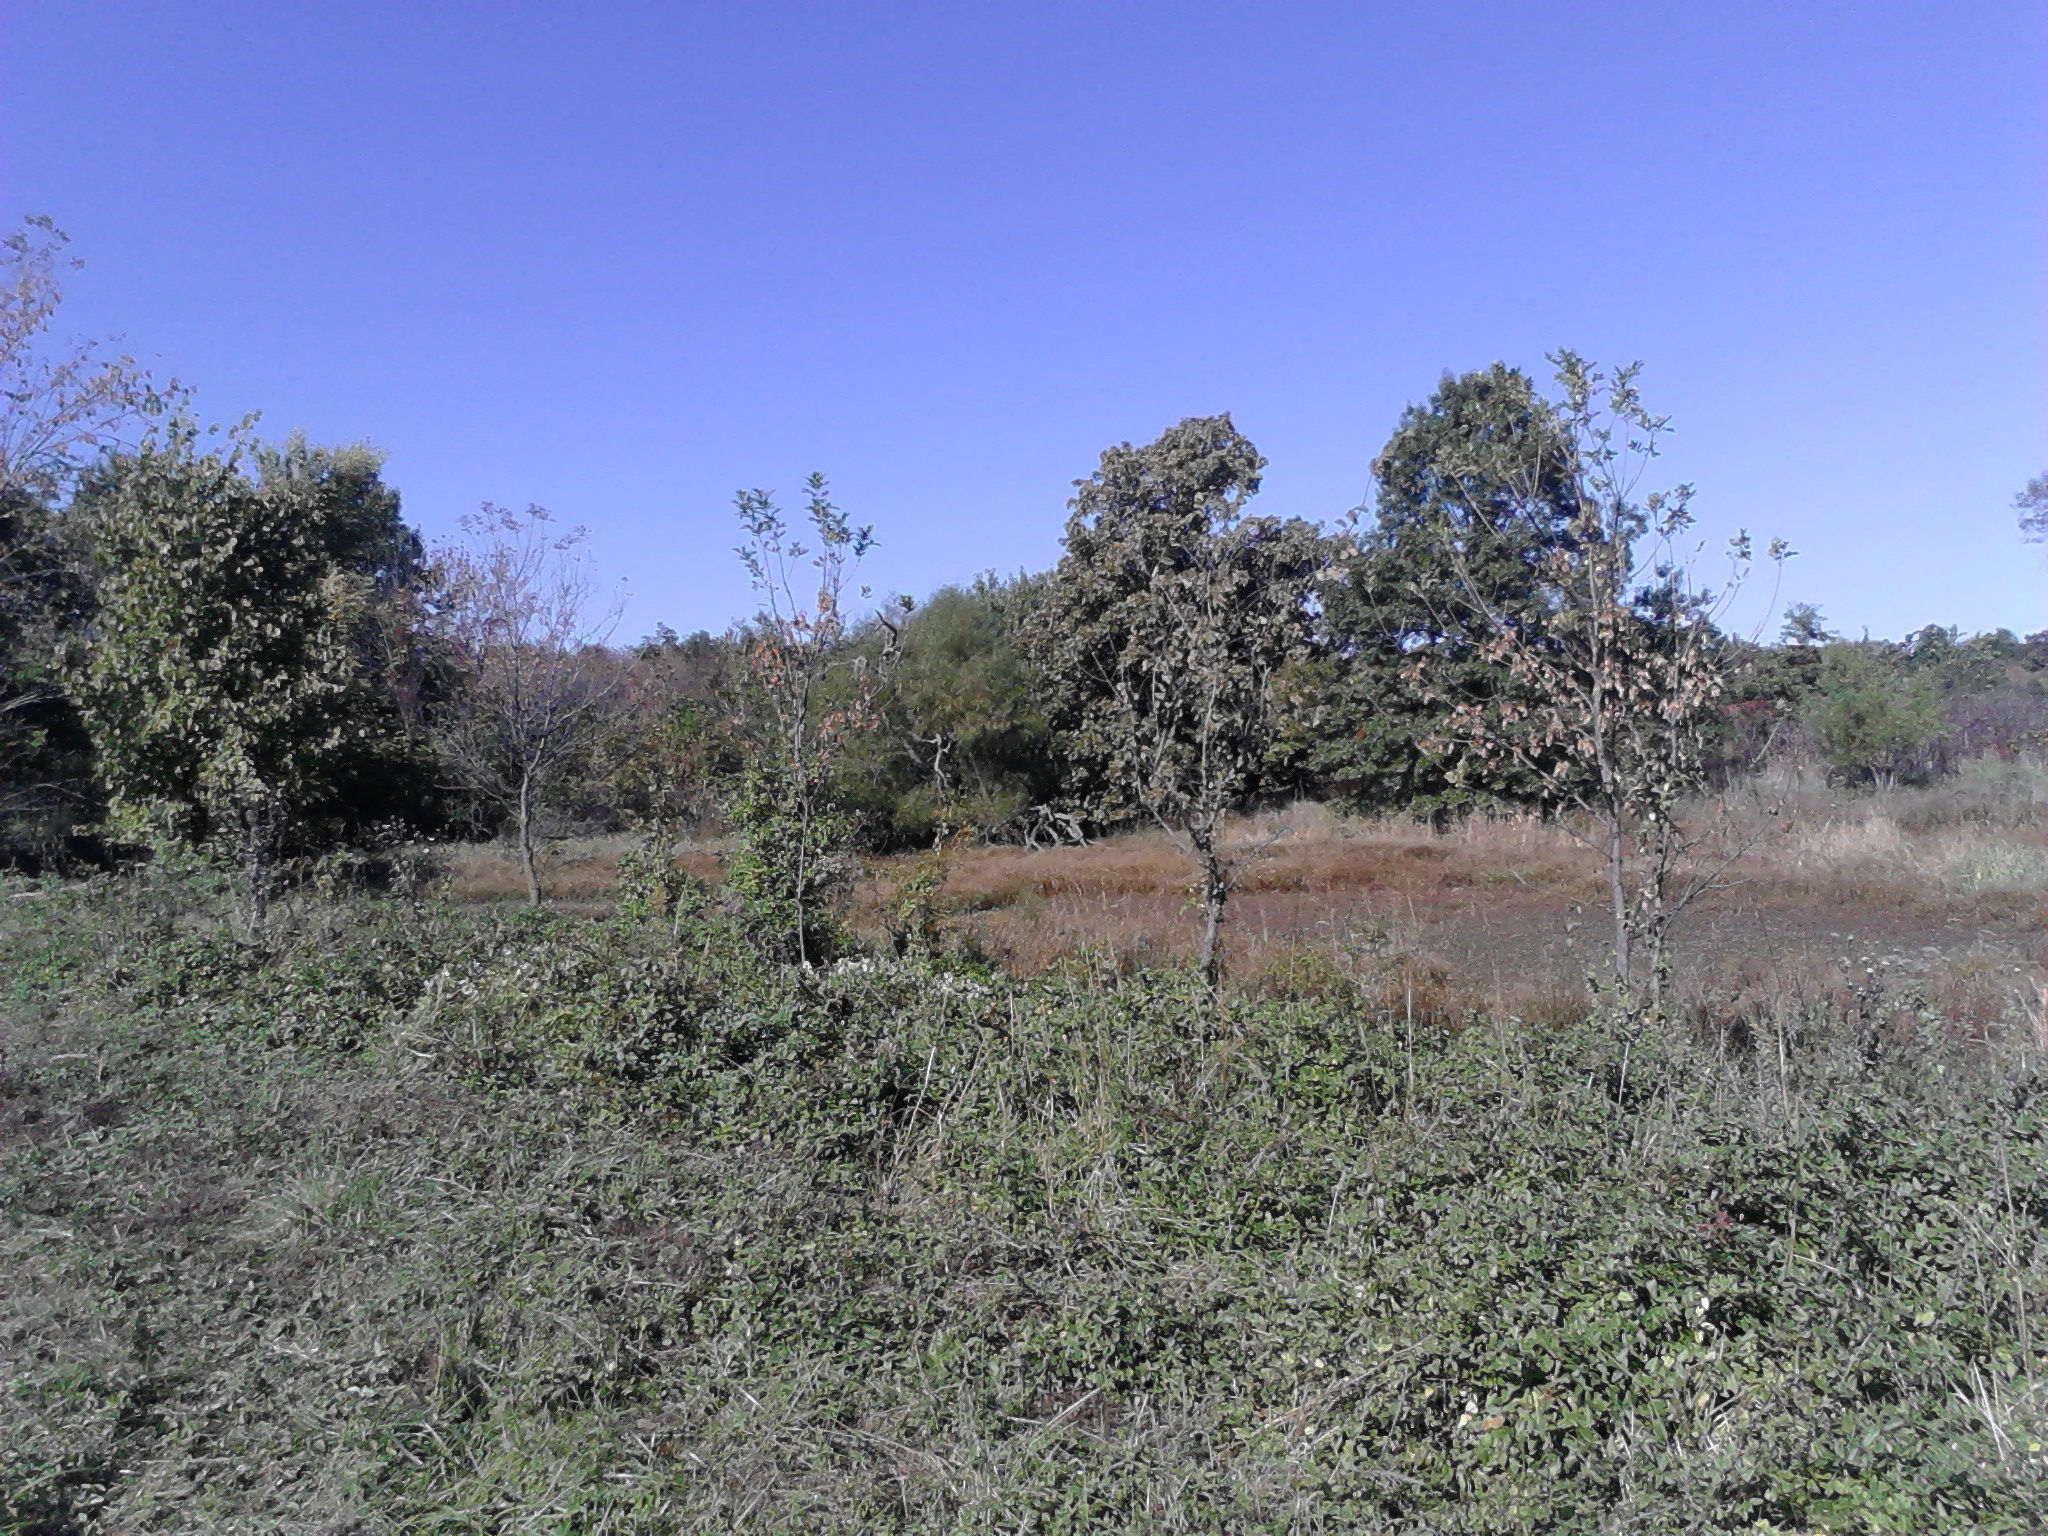
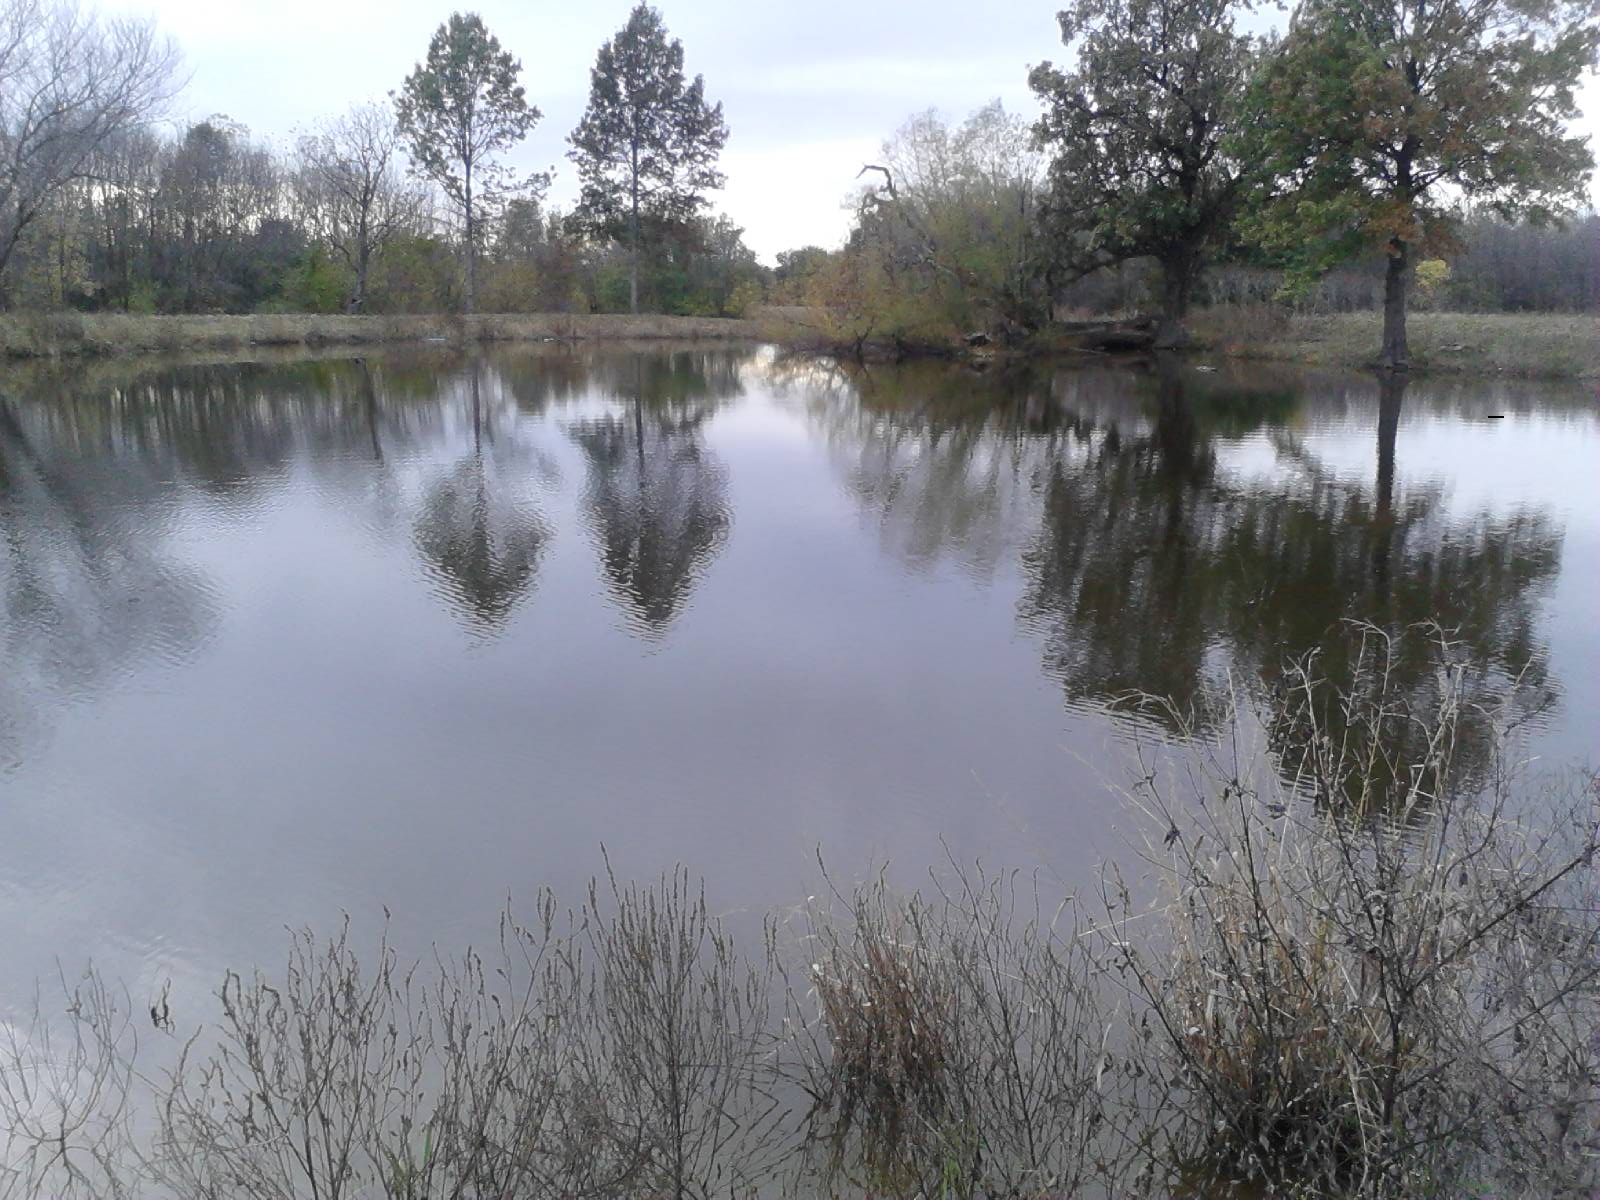
Thought it might be interesting to post a before and after picture from roughly the same direction.
First picture is of old pond basin before starting renovation. Notice the two oak trees to the right center on opposite bank in the first photo. One on right is water oak and on left is burr oak.
You can reference these two trees in the second photo. They are in the upper right hand corner of the second picture because the shot is from a different vantage point but covers roughly the same area. I should go take a shot from the exact same place.
Quite a nice change from what it was before to what it is now.
Description: Before starting renovation
Description: After renovation
Heckuva difference. I wouldn't get too attached to those oaks. Mine don't like to have their roots submerged for long periods.
Snrub, very nice work.
Dave, it still amazes me that an oak can live for 100 years in all types of weather, but slowly die via flooding or a Cat blade too close to the roots. We're still losing one or two a year that are near the water's edge.
Ya'all need some pin oaks. They like having their feet wet. The woods behind the house is predominately pin oaks - it used to have standing water in it until June. They are a characteristic tree of wooded wetlands.
Maybe so. I have post and black jack oaks.
Are yall calling a water oak a pin oak?
Pat W
I believe a water oak and a pin oak are not the same tree?
No they are not the same but a lot of people get them mixed up- both like water
Pat W
Yes, I figured the water would eventually get to both of the oak trees there.
I don't know if the names I'm giving the trees are correct. It is just what they are called locally.
What we call water oak are extremely common, especially in creek bottom areas. The wood is not much good as it splits as it dries out because the tree has a lot of water content when it is cut down. About all they are used for is making pallets and split and dried for fire wood. Very low value for logging.
The Burr oak on the other hand is a good lumber tree and has very large acorns. Maybe an inch or an inch and a half acorns, and a very large pretty leaf. They are nice trees and much less common.
The alternative was to take the trees out now and have a bare bank, or leave them till they went bad. Son cuts lots of firewood in the fall/winter and sells it (as well as burns it himself) so as the trees goes bad he will have no problem removing them. His family fits the red neck description pretty well. They hunt deer, fish in the creek, spend a lot of time in the timber camping, garden ect. (He is also big into solar power and is thinking of putting solar aeration in the pond)
I know trees around and leaves in the pond are not the best for the water environment, but they sure add to the aesthetics of the pond. That and the fact that I had already spend several times as many hours on the dozer as I originally planned cleaning out this pond, leaving the trees was just easier. Notice I did take a pole saw and clean up the lower branches so it was easy for the kids to play around the trees and mow around them.
Thanks for all the comments.
Ya'all need some pin oaks. They like having their feet wet. The woods behind the house is predominately pin oaks - it used to have standing water in it until June. They are a characteristic tree of wooded wetlands.
I'm no expert on trees. Know enough to know which ones make good fire wood and which ones are hard to split. These could be pin oaks for all I know, just know they are called water oaks around here. But they fit the same description for growing conditions as you state. Very often found in areas that have a lot of water, but are also common in tree rows in upland. At least I assume they are the same tree. Might not be but look very similar.
I know some of the ones in flood land area are really hard to push out with a dozer. The tree grew as a sapling then a flood silted it in. Repeat. Root crown might be down six feed under compared to the same tree grown upland.
My very first experience with a dozer was with one of these oaks probably 4' in diameter (seemed like it was 5 but been so long ago probably exaggeration is setting in). I was still in high school and a local contractor had hired me to custom bale some of his hay for him on his farm. He had me run his old D7 3T cable dozer (1950's vintage) to do a few odd jobs. He also had a D8 later model machine and his operator was there and this guy thought he would have some fun with me and told me to get on the old dozer and push this tree out. Thought they would both have a good laugh at my expense. What he did not realize is that although I had not ran a dozer but for a few hours, I'd been driving tractors since 6 years old and had been observing not only his operator but another neighbor operator for some time. So although I had not been on a dozer much I knew a few things about how to use one.
I took off with it, dug about six feet deep all the way around the root crown, then built up a ramp about 8 or 10 feet high up the side of the tree with dirt. In about an hour, over it went. The root ball was so big it nearly hung me up as it went between the blade and the front of the tractor but I managed to back off it.
Needless to say the guy was impressed and hired me to run the old dozer that next winter (after graduating high school) clearing trees and leveling strip pit dumps. Below freezing with tarps on the sides and the fan reversed blowing hot air from the radiator back over the open operators station. Those were fun days.
That is how I learned to operate a dozer. Later in life bought an old dozer about like that one I ran (D7 17a cable operated). Now I'm in hog heaven retired with a D6N XL (hydraulic 6 way blade) to play with.
More than you ever wanted to know.
Read the description of the tree in the link. Does it correspond to a water oak description?
Pin Oak here has LOTS of knots. PITA to split to a uniform size, but it is in the Red Oak family, so it has the same firewood burn characteristics - long to season but burns good and puts off heat.
Pin oak is the name we use when in polite company. When it's just the fellas, we call it by another term due to it's (sometimes) strong odor of urine.
That name starts with a P also.

Snrub, you and I have differing opinions as to what constitutes a redneck!

It is a pin oak! Looked up the leaves of both and definitely pin oak.
And yes it does smell while curing out.
We are mild rednecks or maybe closet rednecks. Go a little south of me and they live up to the redneck reputation better.
Pin oak is a very common tree planted throughout Lincoln, red oak is a distant second, and very few burr oaks - but the latter are common throughout NE prairies and around the Platte and Missouri river basins. Pin Oaks grow very tall and straight and have the smaller round acorns and I think they smell like fresh dog crap when split. It's inferior to red oak as firewood as it can get punky/powdery, but still a superior wood and in my experience very easy to split straight grained with a hand maul. When I get a knotty piece, buck it into 4" rounds and split chunks for charcoal or smoking wood or head to the hydraulic splitter and take out some frustration.
TJ, I have dang near bought a big splitter on several occasions. Now I have decided to ignore trees that need to be split. When I do get one, I get out a maul and do it. My post oaks generally produce more than I need.
Impressive machine. Would have to cut and sell a lot of wood to pay for one of those. Wonder what it would do with an old knotty piece of Osage Orange in there?

Probably not be a good thing.
Dave, yours is probably the best approach.......... just avoid the big trees. But there is a certain amount of redneck satisfaction of seeing just how big of piece of wood I can get in my 35 ton splitter and get it split. Use my little tractor loader bucket to set them in place, the pieces too big for me to move by hand (splitter set vertical). Usually when I get them split in half, then I can tip the other half around enough to get it split up. The good thing about the big wood is it does not take too many pieces to make a rick. Try to cut about half hedge (Osage Orange) and half other wood like oak or ash.
I don't burn much wood any more, being gone most of the winter, but always cut up a bunch for our office manager for the office. The old farm house she works out of for an office has electric heat but she is very cold natured and likes to keep the wood stove going to stay toasty warm. Keeps it 80 in there in the winter. Got to keep her happy. She is the one that keeps the bills paid and the payroll going while we are away.

Great gal.
With age comes wisdom, Dave. I still haven't felled enough trees in my lifetime to get it out of my system. Biggest I ever tackle are 50' Green Ash but have my eye on several 20-40' Locusts - both of which are native to the farm. It's tough getting close enough to the trunk to make a cut through the labyrinth of thorns. Then I think - what the heck am I going to do with this thing once I get it down? Do guys actually take the time to knock off all those thorns with a hammer before they buck limb and split? Seems a ton of effort, although Locust is reportedly one of the most dense, highest BTU woods available in North America. I notice some of them are thornless on the farm...wonder why? Gender specific?
Tj, if you cut down those locusts I would make every effort to clean the felling area thoroughly of any loose thorns. They'll puncture the toughest tires....
Some species are poisonous to livestock also, so beware of that when disposing of smaller limbs and branches.
TJ, I take the chain saw and run it up and down the trunk at modest speed. Be careful it does not flip thorns at you though. I clean the trunk several feet up and down all the way around before felling. Mostly try to avoid the tree altogether but sometimes one is in the way.
I've cut a few up for wood that had large trunks worth knocking the thorns off but generally just avoid them. We are blessed (cursed?) with so many trees around us there is never a shortage of wood to cut, so avoidance is the easiest way to go.
A long time ago used to cut a lot of what my dad called honey locust. It had no thorns, grew tall, and was a fairly dense wood. Not as dense as the thorny locust, but still good wood for heating. Carolynn & I cut a bunch of it and sold fire wood early in our marriage when income from farming was lean, especially in the winter. I can't seem to get her excited about cutting wood any more. Can't understand it.
Used to cut a lot of Black Locust for fence posts years ago. No thorns on trunk, just small ones on limbs and branches.
Thanks guys, good info, and Tony - I know all about those damned thorns in the tires. Me clean up thorns? Are you kidding? Too much distracting me!
TJ, if the tree has thorns all over the trunk, it's honey locust. Some guys drop the tree, keep the weeds beat back with roundup for a year, then knock the bark and thorns off.
But, seeing the few growing around here, I'd mess with something a lot easier to cut and split. All those thorns seem like too much work to me.
Black Locuse has no thorns on the trunk, and only some on the smaller branches.
Let a black locust fencepost cure for a few months and you can barely drive a fence steeple into it. Harder than hammered hell.... lasts forever though, even beats cedar.
Yes, I said steeple, not staple.
I think the posts around here are made primarily of locust and osage orange. Some look like they are 70+ and I still can't make a dent in them. Amazing.
I'm going to try a few smaller locusts [35'] this fall that I ringed last Spring. I'm sure I'll bury a few thorns into my legs and will call it a day, but you know me, gotta throw stupid at it a few times to see it will wake up.
I would be very curious to get the soil tested just under the muck line. I have seen a few folks on here who have renovated a pond like this but had problems with clarity and algae blooms after it filled back up. I am wondering if a high degree of nutrients leaches out of the muck into the subsoil being exposed, and if so, how to remedy that nutrient load so it doesn't return to the water too fast. Now would be the opportunity to check it out.
If high in nutrients, perhaps line the pond with a fresh layer of clay before filling? Perhaps dig a little lower and see if there is less down below?
You were right on the nutrients being a problem. I ended up having to leave one corner of the muck so there were more nutrients left behind than I wanted. But mother nature decided it was time for the fall rains to come and that muck had to stay where it was.
The first year was not much of a problem. But the second year my son did have a lot of FA problem from excessive nutrients. I think this year he is trying to keep that contained but have not heard from him how he is getting along with it.
His kids are in the pond almost daily during the summer. Either swimming, kayaking, rubber boating, fishing, etc. They get a lot of use out of it.
Heckuva difference. I wouldn't get too attached to those oaks. Mine don't like to have their roots submerged for long periods.
You were right Dave. That Oak did not make it. Funny thing is we have another Pin Oak (I had incorrectly called that one a water Oak) just SW of our house that is right at water level of a seasonal creek. Just looked at it today. The water has actually undercut the root ball and has water under the tree. The roots are all growing along the bank and into it, with no roots out in the water. I'm amazed the wind has not blown it over. It is about 30" in diameter and likely nearly as old as I am. It seems to be growing fine at waters edge.
Go figure. The ones we don't want to die do, and the ones we don't care about seem to do fine.
I would be very curious to get the soil tested just under the muck line. I have seen a few folks on here who have renovated a pond like this but had problems with clarity and algae blooms after it filled back up. I am wondering if a high degree of nutrients leaches out of the muck into the subsoil being exposed, and if so, how to remedy that nutrient load so it doesn't return to the water too fast. Now would be the opportunity to check it out.
If high in nutrients, perhaps line the pond with a fresh layer of clay before filling? Perhaps dig a little lower and see if there is less down below?
We never tested the soil but had to leave a portion of the muck because fall rains came and the weather determined when we were "done". And although my son's family gets much use out of the pond, the nutrients have been a problem in the summer both last year and this. He used some Cutrine and knocked the FA back a while this year but still a major problem. He used some pond dye but probably too late for it to keep the regrowth down like it could have if used earlier.
Talked to him today as he and the kids swam and fished in my pond. He is going to get an earlier start on controlling the FA next year in hopes they can use the pond for swimming later into the summer.
But you were correct to anticipate nutrient load being a problem. It is.


