Pond Boss
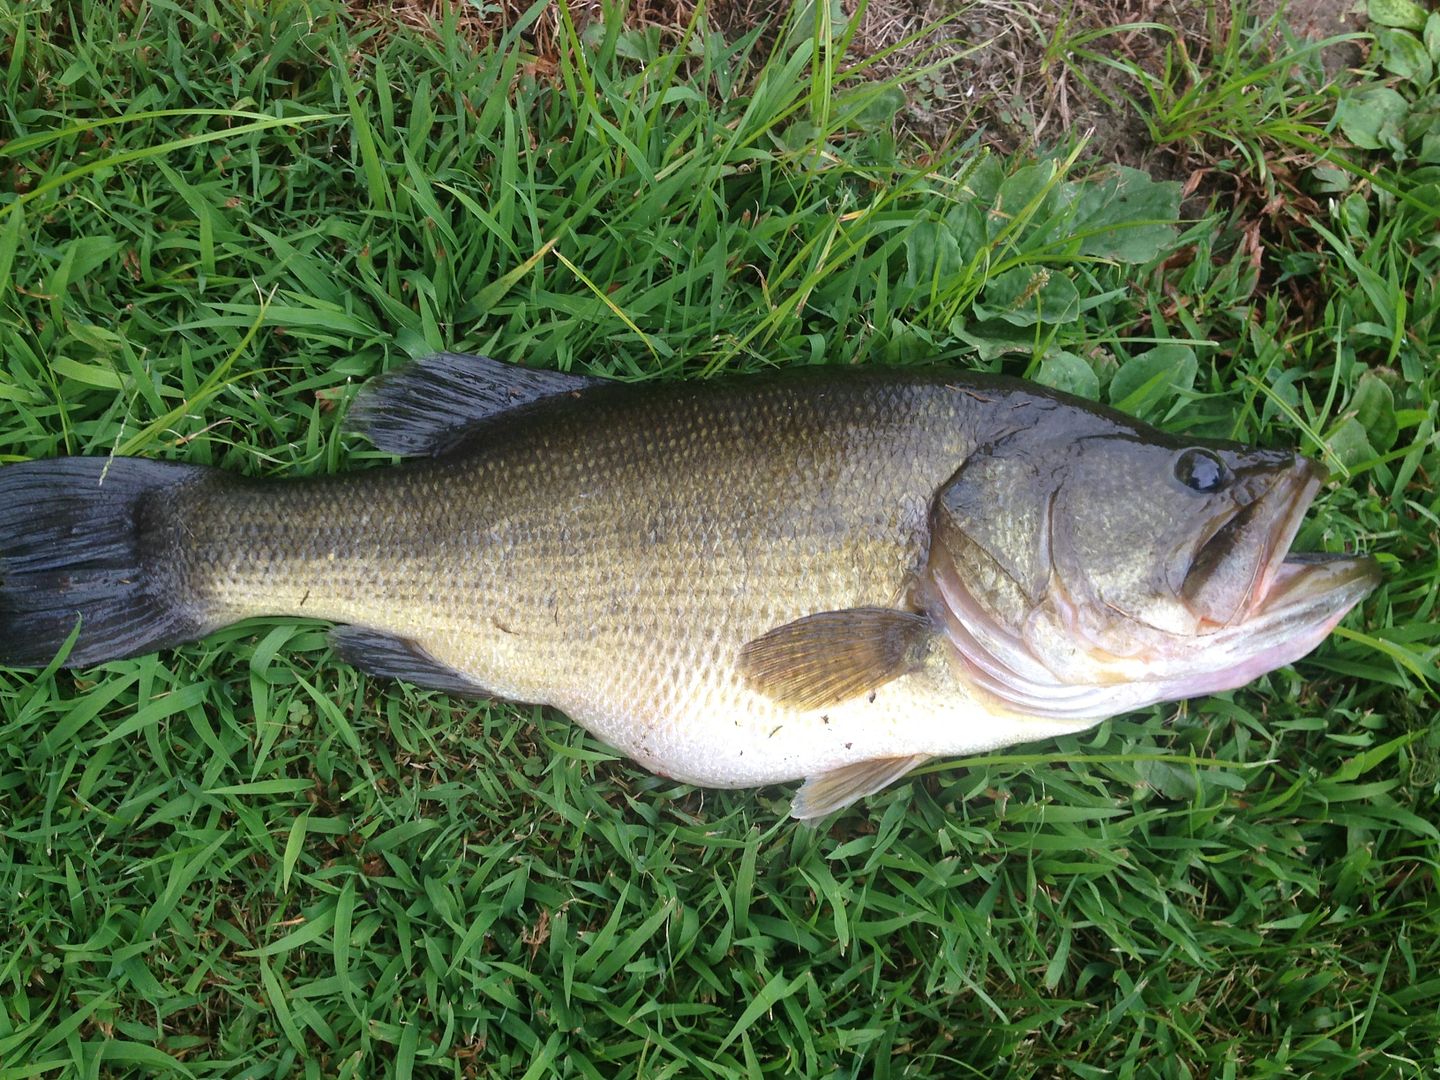
In the following thread Dlowrance caught a big bass from his pond and released it. He has me doing a replica of it. (One of the thing's I do for a living.) He and I thought it would be cool to chronicle the process of doing the replica.

http://forums.pondboss.com/ubbthreads.php?ubb=showflat&Number=420775&page=1

The way fish replica's typically work is if the original fish is not available, the angler gives me a length and girth and/or weight and I order a blank from a supplier that is as close to the original fish as possible. The suppliers usually have thousands of casts of fish of numerous species and sizes listed to choose from.

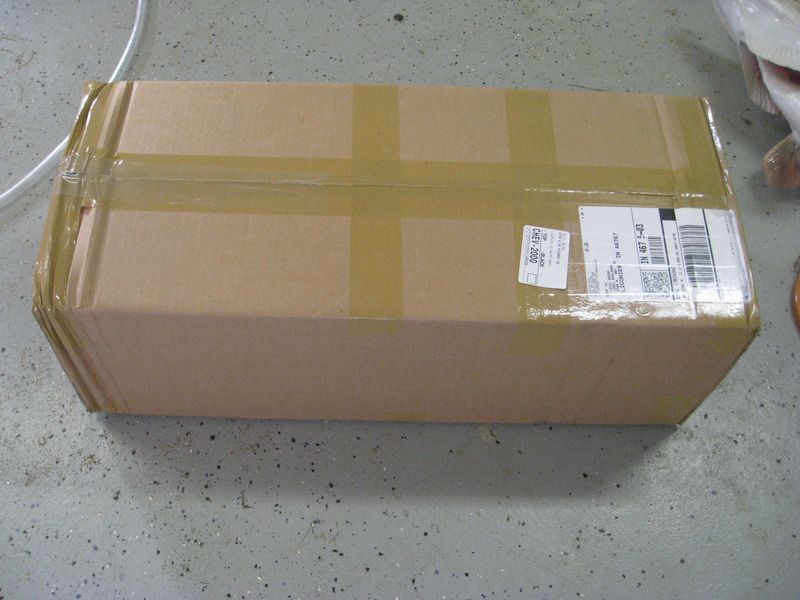
Here the box of the cast has arrived:


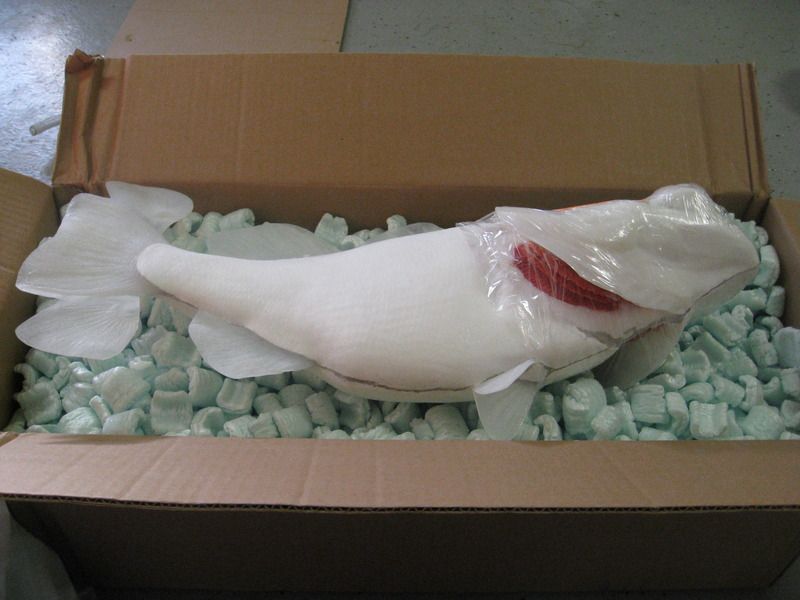
Here is it pulled out of the peanuts:


Here it is showing the approximate length:


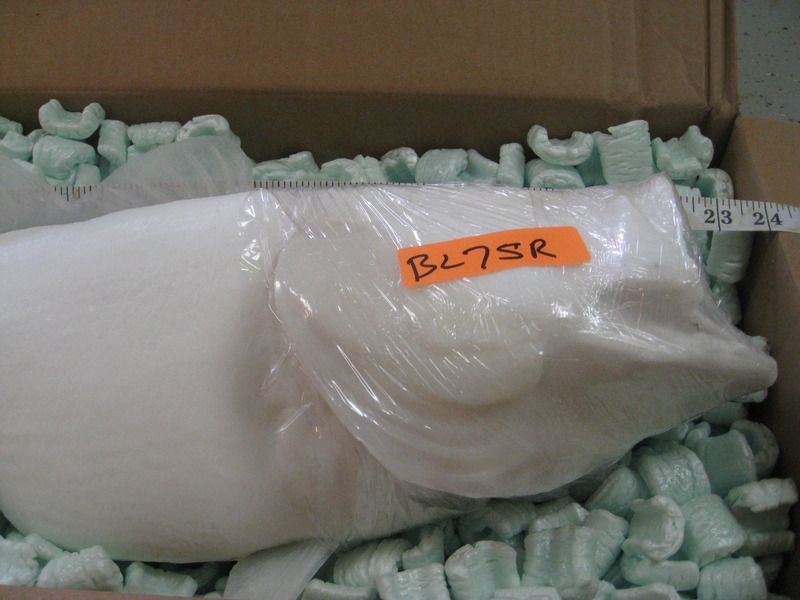
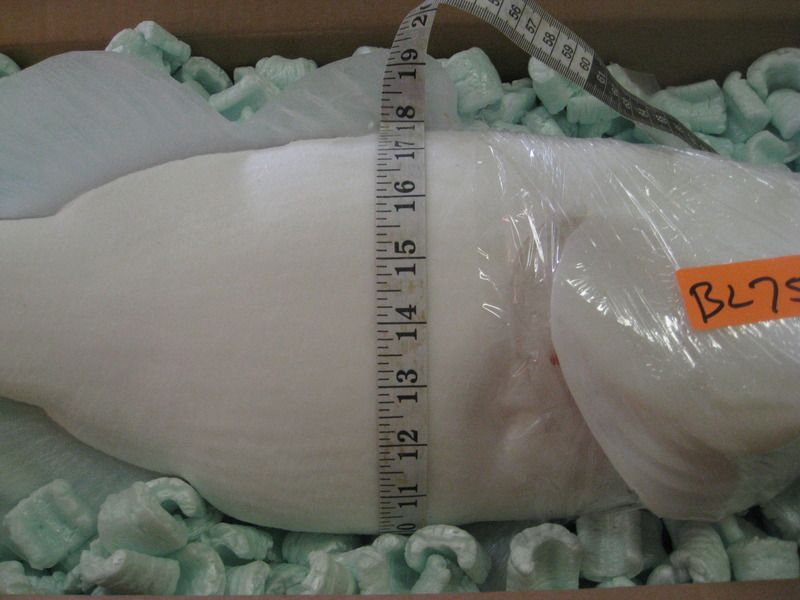
Here it is showing the girth:


I'm very excited about following this! Thank you.
Soon I will show how the pec fins are attached and the pec fin bases modeled in, the whiting out of darker areas, and the blank sealed in clear lacquer sealer. Then the fish will be "antiqued" to prep for applying the colors.

Stay tuned!

Feel free to comment or ask questions as the pictures are posted.

In the mean time here are a few "skin mount" bass I recently did for some customers:

Those bass look terrific!
Just an additional commentary on replicas. I hear anglers on fishing websites comment they look fake, like plastic etc. If the blank is high quality and the painting is good they should be indistinguishable from the real thing.

Here is a musky replica I did a couple of years ago for a musky guide and his client:

Here is the blank before painting:


Here is the blank after painting:


We put the fish back in the box of peanuts the blank was sent in as the guide had to drive it several hours to an outdoor convention. The guy on the left got a free musky replica from the guide for catching and releasing a 50 inch or plus musky from a local lake. The guide paid for the blank, and I did the labor free of charge for advertisement. We don't do it anymore as he got tired of buying the blanks for $300.00, and I got tired of doing them for free with no one wanting to pay $750.00 around here for a musky replica!
Originally Posted By: Bruce Condello
Those bass look terrific!


Thanks. Perhaps a little greener than some regions of the country but pretty much what they look like here.
Very nice work and and the start of an informative trip through the process.
Very cool Cecil. I hope you decide to do a similar thread sometime on a skin mount. smile
This is a very good thread about preserving a life like replica of your trophy catch or one you would like to catch some day. Yes this is a great educational thread for anglers and pondmeisters.
WAAYYY Excited!!!
Update:

Flashing on the fins and body has been trimmed and ground off. Seams and imperfections have been filled in with a two part apoxy known as "Magic Sculpt." This is a product we use in the taxidermy industry to fill in shrinkage on actual skin mounts too. Sets up hard as a rock.

Eyes have been set and the nares have been installed.

Next step will be sanding down the epoxy and putting on a thiner layer in which scales will be pressed in using a silicone mold of actual fish scales.

Also the teeth will be made in the appropriate areas of the mouth using more of the Magic Sculpt and producing the correct texture with a toothbrush.

Then whiting out the epoxy areas, sealing with a lacquer sealer and "antiquing" the scales and other areas to give them a natural detail that shows through the transparent paint.


Originally Posted By: Bill D.
Very cool Cecil. I hope you decide to do a similar thread sometime on a skin mount. smile


Bill,

This may have been before your time here:

http://forums.pondboss.com/ubbthreads.php?ubb=showflat&Number=124398&page=1
Very interesting to watch this thread keep up the good work.
Very informative and excellent job so far. I am learning a lot. Did not know you had to add the scales and teeth. True artistic talent required.
Originally Posted By: Bill Cody
Very informative and excellent job so far. I am learning a lot. Did not know you had to add the scales and teeth. True artistic talent required.


It depends on the mold. Some you don't have to.

This can be learned. Just average artistic ability needed, a desire to continually improve, and a love of nature. And of course lots of repetition.
Originally Posted By: Cecil Baird1
Originally Posted By: Bill Cody
Very informative and excellent job so far. I am learning a lot. Did not know you had to add the scales and teeth. True artistic talent required.


It depends on the mold. Some you don't have to.

This can be learned. Just average artistic ability needed, a desire to continually improve, and a love of nature. And of course lots of repetition.


He is both modest and humble. I agree with the other opinions here, well above average. You deserve every award you have and more.

Cmm
Lookin good Cecil! I'm already in negotiations with my interior decorator as to where that beauty will be hung...I'm being told that dead center right over the headboard in the master bedroom may be a non starter....
Nice work Cecil and thanks for the how to narrative.
Originally Posted By: dlowrance
Lookin good Cecil! I'm already in negotiations with my interior decorator as to where that beauty will be hung...I'm being told that dead center right over the headboard in the master bedroom may be a non starter....


Did have a newlywed couple tell me they were going to hang the hubby's deer shoulder mount (back before I specialzed in fish) right above the bed. I made sure the hanger was a good one and told them to use a screw with a big head so it wouldn't fall off the wall!

Sadly I can't tell you how many wives turn to their husband's and say, "You're not going to hang that in my house," if they come in with their husband to pick it up. I've even had some purposely not tell the husband it's ready to pick up. Many mounts get banned to a damp basement, but if the guy is lucky enough to have a man cave his man cave.
Pretty Cool Cecil!!!

Didn't really know what a replica was until you explained it here. Thanks!!
Originally Posted By: JKB
Pretty Cool Cecil!!!

Didn't really know what a replica was until you explained it here. Thanks!!


Thanks for the kind words.

Interestingly more and more taxidermists are molding fish too. In fact a lot of my frozen fish sales go to taxidermists and suppliers that are molding fish.
I couldn't agree more on CMM's calling of Cecil being modest and humble when he says "This can be learned. Just average artistic ability needed".

After having the pleasure of seeing his operation first hand while on our trip:


Cecil took the time to show us around, answer all of our questions and explain the whole process.

And now we all get to see it from start to finish! Thank you Cecil!

There's no question you possess a rare talent!

And just out of curiosity, are there any other fish taxidermists who also raise their own fish????
Originally Posted By: Cecil Baird1

Sadly I can't tell you how many wives turn to their husband's and say, "You're not going to hang that in my house," if they come in with their husband to pick it up. I've even had some purposely not tell the husband it's ready to pick up. Many mounts get banned to a damp basement, but if the guy is lucky enough to have a man cave his man cave.


This is a non-issue for me...the majority of my house is definitely decorated in Early American Redneck. The better half and I have an agreement...she doesn't mind the shoulder mounts, fish, outdoor pics, beer signs, etc in the basement (my man cave) and also scattered throughout the main floor, and I don't mind her painting numerous walls colors that are better served decorating an ice cream truck.
More progress. The painting should be completed today. Lots of distractions including adding on to the house and a customer flying in from Alaska to pick up his 44 inch 40 lb. lake trout (skin mount). Several thousand spots to repaint and make them not look painted. Probably the most difficult fish I paint. And of course delivering tilapia to four high schools and holding their hands on set up. LOL

Anyway here is the fish all whited out over the epoxied areas and then sealed in a lacquer sealer.


Next a dark brown is painted on the scaled areas and fins that have some color to them.


After that the brown is buffed with fine steel wool to take paint off the high areas of the scale to add detail and realism to the blank. In the industry we call this "antiquing." Otherwise even with the right colors the fish would look like some fake plastic fish.


Next I use five minute epoxy and put the pec fins on and fill in the pec fin base with a two part epoxy I use to model in things on fish.

I wasn't happy with the scale detail on the belly and I'm trying it again this time leaving the scale mold on the fish with tape and letting it sit for a few hours.

Here is the material I use to make scale impressions to add details on seams. No mold release needed. Get it on Ebay.


It's two part weighed out in equal parts, and I apply it to an area near where the scale detail will be added for the same size scales. As you probably know scale size varies on fish depending on where they are on the body of the fish.

Fascinating stuff... thanks for taking the time out to let us see your talent.
+1 I am really enjoying following along
Man that big girl is gonna look great over the mantle! Cecil I sure do appreciate the quality work you're doing here.
More pics:

Iridescent gold is painted where the following yellow will go to give the bass a kind of a metallic sheen under the subsequent green final color. I didn't take a picture of that step as it may not even show in a picture.

A bright yellow is misted over the same scale areas of the fish to make them look green. This will be darkened later. Note instead of yellow it appears to be a light green due to the brown antiquing underneath. Novices think they need to paint the same color they wish to achieve when it's not the case especially with skin mounts.


Here the pec and anal fins (one on back too) are painted an orange color to be darkened later to match those in the original photo of the fish that was released.


Here a dark green followed by a brown and barely some black is used to paint the scale tips on the lower lateral portion of the fish, paint the caudal, dorsal, and anal fins, and darken the fish and subdue the green a little to match the fish in the original photo. The longitudinal lateral stripe markings that go from the front of the caudal fin to the back edge of the clithreum bone that are fairly subtle in the original fish, are also added.


Gill Red is painted on the gills to intensify the molded in color. (Not shown)
The final fish on driftwood hanging on the wall.


The fish in a crate I built out of lightweight thin wood that I had left over from a pallet of plastic I ordered a while back. I couldn't find a box the right size as the attached driftwood made it bigger and this is better than cardboard.


The box has four screws that come in from the bottom into the driftwood and each screw has a fender washer to keep the screws from breaking through. The idea is to have the fish in a fixed position and nothing touching the fish. Peanuts aren't always the best thing for fragile fins, and I'm not sure how they would interact with the automotive final clear coat that is used to protect the paint from UV and give it a wet look.


Unfortunately made a wasted trip to the post office to ship the fish today. frown They now close at 11 A.M. vs. 12 P.M. Will have to ship first thing Monday.

Refuse to ship UPS. UPS is a nightmare when it comes to fragile fish mounts. Doesn't matter how well it's packed. It's almost like someone intentionally destroys the box. And btw the box is not held to together by tape. LOL There are staples and screws. The tape hides the rough edges of the wood.

Beautiful mount.

Original dlowrance fish for reference:

Cecil's posts in this thread would make a great presentation for a conference, or a great magazine article on how this is done.

Great work Cecil. Thanks.
Originally Posted By: Bocomo
Beautiful mount.

Original dlowrance fish for reference:


And the other photo of the fish.


One thing I find perplexing about taking pictures of mounts to match the original photo is depending on the background of the mount or the lighting the colors vary a a lot.

As in this photo the fish looks much lighter and greener due to a flash.

Originally Posted By: catmandoo
Cecil's posts in this thread would make a great presentation for a conference, or a great magazine article on how this is done.

Great work Cecil. Thanks.


Thanks for the kinds words Ken.

As far as a magazine article I'm burned out on magazine articles. Working on a DIY RAS aquaculture booklet and a novel though.
Cecil, that's a good job !!

Tracy
Beautiful work!
Awesome work! Which is harder to do, replica or skin mount?
Originally Posted By: Bill D.
Awesome work! Which is harder to do, replica or skin mount?


Skin mount is more time consuming but the material cost is higher for the replicas as the blank has to be ordered.
Fantastic work, Cecil. A thing of beauty.
Thank you all for the compliments.

The most important person to please will be Dale of course.

Shipping always makes me nervous but so far no issues with USPS. It's UPS that is a gamble shipping fragile mounts especially this time of year regardless of how well they're packed. A guy told me a friend of his that worked at the nearest UPS terminal told him they literally walk on boxes this time of year they are so flooded. Also said unloading a truck is faster if they pull out boxes underneath to cause them to tumble out. shocked
She looks AWESOME Cecil!! I can't wait for the box to get here...I feel like a kid at...well, Christmas!
She's on her way. I sent you the tracking number via email.

It's in the hands of the Post Office now. Ooh that doesn't sound good. LOL
Great work Cecil ! Of course we have come to expect that - well done !

See this for more of Cecil's work - PB diorama

http://forums.pondboss.com/ubbthreads.php?ubb=showflat&Number=202940#Post202940
Thanks Eric.
thanks, again, for sharing your talent with us...
Post a picture of the final resting place of your memorable catch.
It got there in one piece! I am so relieved. Can't tell you how many times I've shipped fish UPS in packing that was virtually bullet proof and the fish still got damaged. One I sent to Texas, that was damaged, the box literally had a hole in the side of it! That's why I ship fragile things only USPS vs. UPS.

Here are two pics Dale sent me of it hanging. Hope you don't mind Dale. Love that European skull mount too!


You beat me to it Cecil!

Cecil's work is first rate, no doubt about it. My kids were awestruck as I took her out of the (very well made and sturdy) shipping box. My daughter (who was with me when I caught the fish in the first place) said 'it looks just like it did when you caught it!'

The attention to detail is outstanding Cecil....I really appreciate it.

FYI the bass on the right is a 6 lb LMB my Dad caught when I was about 3 years old...he passed on a few years ago. I wanted my trophy and his to both have a spot of honor over the mantle.
Originally Posted By: dlowrance


FYI the bass on the right is a 6 lb LMB my Dad caught when I was about 3 years old...he passed on a few years ago. I wanted my trophy and his to both have a spot of honor over the mantle.


Awesome Dale! Very touching!
Nice work and showing the process of how it was done. I may be asking you to do a replica for a giant Florida bass I caught.
© Pond Boss Forum