...a little more progress on the dry hydrant installation.
As part of the boat launch concrete pours, we swiped a little bit of the concrete to finish off the intake end of the dry hydrant.
(ref;
the launch-dock construction thread -
-
Since I neglected to think of drilling the hole for the small concrete pier required to stabilize the dry hydrant support rod, it became a "clamshell hole digger" project. I got down about 20" and hit clay that I could barely scrape with the cutting edges of the digger. This is gonna have to do...(sarcasm; it will be an excellent foundation for this little project).
The dry hydrant unit has optional holes drilled top and bottom near the end of it to accommodate a 1" diameter support rod. I wanted to use a non-corrosive metal for longevity. Stainless was too pricey. Then I searched for aluminum with elevated anti-corrosion properties. I found the best deal on-line. I picked up a pc of 6061, 1" x 144" for about $40. They cut it in half and UPS'd it to me.
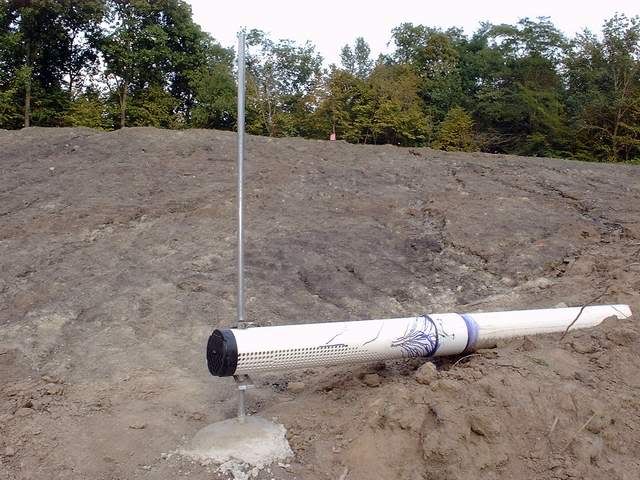
We glued the final fittings, filled the foundation hole with concrete, and set the aluminum rod.
-
-
The strainer unit is supported on the rod with a hard rolled stainless strap that exhibits spring properties. PB brethren, Tom Bingham, provided helpful guidance in selecting a strainer unit that also incorporates a spring-loaded back flush end-cap.
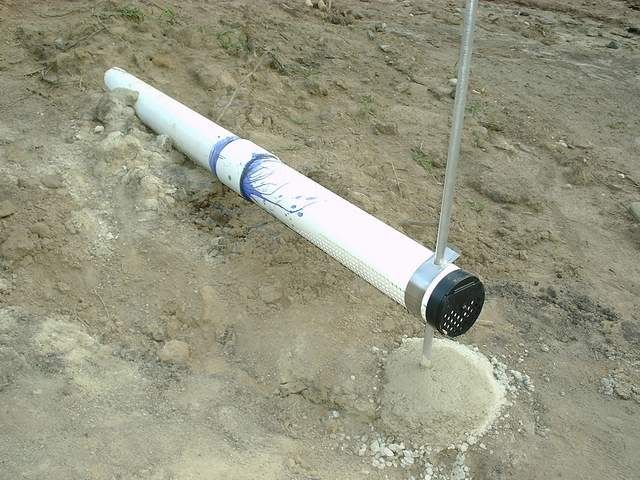
When the concrete cures, the support rod get trimmed. The soil just below the strainer holes will be trimmed down a bit, also. Then, all the exposed PVC components get a splash of latex paint to ward off UV damage.