...OK, just a little bit on the concrete piers.
We laid out the exact centers of each pier right on the ground and pounded a short pc of #3 rebar into dead-center. The real trick is to transfer this exact location vertically to the top of the poured concrete pier. Remember, the post-hole digger can have a mind of it's own, especially when it hits a substantial rock or root. Also, the hole is rarely perfectly plumb; this is usually the biggest offendor. I have used a measurement transfer method before with accurate success, but did not take pics of it's application during this project. I can expand on it and fudge in a pictorial should someone care to see it.
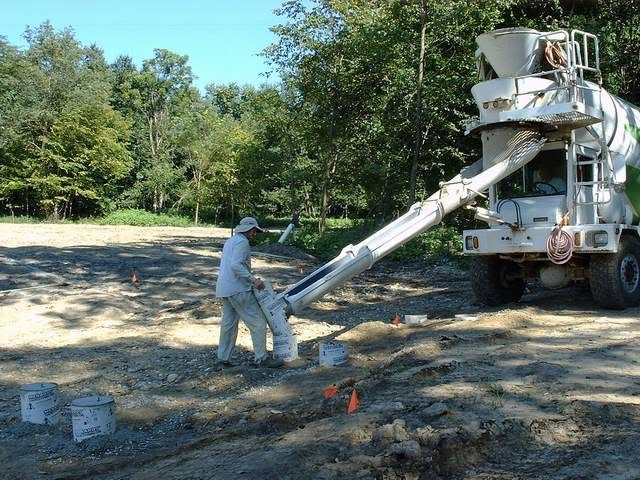
OK, the holes are drilled, the tubes are FIRMLY placed within the holes, and the center locations have been transferred to the tops of the tubes. Time to pour concrete, right? Almost. Cut an extra tube, or a leftover cut-off, in half length-wise. It should be a min of about 24" or so. It will save a bunch of concrete over-spill.
-
-
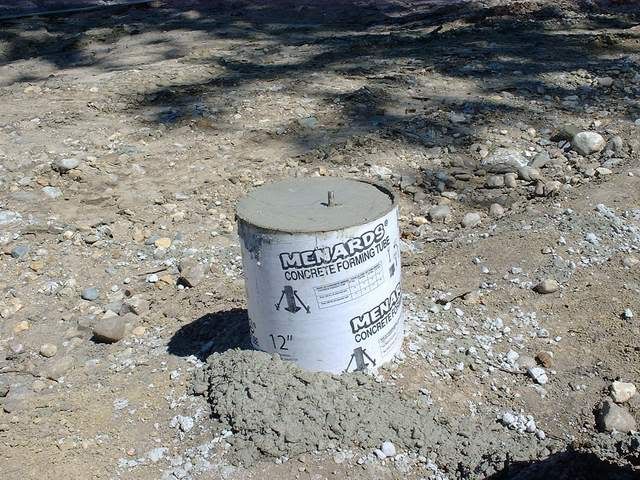
As noted above, some of the drilled piers holes wound up with a slant. Instead of leaving the form tubes loose in the hole and propped up perfectly vertical with stakes and supports, I make sure they are tightly jammed in, won't move, and accept the lean. I used my eye to trowel down the surface to "close to level", then used a short bubble level (right on the wet concrete) to finish it. (you will also note that the anchor bolt is off-center. Not really...it is actually dead on WRT the layout)
-
-
We used 1/2" x 12" 18-8 Stainless Steel "L" anchor bolts. I left about 1" exposed to accommodate the post base, a couple of SS washers and a nut.
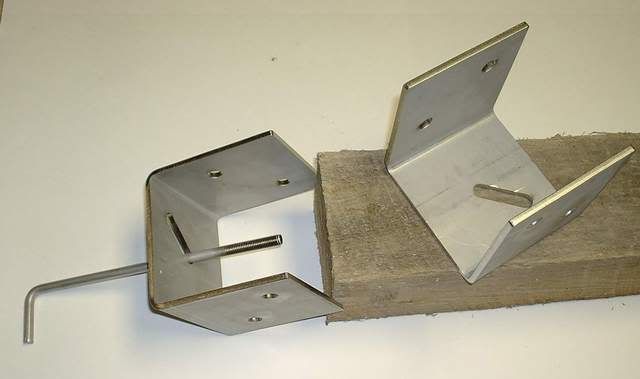
The 1/4" SS post bases will come into play a couple weeks out when we start framing.