I was talking to my dad the other day and he thinks it is about time to start building a pond. I have a week off between the end of deer season and the beginning of the spring semester so I am going to start clearing the site. The watershed will be about 30 acres and is mostly forested. Annual rainfall is 45-50 inches per year. I am hoping for a 2-3 acre pond.
Here is some general information.
Soil: Woodtell fine sandy loam, 1-5 percent slopes
Typical profile
0-6 inches: fine sandy loam
6-29: clay
29-45 inches: clay loam
45-72 inches: Stratified sandy clay loam to clay
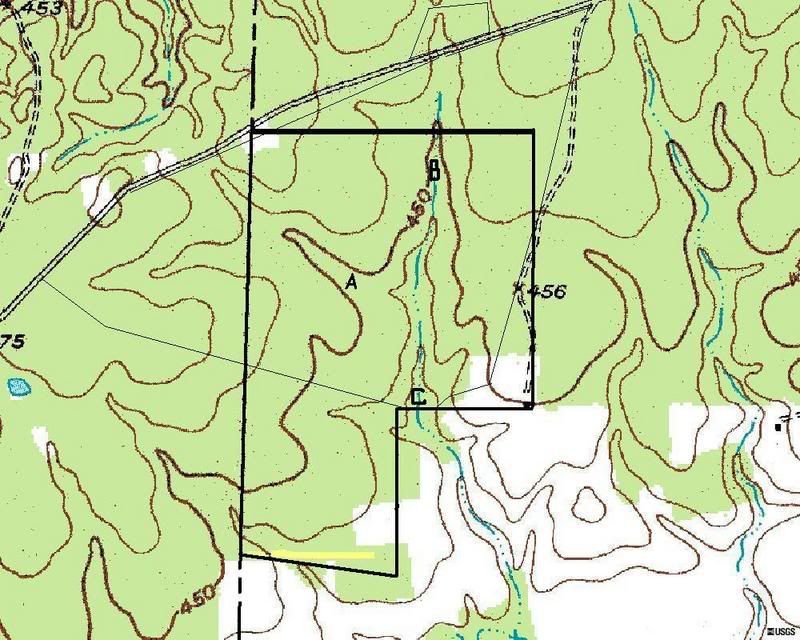
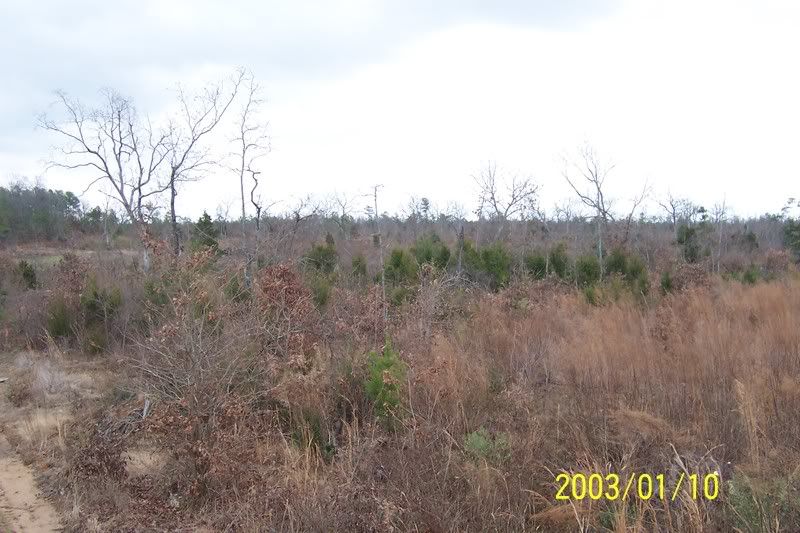
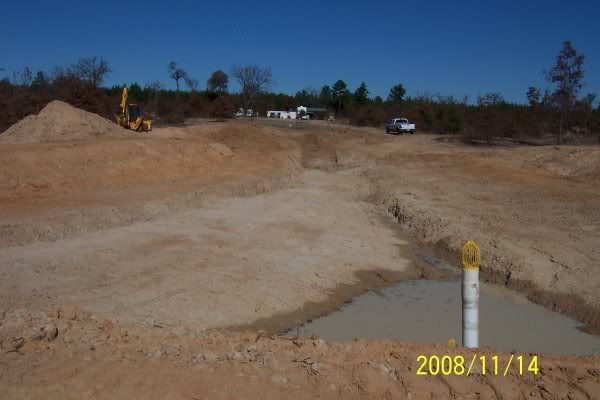
This will be pond site B.
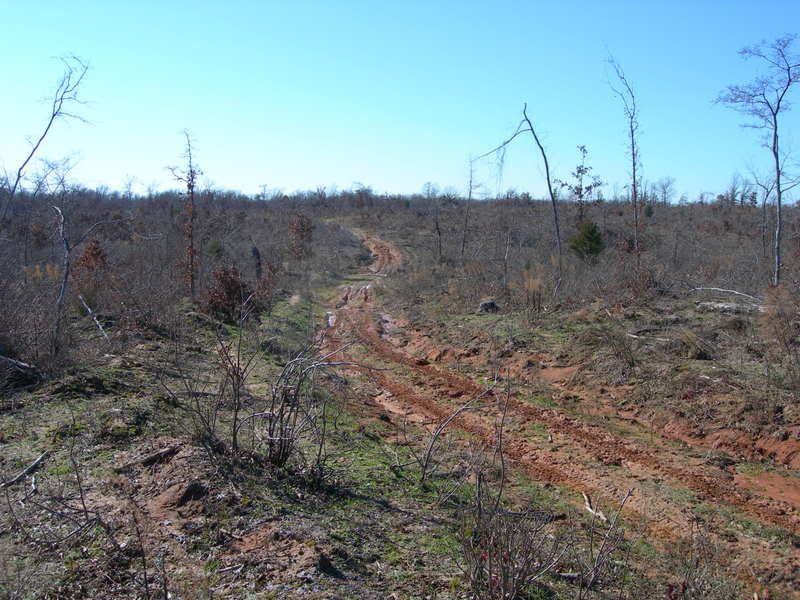
This is looking down into the ditch. The pond will be off to the right. I will get some better pictures the next time I am down there.
I have been doing a lot of research with web soil survey over the last few days. There is so much information on that site. I have used it before but didn't see all of the menus that you can look under.
Here are some things that I found out.
The soil is considered type B and D. Here is the description from the web soil survey.
B—These soils have a moderate infiltration rate when
thoroughly wet. They are chiefly moderately deep,
well-drained soils of moderately fine to moderately
coarse texture.
D—These soils have a very slow infiltration rate. They
are chiefly clay soils that have a high swelling potential,
soils with a permanent high water table, soils with
a claypan at or near the surface, and shallow soils over
nearly impervious material. The runoff potential is high.
The pond site is all in soil type D. This makes sense because of the small wetland areas that were made when the property was clear cut back in 2004. Most of the ponds in the area have three acres of watershed per acre of pond. My watershed is all wooded so 1-2 more acres will be needed at least. After doing so more revisions I decided the watershed is about 40 acres, so I can possibly have a 7 acre pond.
The pH ranges from 4.5-6.5 at the surface. There was no lime content, so with the low pH and it would be a good idea to spread aglime. Clay content averages 40% down to a depth of 6 feet.
Everything that I have found so far has been good news, so I am excited about the possibilities.
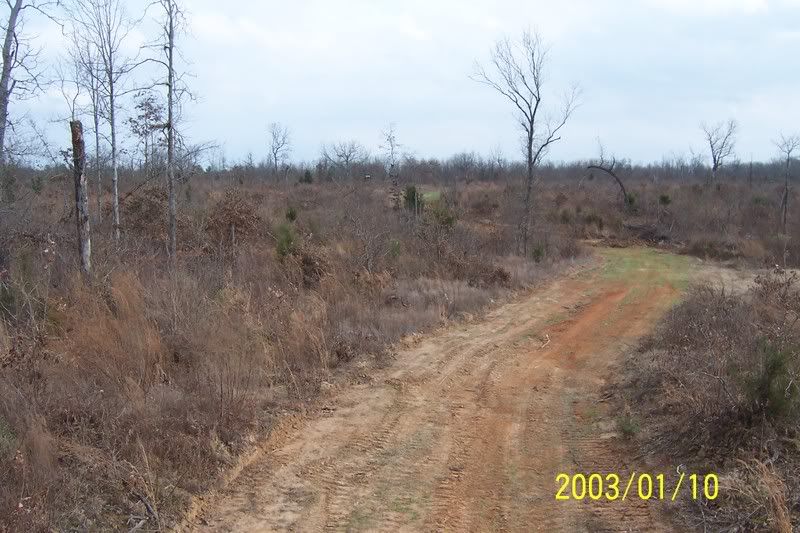
I talked to my dad again yesterday about building a pond. He thinks we should start with site A(refer to original post for location). This site will probably be the easiest to build on. The pond will probably be 3-4 acres with a watershed of 55 acres. The soils are similar to site B.
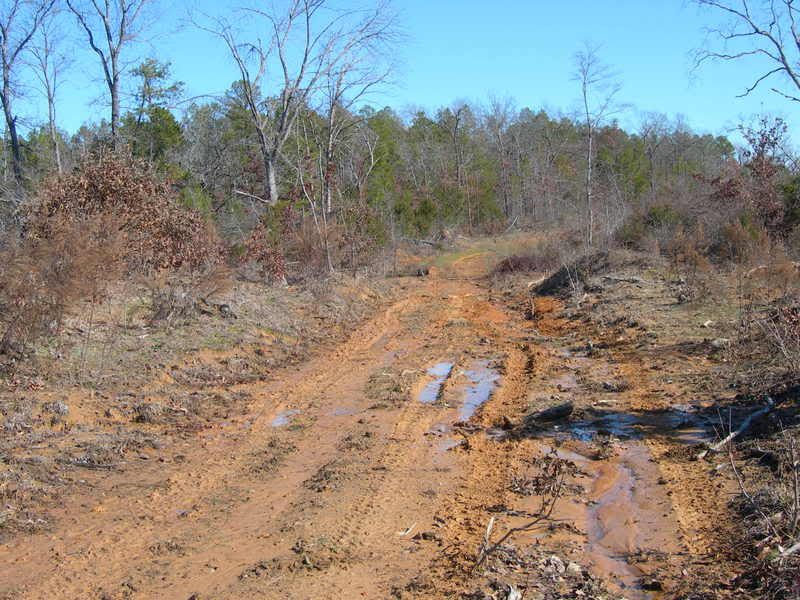
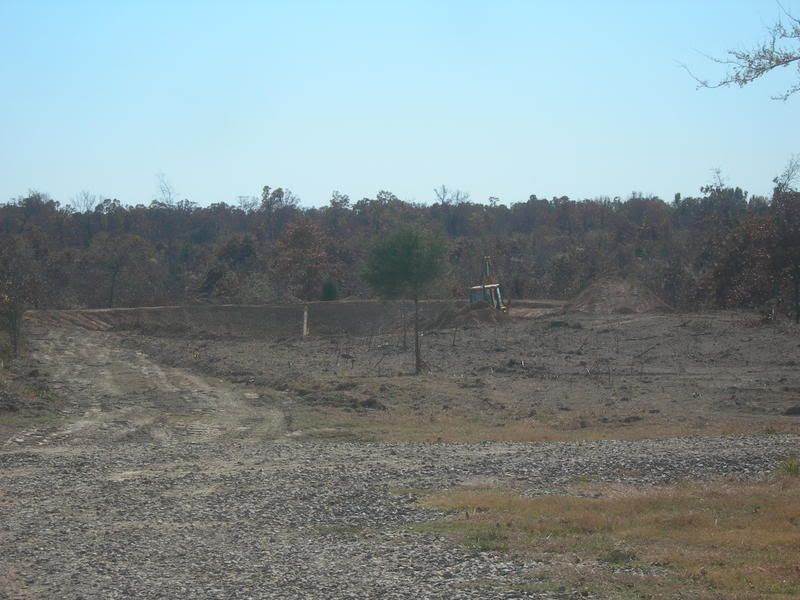
This picture is looking south. The dam will be just to the left of the road and the water will back up to the right.For this site we may have to worry about backing water onto the neighbors property, so I would like to get a surveyor out to get an accurate elevation.
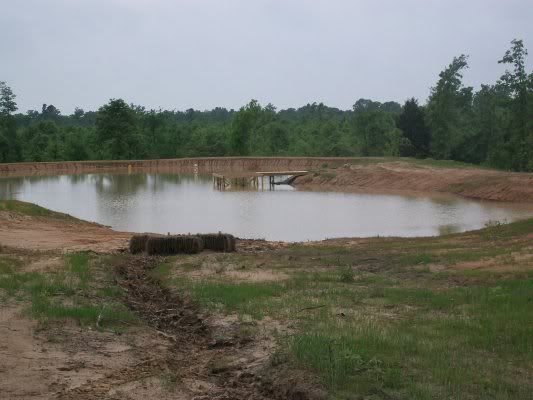
Started clearing the site(site B) Monday and Tuesday and put about 6 hours on the dozer. I haven't run the dozer much so it took a while to get used to how it worked.
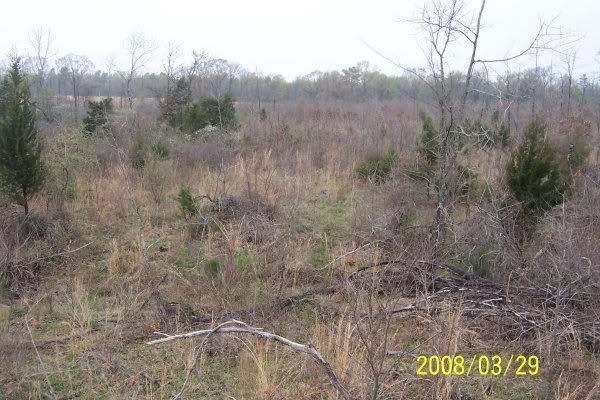
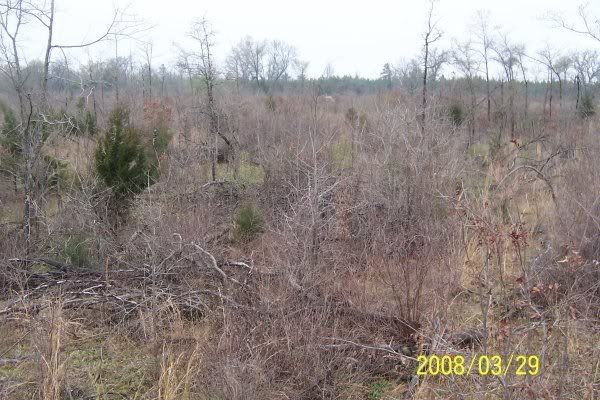
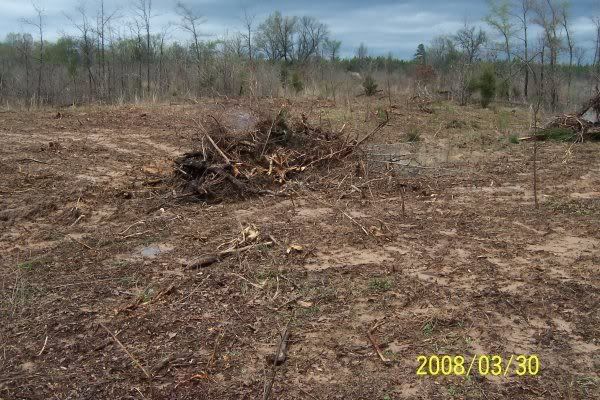
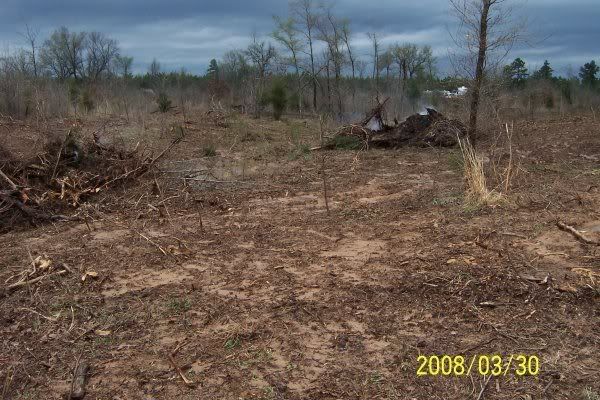
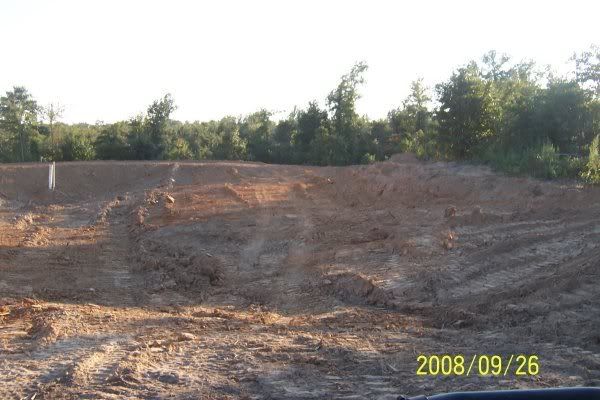
He are some before photos.
Dam area looking east.
Looking south from upper end of the pond(east side).

Looking southeast from upper end of pond(west side).
I had a contractor out this past Sunday. He suggested we keep clearing the site to get a better view of what we are dealing with. He also recommended that we dig some test holes with a backhoe to get a better idea of what the soils are like.
After looking at the watershed and using the Google Planimeter I think the watershed is between 65 and 70 acres.
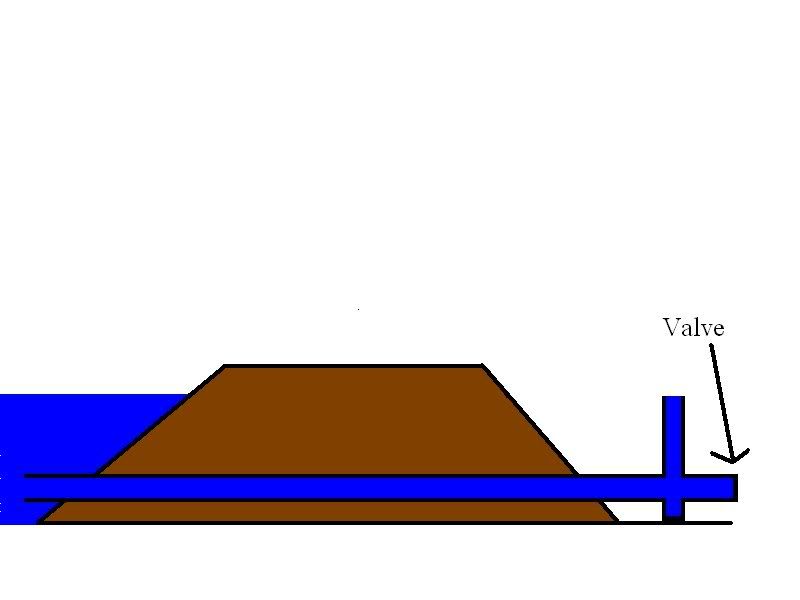
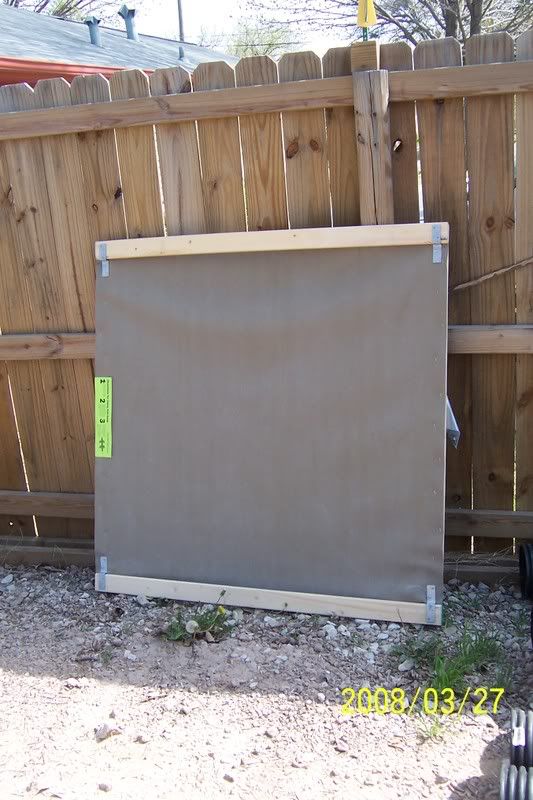
Here is my idea for the bottom drain. I will be able to drain off the water for the duck pond that will be below the main pond and for winter drawdowns. Combining the two will help save some money because I was going to add a siphon system as well.
Hi Chris,
I have that bottom drain on my pond and it works pretty well. I like that it allows water to escape prior to major rain events and it takes the "bad" water from the bottom. My system has a 6" drain and hasn't clogged yet.
So if I understand that drawing correctly the water discharges out the top of the riser under normal flow and the valve could be opened to drain the pond. What type of valve are you planning on using? I was contemplating a similar design and was looking at an alfalfa valve on the discharge end. The only thing I didnt like is the water coming out the top of the riser could cause erosion under it and cause a problem.
So if I understand that drawing correctly the water discharges out the top of the riser under normal flow and the valve could be opened to drain the pond. What type of valve are you planning on using? I was contemplating a similar design and was looking at an alfalfa valve on the discharge end. The only thing I didnt like is the water coming out the top of the riser could cause erosion under it and cause a problem.
Yep, that is how it works. I haven't decided what type of valve I am going to use. To deal with erosion you mount the pipe in a big concrete pad or place rocks were the water is going to fall.
So your Dad want's you to build on site A and you start on site B. Is that a typical father/son relationship or what???

Given your background Chris, I look forward to following your progress.
What types of fish are you considering for your eventual stocking?
So your Dad want's you to build on site A and you start on site B. Is that a typical father/son relationship or what???
Given your background Chris, I look forward to following your progress.
What types of fish are you considering for your eventual stocking?
Well, site B would be easier to build but site A will be close to the cabin that we are going to build.
I haven't really decided yet. If the pond ends up about two acres I was thinking trophy bluegill. If it is bigger than that I will go a normal LMB/BG/RE stocking.
Hey Chris,
I don't know alot about the drain stuff except what we went thru. I don't regret installing it, but want to throw some ideas out there for consideration. I'm not saying that this info is gospel; others can chime in.
-
We did a 6" drain, like Bar-O. We do not have any riser pipes, though. It is a very simple,
straight thru the bottom of the dam kinda drain. We did install an inlet filter. Our pond is surrounded by tall timber. I can't imagine not putting a filter on our project. We used a butterfly valve; a very nice pc of equipment. It worked beautifully, but it didn't take much to clog the drain at the butterfly vane right after we installed it. I guess what I am saying is that use of a butterfly valve might very well go hand-in-hand with an inlet filter, particularly if there is any vegetation close by that will litter into (or get blown into) the pond.
Eddie Walker was building his pond about the same time and we were comparing notes on valves. IIRC, he was told that a gate valve (knife action) might collect particulate within the gasket area and hinder closing and/or sealing action when the valve is closed. About this, I dunno. Kinda makes sense.
-
At the risk of duplicating your research, I'll link you to one of my self-professed classics:
Drain Valve thread
Thanks Brettski. I will check into that.
My riser pipe goes up to the conservation level(13') of my pond then back down to the horizontal pipe coming thru the dam. The top of the loop allows the pond to automatically drain(siphon effect) once it achieves full pool and quits at 13'.
So your Dad want's you to build on site A and you start on site B. Is that a typical father/son relationship or what???
Given your background Chris, I look forward to following your progress.
What types of fish are you considering for your eventual
stocking?
JHAP,
I just remembered it is the other way around. I wanted to start at site A(easier to build) and my dad wanted to start at site B( better view). We are clearing site B right now.
I would not use a gate valve on a bottom drain pipe on the front (water side)of the dam. Even very good well maintained ones tend to stick over time as per B'ski notes above.
I went by a pipe supply store today that is just off campus. The salesman showed me some 6 in. pipe that just fits together. It is called SDR 21 CL200 water pipe. He qouted me $3.44 a foot.
Does anybody know how this would compare to Schedule 40 or 80 PVC pipe?
Chris:
Based on the descriptions
here, and the fact that they position the class 200 on the light side of schedule 40 and schedule 80, I'm guessing it's lighter than those two thicknesses.
Hey Chris...
I just went thru all this pipe grade calculations 18 - 20 months ago. I ultimately went with 6" PVC Schedule 40, but you have to be careful. There are different grades of Schedule 40 based on the ASTM manufacturing spec. It has to do with the pressure handling capability. Not all Sched 40 is ASTM graded for pressure. Some is only DWV (drain/waste/vent). I got outstanding customer service and support from
these guys . I remember, their cust service rep on the phone was a guy named Chad Presske. He was pretty darned good; bet he's moved along into management or sumthin'. Anyway, their on-line catalog is outstanding. Their hard-copy product catalog is the excavator/plumber's product bible. I would study their on-line stuff, then call them in the morning. I actually wound up buying my 6" fittings and glue from them. It was cheaper in the quantity that I used than any home center. Good product, good service, good prices.
The guy told me that they bury it deep but he didn't give me an actual max depth.
What size would I need if the pipe was at a depth of 15 feet?
(I'm going by memory, but purdy darned sure I got it right): Based on the pub 590 spec's, at 20 feet of soil over the top of the pipe, they want to see Schedule 80. Less that that is Sched 40.
I just searched and found an older post I made when I was closer to the actual drain installation project.
right here
Brettski,
I just saw the link to e-pipeconnection. I will call them tomorrow and see what they recommend.
There has been a change of plans.
This weekend I helped one of our family friends with his ponds. He has three ponds that he would like to manage.
One pond will be catfish. We seined this pond and caught crappie bluegill and bass. I originally recommend he kill off the pond but he liked the crappie so we are going to go ahead and stock catfish.
The next one will be big bluegill. We are going to drain this pond and repair the pipe that is going through the dam and then stock with male bluegill.
The largest pond will be large bass. The bass are currently stunted. He took 100 last year and I told him to take at least that much this year. The pond also has 3 feet+ of visibility so we are going to fertilize it.
After we were done for the day he asked me what he owed me and I said a pond. He is going to use our dozer to build 1/4-1/2 acre pond. We looked at the site today and put up stakes for the dam. It will have about a 5-6 foot dam and will excavate out the rest to get 10-12 feet of depth. I am going to check on pipe and antiseep collars this week and start clearing the site this weekend. I will make sure and get some pictures this weekend when we are done clearing.
The pond will be 200 yards northwest of point A.
That is a great deal Chris. Just keep in mind if its up stream of the other ponds that migration may occur.
My plan right now is to stock fatheads, golden shiners, gambusia, and male bluegill. My goal is to put Bruce to shame in a few years.

My goal is to put Bruce to shame in a few years.
If you mean with big BG, I wish you the best of luck.
If you aren't particular on how you put him to shame, it could be accomplished right now with the proper information.

I was thinking about adding some HSB just to keep the other forage under control. Maybe 15-20 depending on the how big the pond ends up being.
This is my plan for the pipe. The vertical pipe will be adjustable so that I can change the water level.
Does anybody know what size antiseep collars I should get. The pipe will either 4-6" and at most 75' in length. The cheapest ones that I have seen were 2'x2' but I was thinking of getting a 3'x3'.
Chris, I had some 4x4's made. No idea whether 3 by 3 would work just as well. I expect it would.
The 4x4's are only $7 more so it may be best to get that instead.
We put 4 x 4 on a 6" PVC drain. No regrets (so far

). My contractor spec'd 2 of 'em; Otto agreed.
I have 2 4'x4' collars on each pond's 8" drain pipe. In both cases, we dug 2' wide trenches thru the compacted core, notched 4' slots in the locations where the collars were going, then recompacted as we backfilled with a jumping jack. We set the collars flush with the (downhill) edge of the slot.
Pics available if anyone is ever interested.
I would to see the pictures Theo.
Chris:
I checked and I don't have any anti-seep collar pics on-line.
If you have an E-Mail address you can PM me, I will put together some and send them to you.
Aw, crud. I was sure I had pics of my anti-seep collar installation, but I don't. I have about 130 photos saved from the day we put it in, but none of the collars! In my defense, I can only state that it is hard to work a shovel and a digital camera simutaneously while avoiding being struck by a trackhoe.
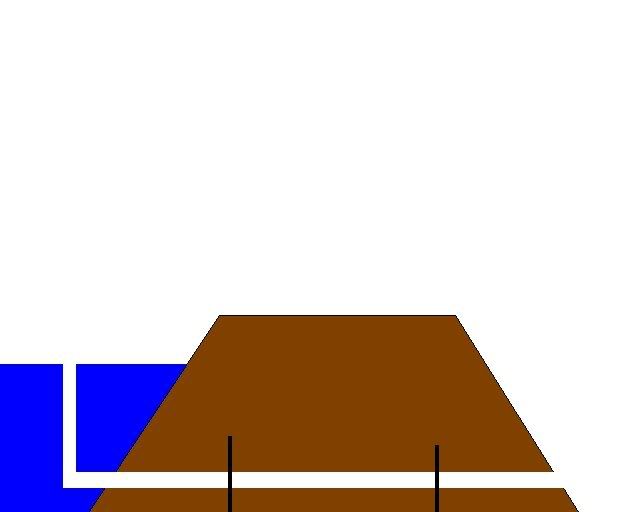
Maybe this diagram will help a little bit:

IIRC, the collar frames were placed snug against the back (downhill) side of the 4' slots dug into the trench the draintile was layed in. This way, when the slots are back filled and compacted with a jumping jack, the front (water) side of the anti-seep collar has compacted clay pressed up tight against it.
I can think of two other "tips" my excavator emphasized during construction. He had set aside a pile of what was judged to be the best clay we had available, and used it for backfilling and compacting the drain trench through the dam core. And we carefully cut perfectly round wholes in the rubber collar sheets using scissors, 1" less in radius than the smaller diameter of the corrugated plastic drain pipe. Cut in this manner, the sheets are much less apt to tear than if cut by a knife (which is how we did it on my first pond, and I spent a couple of hours repairing a torn sheet as best I could with cable ties and silicone seal).
My apologies to Chris Steelman and Jim Secen for the lack of pictures I thought I could deliver.
Thanks, Theo.
So you placed the collars inside the core? Most of the diagrams that I have seen placed them on either side of the core.
Pub 590
If an antiseep collar is used, it should extend into the
fill a minimum of 24 inches perpendicular to the pipe.
If the dam is less than 15 feet high, one antiseep collar
at the centerline of the fill is enough. For higher dams,
use two or more collars equally spaced between the
fill centerline and the upstream end of the conduit
when a hood-inlet pipe is used. If a drop-inlet pipe is
used, the antiseep collars should be equally spaced
between the riser and centerline of the fill.
Chris:
Yes, we placed them in the core. One collar near the inside edge, one near the outside edge. I am real sure about that; it was easy to tell from prior compaction by the vibrating sheepsfoot roller where the boundaries were.
I suspect there are several ways to place anti-seep collars well (just like there are a variety of materials that can be used for collars). This was just one of them.
I got my 2 anti-seep collars in today. I ordered them from Agridrain Tuesday morning and they got here this afternoon. Talk about fast service.
Chris:
That's the same model I used last year, which is an upgrade of the ones we got in 2001. Take a staple gun and put a LOT of staples in to help hold the rubber sheet onto the frame. It will probably help during soil compaction after the collar is placed
I got 90% of the clearing done this weekend. In the one area I have left there are a bunch of trees. I will have to convince him to let me take them out. That way I can raise the dam about two feet.
It started raining Sunday at about midnight. By 9:30 it was still pouring so I went out to check on the amount of water that was flowing through the area. The pond should stay full most of the year. I think that I will need a bigger pipe.
Pictures are will be posted tonight.
After you post the pics, Young Man, let us know how your grades are doing.
Check out the "Branta canadensis down" thread.
Chris Steelman wrote: "Let's just say that hey could be higher."
Outstanding, Young Man!
Always thinking ahead. Why get straight As? It gives you nothing to stive for....(wait, thats not right).
Gitcher butt back to the books Chris. We're counting on you take Lusks place at some future date.
Picture looking west across the dam.
Before
After
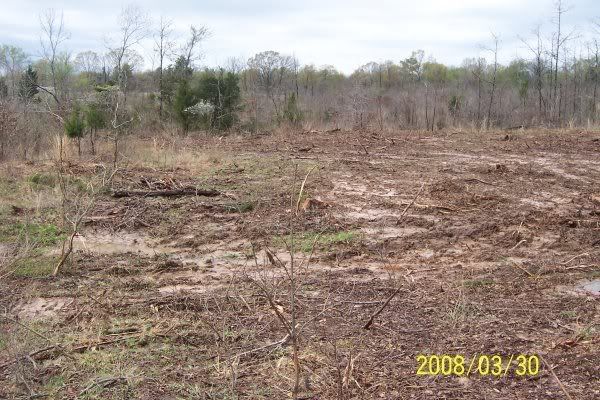
Main area of the pond.
Before
After
East Bank
We have a friend that is a manager of a construction company. He said he can get us all the PVC Pipe we want.
Since we aren't going to have to pay for it I am going to use 8 inch pipe instead of 6 inch.
I am going down to the property this weekend. Our friend started clearing off the rest of the site and piling up the topsoil. I am going to show him how I want the pond contoured and how the pipe is going to be installed.
Chris
You have done lots of homework on your construction project.
Get it laid out out and start having fun.
Keep posting.
OTTO
This past weekend we got all of the pipe and didn't have to pay a penny. We are using 8 in. Schedule 40. The only thing we have to buy is an elbow. I will be back down in two weeks to install the pipe.
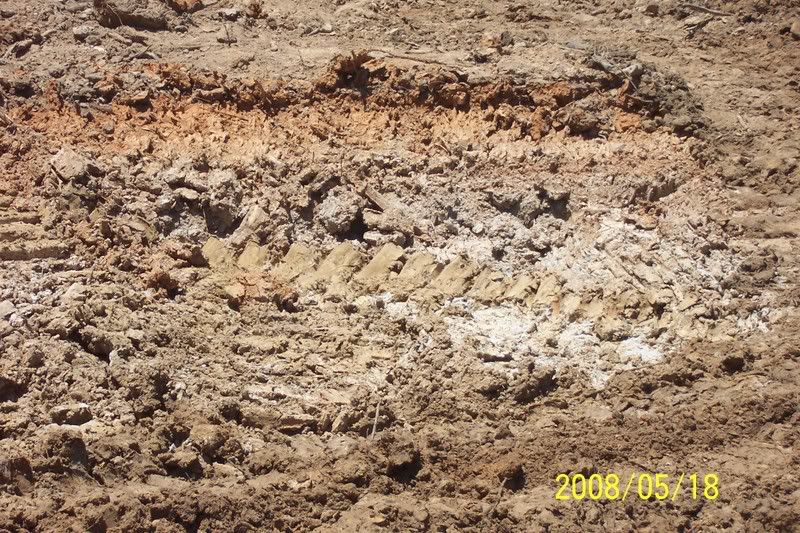
Here is an ok picture of what the soil looks like after some the topsoil has been removed. About 4 feet down you get into light gray clay. This stuff stays balled up nicely when moist and doesn't fall apart when it is in water.
Otto, check your PM's at the top of the page.
Man, that looks like it was really and truly gooey when wet. My feet picked up 10 pounds of clay apiece just viewing the photo.
Chris
Dave Davidson is sure right keep up your grades.
You can take my advice because I did not use it.
OTTO
The pond will be right at 1/4 of an acre.
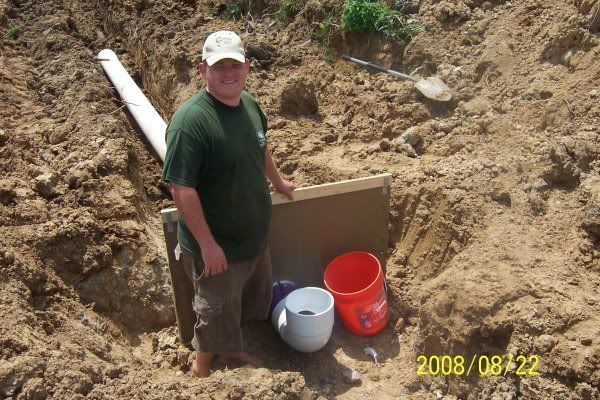
We got part of the pipe and the antiseep collar in this weekend. We got a hard rain Saturday afternoon so we just dug the trench that evening.
I packed the clay in with my feet. That is how Otto recommended it to be done. The antiseep collar we used was a sheet of rubber with a wood frame. For the price($54) it was not a bad way to go. We alternated sides while filling in the trench for the collar. The rubber would bulge out if you added to much clay to one side. I used a bat and hit the opposite side to try and keep it even.

We added the elbow and called it a day. Since we weren't going to finish today we didn't worry about positioning the pipe in the correct spot on the pond side. Everything should be fine unless we get a flood. There is room around the edges for the water to escape.
Chris
Good work.
How did it all work out?
The packing around the pipe is the hardest part of the job. Once complete the rest cab be done with equipment.
Keep us posted.
Otto
I think it went well. It was probably good that it rained because it was very easy to pack. I could pack the clay up to the size of a softball and not have to break it up beforehand.
Chris
Where are the pictures? We need to see the finished job.
Otto
That is as far as we got. Our friend that is building the pond should finish it in a week or two.
I left some room on the sides for water to escape and it should be fine unless we get a flood.
Chris,
I just finished my pond as well. I built an overflow just like the one you drew in your first diagram. I did not want the "drain" inside the water because this would require me to get into the water to adjust it. I used 6" Sch 40 pipe.
Right now I am filling the pond for the first time. The overflow pipe is a lot taller than it needs to be. Once the water gets to where I want it, I will then cut the excess pipe off.
When it came to the anti-siphon, I was told that it was not necessary unless there was about 10 feet or more of hydrostatic pressure on the pipe. I will never have more than about 4 feet of hydrostatic pressure on the pipe so I did not use one.
At 4 feet I would have about 1.75 pounds of hydrostatic pressure. With a 6" pipe, this is only 50 pounds of force "pushing" the pipe. The pipe I have is 40 feet long and I doubt that 50 pounds will overcome 40 feet of friction.
I don't know what the valve is called, but it slipped over the 6" pipe and had a threaded rod that when turned it mated up the valve to the seat.
The guy that conculted me on this builds catfish ponds for a living so I assumed he knew what he was talking about.
Good luck with it all. I hope you enjoy watching your pond evolve as much as I have enjoyed watching mine!!!
I got the other two sections of 8 in. pipe installed today. I also put in a 2 in. pipe with a valve on the backside of the dam. With the 2 in. pipe I will be able to lower the water level without removing the standpipe.
I just checked the stormtrack for Gustav and it is expected to go directly over my property.

Bottom Contour

Chris
Looks like a plan for the lake bottom. The hurricane did or did not come over your place.
We got only got a few inches of rain so it wasn't that bad.
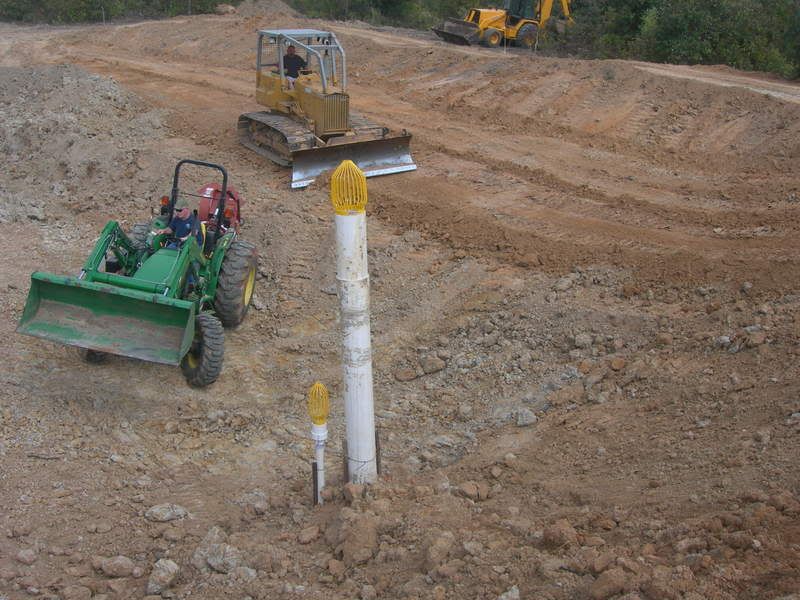
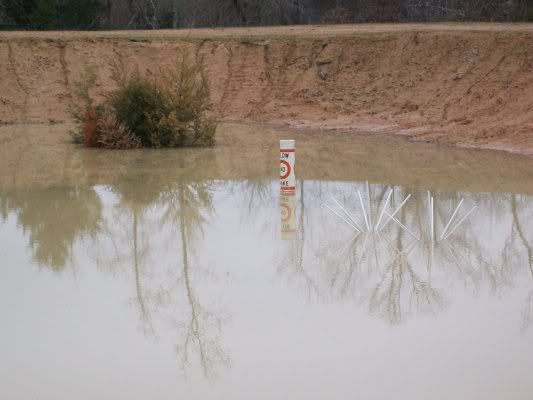
I officially have a pond as of today.

We got both standpipes in place and the dirt placed around them. We used some T-posts and ziptied them to the pipes to keep them in place while moving the dirt. The dam will be about 3 feet taller than it is right now.
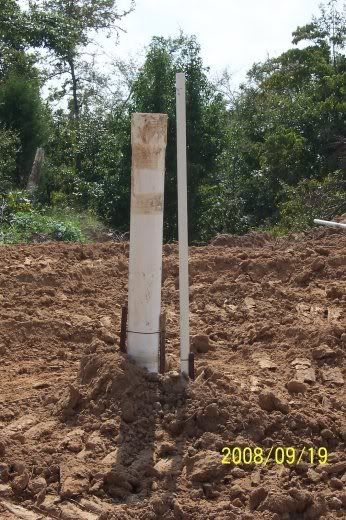
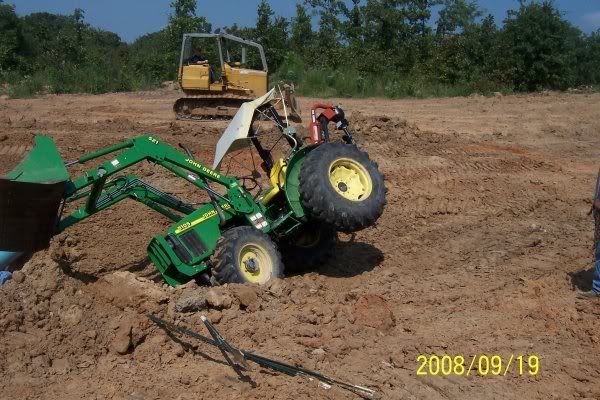
To install the 8" standpipe we needed some heavy equipment. My dad was trying to line up the tractor to push down the pipe when this happened. Luckily nobody hurt. We ending up using the backhoe.
This is what the pond looks like right now. Our friend will hopefully be finished in the next few weeks.
Awesome, Chris! It's official...time for some precip.
When I went down to the site Saturday morning to check it out I saw that the antiseep collar was ripped. I guess the rain from Ike was enough to do that. I ended up adding 8 bags of conrete around the pipes to fix it.
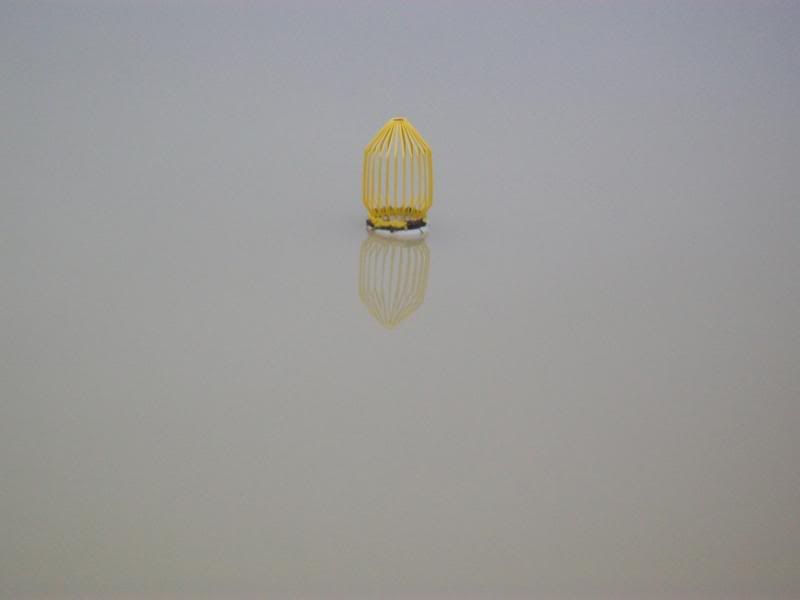
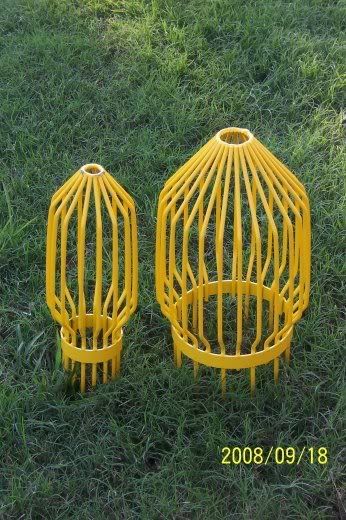
Here are the Trash guards that I got from Agridrain.
Way to go. You may want to keep your dad off the green tractor.
I blame Chris for all of my equipment adventures. I would not have been in that hole if it were not for his project. That is my right as his father to blame him for everything. He isn't giving me much credit for much of the work though. After he left that day I cleared all of the top soil and moved it to high ground. We will use it to top out the damn and cover the banks. We want good clean soil that will grow grass all around the pond and on the damn when we complete the project
It is a self-assured man that will let his son post a picture like that.
I blame Chris for all of my equipment adventures.............
thats really funny. young blood, you need to take better care of the old man.

We all know who is doing the work.
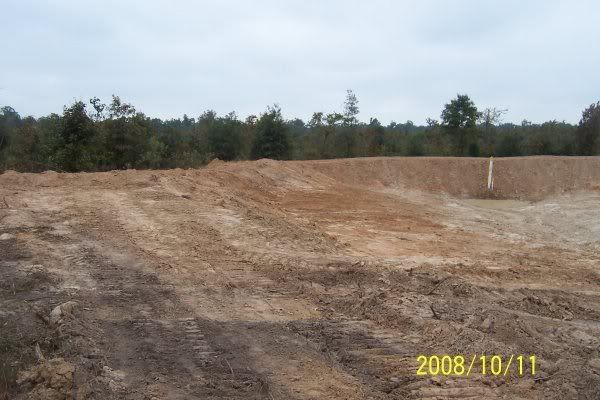
On top of the dam looking north.

Upper end of the pond looking south.
We all know who is doing the work.
And, I suspect, paying the bills.

Young Blood, this is a pond website, not a hole in the dirt website.
Where's the water?
Young Blood, this is a pond website, not a hole in the dirt website.
Where's the water?
It's there just REALLY CLEAR!
Young Blood, this is a pond website, not a hole in the dirt website.
Where's the water?
So everybody else can show construction pictures but I can't.

It should be done in about 2-3 weekends of work.
You are held to a higher bar, Young Blood, even though you don't drink.
Sunil,
Let me know when he is ready for IKWMABTIWT initiation.
Brettski, I've been meaning to call you regarding how our organization might grow. As you know, a group, or an association, is destined to die if there is no new membership.
I know I speak for rmedgar, Fatty McB., and myself when I say that none of us are comfortable in executing the initiating ritual, or trail (no spelling error there) by fire as it may be, on a prospective future member, especially as we are all members not by choice but by circumstance.
Chris
Don't let these guys scare you.
Not for sure who led who off the path, all we know is they are glad to be gone.
Otto
...looks like Otto wants "in" too
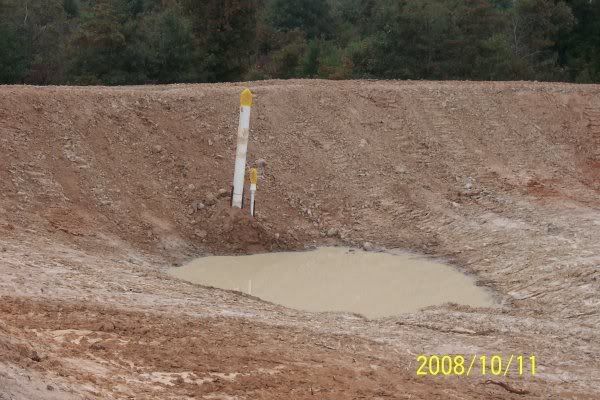
There is no way he could know unless we have a leak.
The pond is mostly done. The dam needs to be raised about a foot in some areas and there is some more contouring to do.
Pipe installion completed
It should be 13-14 feet deep at here.

Chris
The dam is a lot bigger than I thought When we looked at it before you had much dirt moved.
Really looks good.
Otto
Yes it is.
We ended up adding about a two foot dam to the east and west bank so that we could back up some more water.
I think we got about an inch of rain yesterday but that shouldn't be enough to mess anyhting up. Our friend who is building the pond got everything below the drain cleaned up on Sunday.
Chris
It looks like you guys are getting a lot of work done. Is your bottom contours working out like you previously sketched out? The contour drops would be great locations for fish holding structure. Take full advantage of the equipment, help, and motivation you have now. Its easy let that part slip buy in your time management and next thing you know your pond is half full and 10X harder to get proper structure in. It can make all the difference down the road when your trying to enjoy the fruits of your labor. After all, the reason we work so hard on our ponds is to enjoy great fishing. Isn't it?
-HH
It won't be exactly like I sketched it but it will have two drop offs that are 3-4 feet high. I will be back done next weekend to put in all of the structure. I am planning on adding 5 Crappie Condo's, 5 Bluegill Condo's, and 5 Porcupine Fish attractors.
Since we going to back up more water than I thought we are going to leave the upper end of the pond as it is and just clear out the trees and brush. This should give a good sized area full of vegetation for the little fish to hide in.
We got some more digging done this weekend. Shouldn't much be much longer till it is completed.
East Bank
West Bank

Do you think I am ready for some Fatheads?
It looks like your drain pipe is a bit too long Chris, heh heh. I'd say a half pound of FH's would thrive in your pond...Just pulling your leg a little. Could be your picture angle but your finish guy left a few inches directly behind your drain, it's higher than each side, hqad to find some fault, the rest looks so dang good. That's a going to be a nice pond when it fills, nice work.
Chris
Are you on fall break?
Otto
I might have to consult with burger on that, but you know where I stand.
Now Young Blood, please, please try and get some water in there.
JoeG,
I may have cut it 6 inches to long. I am going to check it this weekend when I go down there.
Otto,
No, I am not on Fall Break. I don't get another break until Thanksgiving.
My best red neck buddy Earl and I shot the elevations again this past weekend and we still need to raise the damn 18 inches and then finish digging out the upper end. Once that is done, we’ll be ready to do add the top soil and do all of the finish work. We are just waiting on our Fisheries and Wildlife Biologist to give us our final orders.
Once Chris finishes his little project, Dad gets to start on his pond or should I say lake? I plan on it being at least 5 acres. I will catch all of Chris's fish to feed my big bass. Maybe that will teach him to stop posting pictures of me getting my equipment stuck.
Randal, great to hear from you! The new pit is looking nice, and I love the sound of the new, new pond also.
(psssst... remember, Chris is a moderator now; he has special powers to edit your posts and have unlimitied private messages in his mailbox)
Randal
You also have some special powers.$$$$$
I took some pictures today but can't get them off of my camera.
The dam is almost done. We are taking the extra dirt from the pond and backfilling it so that it is not so steep. After that is done we just have to level it and add the topsoil.
Like JoeG noted, the pipe was higher than the dam in one spot. Instead of raising the dam we cut 11 inches off of the pipe. This will give us 1.5 feet of freeboard. The spillway is 5 inches above the pipe.
We decided to add more area to the upper end of the pond. It will end up looking like a kidney instead of a tear drop. I am guessing it will be about .4 acres when completed.
Chris
Even I know how to get pictures off a camera.
"Chris
Even I know how to get pictures off a camera."
Young Blood, look in the mirror. You've got a glove-mark on your right cheek.
I can't get the pictures off because I don't have the right cord. I usually just take out memory card and put it into a reader. The last time I downloaded some pictures I forgot to put the memory card back in the camera so it saved the pictures to the camera.
I can't get the pictures off because I don't have the right cord. I usually just take out memory card and put it into a reader. The last time I downloaded some pictures I forgot to put the memory card back in the camera so it saved the pictures to the camera.
GEEZ!!!!!
And he wonders why half the forum warned him he would get hurt with his removable standpipe idea...............I forgot!

LMAO
Chris
I guess you could get your dad to help.
Chris
I guess you could get your dad to help.
There goes my Diet Mountain Dew.
["Chris
Even I know how to get pictures off a camera."
Young Blood, look in the mirror. You've got a glove-mark on your right cheek.]
"Chris
I guess you could get your dad to help."
Young Blood, look in the mirror. You've got a glove-mark on your left cheek.
Chris
Don't let a smart --- like me keep you off the forum.
Your Friend
Otto
Put you things like your disk back where they belong and you will have them when you need them.
Castigated via an on-line forum!
Oh, how I miss the good old days when Fathers and Sons conversed with plain old simple text messaging.
Young Blood doesn't have a cheek to turn.
I don't think you guys are helping.
We got a lot done this weekend. Our friend worked on the dozer and piled up the dirt while I added fill dirt to the back of the dam with the backhoe. I think we have about 20 yards of dirt left to move.
It will end up being between .4 and .45 acres and shaped like a kidney.
Did you put some fatheads in yet?
Not yet. We got some rain today so if the water comes up a few feet I may go get some.
Burger is crying right now.
Chris,
Don't succumb to Sunil's overbearing and aggressive fathead fixation. He and Burger pummelled me into a whimpering mass as soon as I had my first mud puddle. At first, I wanted to believe that this was Sunil and Burger's psychological method of promoting both character and forage base success for the budding pondmeister. I was wrong.
I would probably already have some in there if the water clarity was higher. Right now the secchi reading is probably less than 2 inches. It may not make a difference though.
FH , FH itty bitty FH. We want FHs. You recall that B'ski?
Fatheads THRIVE in turbid water!
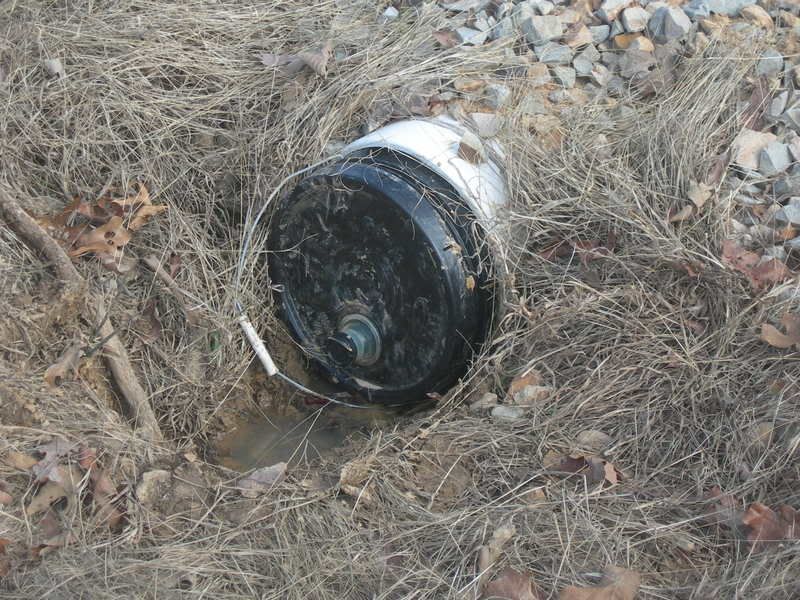
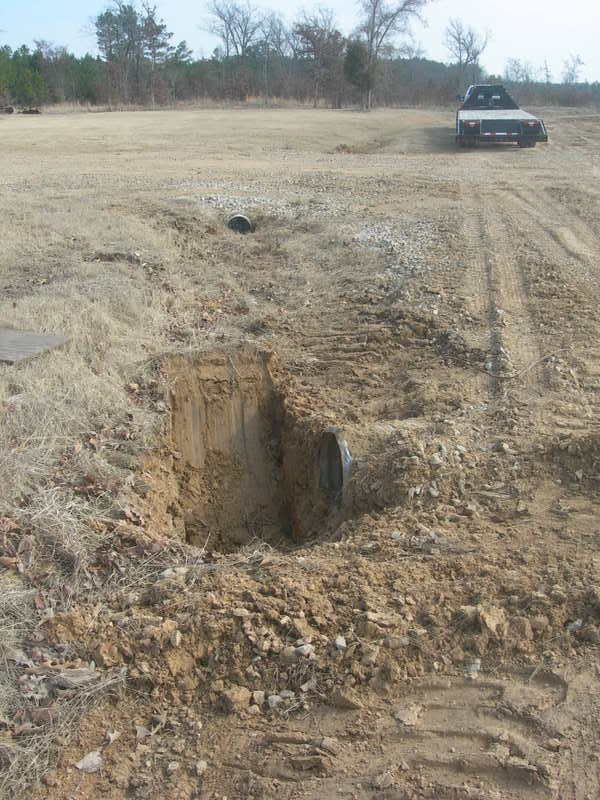
The two pipes for this pond end in a ditch that drains about 60 acres+. I was worried that the 2" pipe would fill with mud so I added an elbow and another 2 feet of pipe to get it above the water level during a flood.
While I was installing the elbow I noticed that pipes were located in a big bend in the ditch. The ditch is shaped like a U with the pipes at the bottom. My plan is to dig a ditch to connect the top of the U and fill in the ditch just upstream of the pipes. This will stop the flow by the pipes and hopefully keep them from filling with mud.
FH , FH itty bitty FH. We want FHs. You recall that B'ski?
...how could I ever forget!
-
-
-
-
-

Fatheads are the fruit of the pond.
Looking south towards the pond. I am standing out in front of the campers which are about 150 yards away from the pond.
i love pics of fresh dirt. way to keep this thread on track chris
how deep will the pond be?
It will be at least 11', more likely 12'.
I worked on the backhoe and you can move a lot of dirt with that thing. With a mounded bucketload you have about 2 yards worth of dirt.
Almost done. Everything should be completed over the Thansgiving break.
Looks good. How steep will the sides of the dam be? I made mine what I thought would be an easy angle to mow, but it's almost too steep. If I had it to do over again, I'd make that slope above water more level for mowing.
Eddie
The front will be to steep to mow but the back should be ok.
Chris,
Looks good...how many tractor hours would you guess did it take to get to this point?
Well the Thanksgiving break ending up being a total waste. Wednesday evening our friend was digging on the upper end of the pond when the hydraulic arm that steers the backhoe broke. We didn't get it reinstalled until late Saturday. We need to dig out about 100 more yards of dirt and then spread the topsoil.
Matt, I have no idea how many hours we have worked on the pond. My guess would be less than 100 hours among the 3 of us that have worked on it.
And just to think that you could have been fishing for fathead minnows the whole time the back-hoe was broke down.
Bummer Chris. Having a piece of equipment breakdown or not having a stupid part that is not readily available sideline a planned work schedule really mades me mad. Been there done that a bunch of times.
the break down takes the fun out of the dirt business
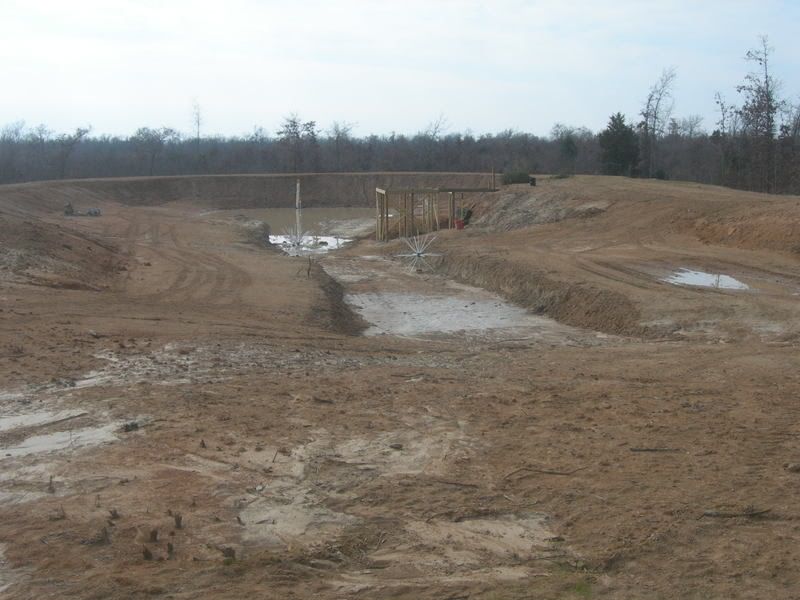
We are almost done.
View from the upper end. We need to take out about a foot of dirt on the left and right bank near the upper end. The extra dirt will be placed on the dam to give us more freeboard.

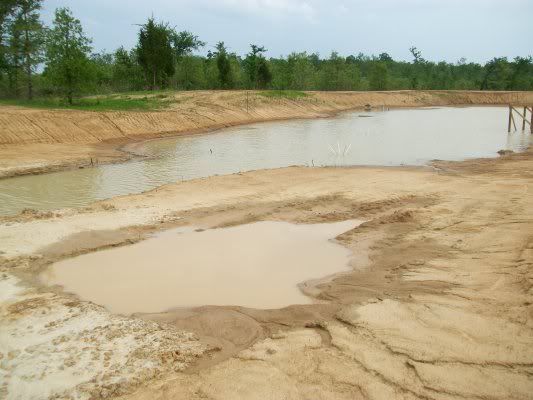
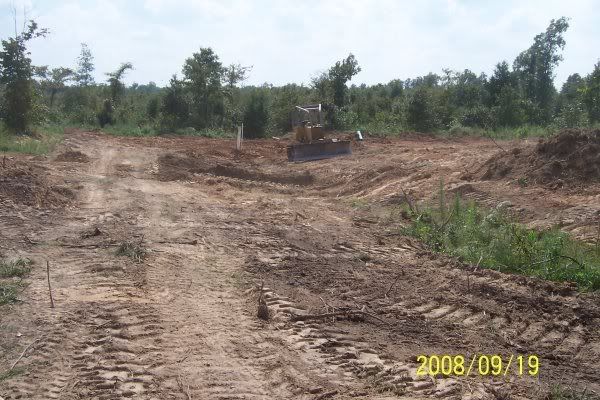
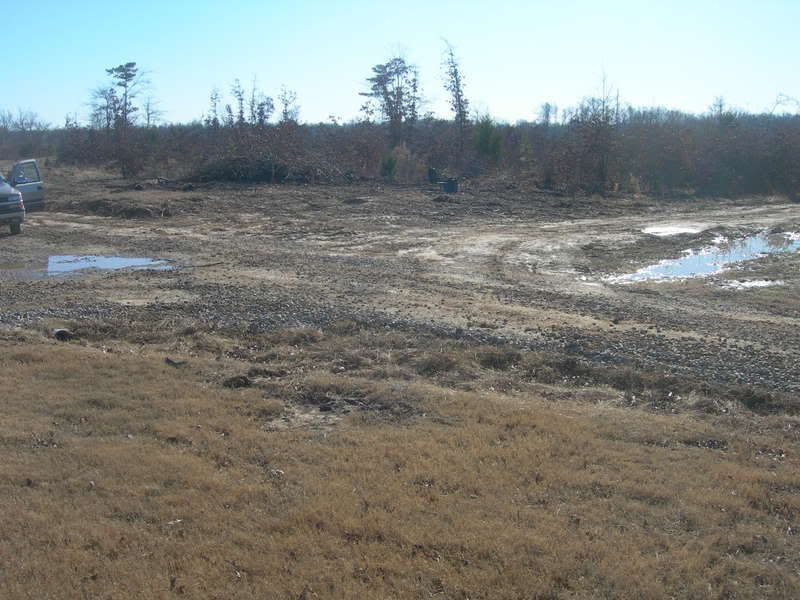
This is a picture near the middle of the watershed. On the left you can see the pipe that goes under the road and drains away from the pond and on the right you can see a puddle that drains towards the pond. During light runoff events most of the water runs through the pipe and not into the pond but during heavy runoff the water runs across the road and into the pond.Our plan is to put a pipe under the road uphill of the current pipe so that most of the water will drain to the pond. We will cap the current pipe until the pond is full and then remove it so the water will drain away from the pond.
That really does look good. A lot has changed from when we first looked at the site.. All you guys need is a little rain.
Chris, I like the channel in the middle of the pond. What will be the pond's depths in the channel and outside of the channel?
On the upper end, the channel will be about a foot lower than outside the channel that is 3-4 feet deep.When you get down towards the middle of the pond the channel is 3-4 feet deeper then outside. The top of the channel will be about 5-6 feet deep.
I am going to place some Porcupine Fish Attractors and PVC trees right along the drop off and maybe place some cedars in the channel on the upper end.
We are pretty much done with the pond. I am going back down in 2 weeks to put out some more structure and that will be it.
Here are a bunch of pictures.

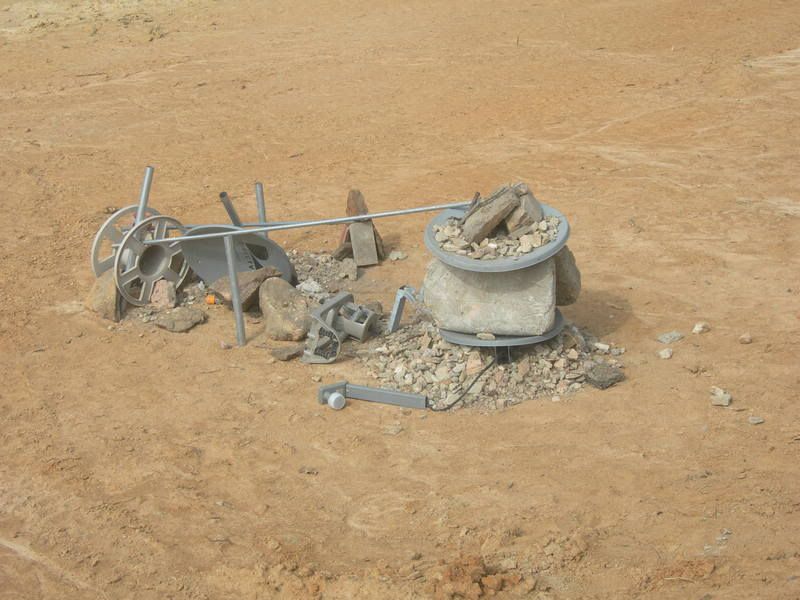
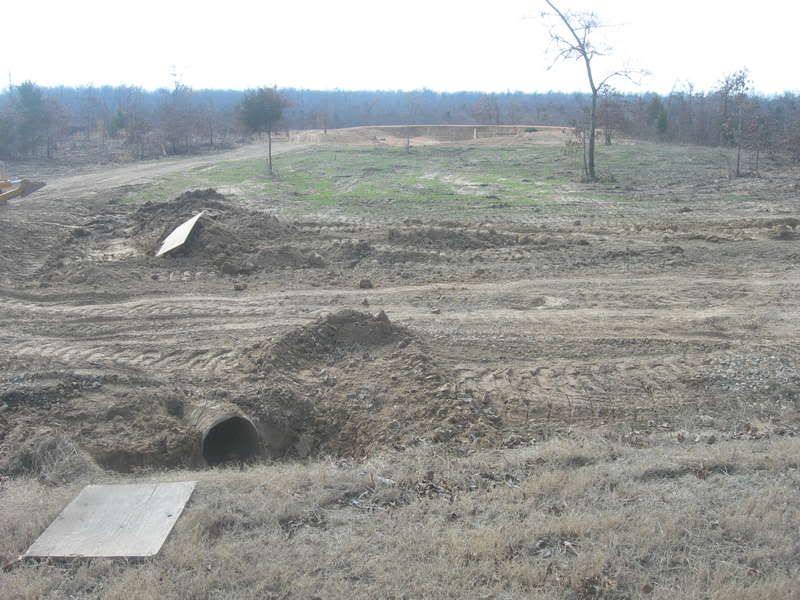
Culvert that makes the watershed bigger.
High Tech Water Diversion Device
Upstream side of the culvert and the HTWDD in the background
Chris
Looks great.
With average rainfall ... how long do you expect it to take before the pond fills?
If we get our normal rainfall it should only take a few months. The watershed is all clay so as soon as the ground is saturated the rest of the water will flow to the pond. It will only take about 5-6 inches of runoff to fill the pond.
What inspiring structure; DirecTV meets the Flintstones. That's something that could be in MY pond.
Excuse me, there's something in my eye.
Lookin' good Chris - can't wait to see it full of water...!
Get some fatheads in there man!!!!
Where burgermeister when you need him?
Fatheads will be going in at the end of the month.
OK, now back to the books.
Or we'll never learn what they call the valedictorian at Arkansas Tech.
It looks real good, Chris. Nice work.
You've got it looking really good Chris. I sure hope you get some rain soon.
I just got a text/pic from Young Blood. He's letting freedom ring right now for some lucky fatheads.
Burger, let's raise a toast.
So is he releasing forage base or did he just buy a keg for the frat house? It's hard to tell from your post.
JHAP, unfortunately, I'm only able to answer that question if you have a Rum & Coke in hand.
Sunil, I live out west remember? It's only 10:44am out here.
OTOH, that never stopped me before.
I am aware of the time difference. If you need to wait until you can hear the answer, I understand......wus.
I at least thought that would get an "oh snap" out of you.
I at least thought that would get an "oh snap" out of you.
Sorry, I had to get back to tax returns (I hate it when that happens).
A belated, but none the less heartfelt...
OH SNAP!!!
I am aware of the time difference. If you need to wait until you can hear the answer, I understand......wus.
Not everybody starts drinking at 7:00 AM,Sunil.But I can if the need arises.
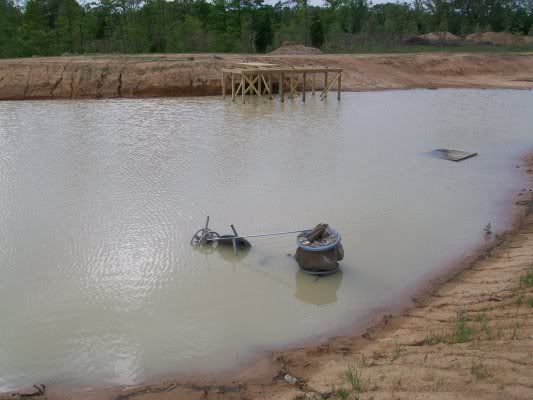
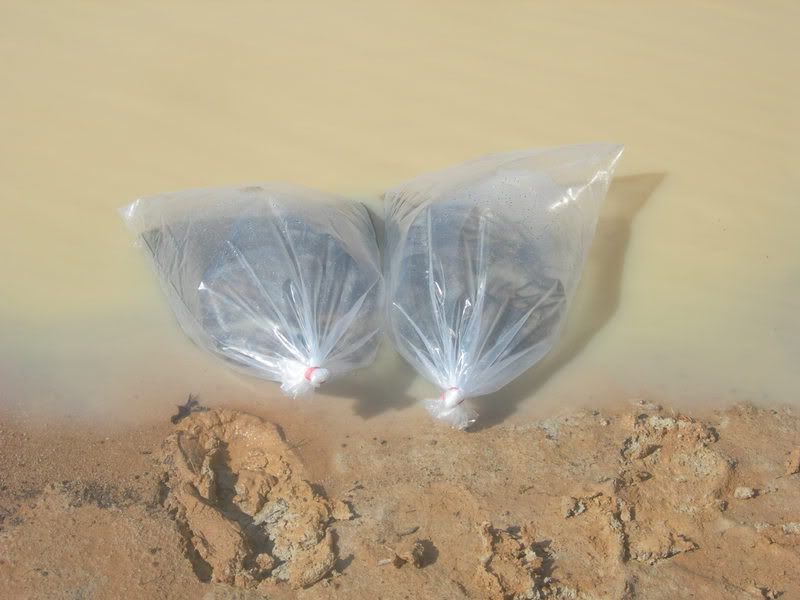
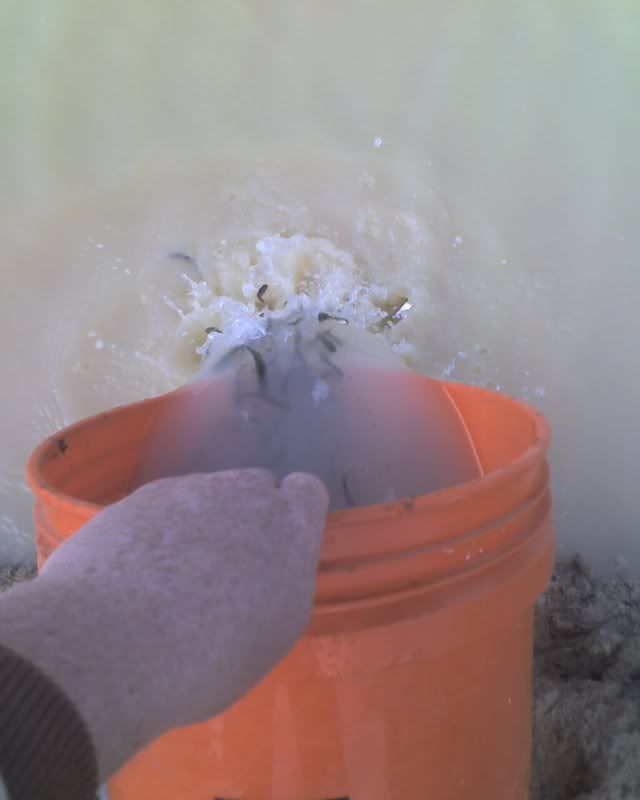
I bought 2 lbs. of Fatheads and 1 lb. of Golden Shiners.
Letting them acclimate.
Letting them go.
We also got some rain on Friday. It was just enough to soak the watershed and to fill the ditch going to pond but none of it got there. I cleaned out part of it so that the water can get to the pond easier.
Chris,
I have considered providing satellite service for my fish, but never made the commitment. My fish are jealous!
-HH
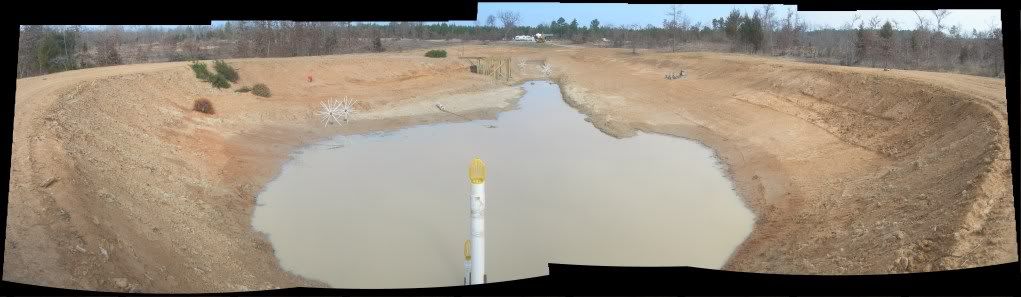
According to the radar we received at least three inches of rain since Wednesday. The water level came up about 3 feet. Only 4-5 feet to go.
Here are some older pictures that made into a panoramic photo.
Will you be able to work this week or will it be to wet.
My break is next week so hopefully it will dry out by then. There is more rain in the forecast though.
You need more structure Young Blood!
I had a PVC tree on the right side of the ditch but it got knocked over so I may go swimming for it. This weekend I will propably place a few more.
The upper end is cleared for seining. I am giong to try and place some BG condos in the ditch on that end though.
Here is my stocking plan based on .4 acres. We will have a feeder set up.
50 8-10" HSB
50 6"+ CNBG
40 4-6" RE
14 1 lb. Male Feedtrained LMB
Plus the FH and golden shiners that I have already stocked.
Better have a good feeder and plenty of pellets for those LMB as there is very little natural food for them (assuming the GShiners are not adults yet).
Unless we get a bunch more rain the fish won't be stocked until this fall. I may stock some BG from a friends pond that he is renovating to get the food chain going as well as a few more pounds of fatheads.
The golden shiners were 3-4 inches. When do they start to spawn?
They'll spawn at that size... Do you have any vegetation or FA for them to spawn on in the pond?
Nothing other than a few cedar trees.
GSH prefer to spawn over vegetation, their eggs are adhesive. They will also spawn over other material like gravel and wood, but they prefer vegetation. I have had the most luck with them spawning on fine leafed species of pond weed.
Does anybody have some ideas for floating fathead spawning structure. Since my pond is still filling up I don't want to put anything in right now that will be 5 feet underwater when the pond fills.
I was thinking of tying gallon bottles to the corners of a pallet.
I have used the foam insulation sheets. They float on the surface and FHM love to spawn on them.
Dry pallets tied by rope and staked to the bank work well. They take a while to sink (couple of mths). You can keep them near the bank as it moves up to full at which point you leave it in place.
What's the status here Young Blood?
I placed two pallets today and will place a few more the next time I am down. I also dug out part of the upper end of the pond where some dirt had washed in and made it deeper.
Yes, but I am back in Arkansas now. I have some water sampling to do for a class today and will be working friday through sunday.
Here are the first predators for my pond. I went backpack electrofishing with one of my classes today and caught these spotted bass. Also placed two more pallets in the pond this weekend and made two more PVC trees.
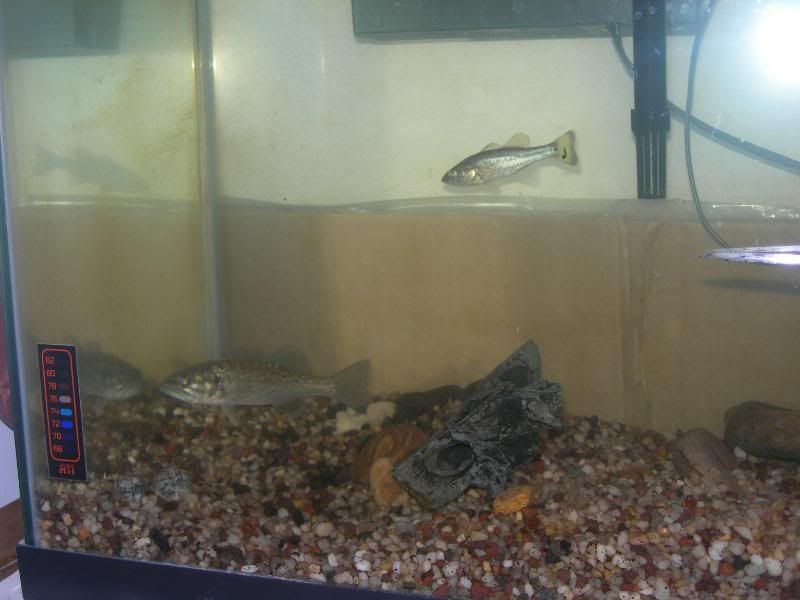
I think you are lucky to have a source for Spots, Chris.
I hope I can keep them alive. I think the smallest one may be in trouble if the others get hungry.
Why does the little one look like it's flying?
(I subscribed yesterday.)
I hope I can keep them alive. I think the smallest one may be in trouble if the others get hungry.
I've never kept spots but I have kept smallies and largemouths and have never had an issue. Just keep them well fed... I'm going to try a couple walleye in my aquarium this year. I'm interested to learn about their behavior as I have never kept them in an aquarium before.
Welcome Jerry.
The small one is a subspecies we have here in Arkansas. The species name is
Micropterus punctatus levitatus .
The fish is just near the top of the water.
I think I am going to catch some gambusia and put them in some rubbermaid containers that I have and put them outside. Does anyone have experience with raising gambusia. I think I heard that you can place easter grass in container with them and the fry will go up in it and hide.
I have raised the spotted partially melanistic form from FL in the past and have kept the plain old ones that are wild around my house. I used to use willow moss, Fontinalis antipyretica when trying to keep a natural tank and used plastic plants like this one:

Worked great, the fry hide in there and as long as you keep the adult well fed they rarely go crazy eating their own babies. Just float the plastic plant near the surface as that is where the fry like to hang out. Just a 10 gallon tank will hold a good number, when it warms up you can put them outside into a feed tub. I used to keep them in one and always had plenty of feeder fish. Gambusia area pretty undemanding and will breed like rabbits.
Welcome to the fourm JerryK
Glad to have you on board.
Otto
Caught another spot today. I think the redear in my aquarium is going to be banished to the school aquarium. It is a food hog.
I love watching a pond get built and then fill up!
Those footprints in the mud next to the FHM bags looked very familiar. I have prints just like that under 10 feet of water in my pond.
Good stuff, Youngblood. Enjoy and learn.
Way to go, hot shot! It really puts it into perspective...in under 4 minutes, too.

Excelent job young man.great production,and I think the music was just right.Nice touch.
Chris, that's great!!!!!
Did the rain yesterday fill the pond?
We need to have another Mini-PB meeting and view your and Franks ponds at full pool.
Good job....
I want Randall to adopt me. You have way too many cool toys. Honest, I'm cute and don't eat much other than BBQ and enchiladas.
George,
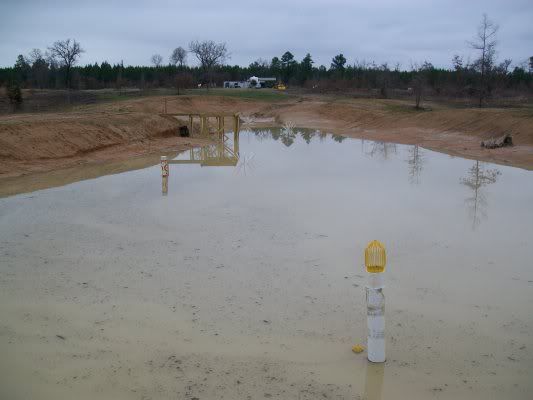
My dad is down there now. I told him to get some pictures.
I just checked the radar and it looks like I am missing all of the big rains. We only got about a 1/2 inch yesterday.
Really nice Chris ....keep up the good work.
Here is a picture my dad took today.
I just watched your slide show and enjoyed it tremendously. You did a nice job of it, which I mentioned in my comments on over there.
The pond looks great. You should be in really good position to get your seed planted pretty soon too. I know that until I had grass all around my pond, it was just a mud hole, but with the grass, it transformed into a place of beauty.
Eddie
Great slide show Chris.
Bing
Very nice job!! Thanks for posting.
Dave, Randal cannot afford another child who spends all my money on ponds. I have more toys to buy.
Chris got me in trouble again. Notice my newest toy stuck in the mud.
http://www.picturetrail.com/sfx/album/view/21772827
But on the plus side, nothing caught fire.
I always consider that a good thing with my Son.
Waiting for more pictures I know you got a lot of rain Monday
I think we got close to an inch and a half of rain. That probably brought the pond up 6 to 12 inches maybe more. I should have some pictures by next monday.
Chris
How much rain did you get Wednesday?
I bet the pond is full.
Otto
I am guessing around 2.5 inches. That should bring the water level up a foot or two.
Edit: Make that 3-4 inches of rain. If they pond is not full it is really close.
CONGRATULATIONS...!!!!
Just got the same report for Delta County Chris - water flowing through syphon system.
First flush in a couple of years.
Wonder if Frank's pond filled?
I think he said his watershed was around 25 acres so I doubt it is full but it gained a lot of water.
Talked to Frank via PM. He said his pond came up 4 feet and has 5 feet to go.
Lookin' mighty good there, Youngblood.
Good looking pond. Congrats.
Thanks guys.
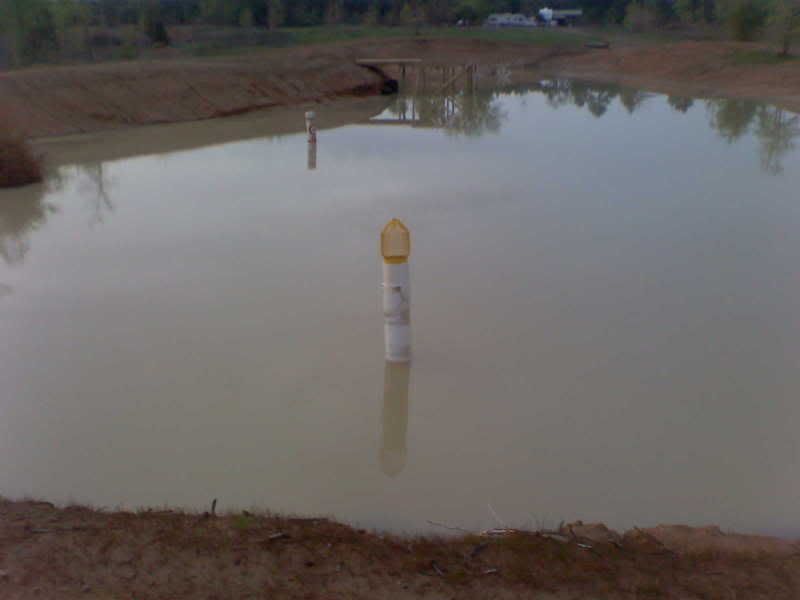
While we were building the pond we cut about a foot off of the pipe because we were going to have to move to much dirt. A couple weeks later my dad decided he wanted the pond bigger so we are going to add some more pipe to raise the water level. The pipe will be just below the spillway enough for it to run full bore before the water goes out the spillway.
Chris you and your dad did a great job.
Here is another picture looking towards the dam.
Chris, your and Franks ponds are a special tribute to "Regional" PB field trips.
Many thanks to the both of you.
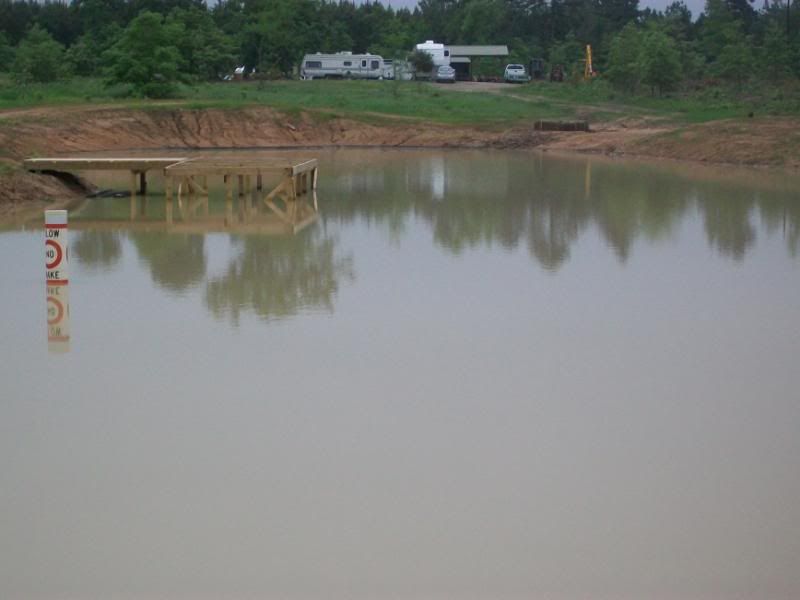
I was working on the pond yesterday and saw a YOY. I think it was a golden shiner because it swam off fast when I bent down to look at it. This evening I went and fed the fish. The fatheads were ganging up on the pellets. Also saw about a dozen YOY while watching the fish eat.
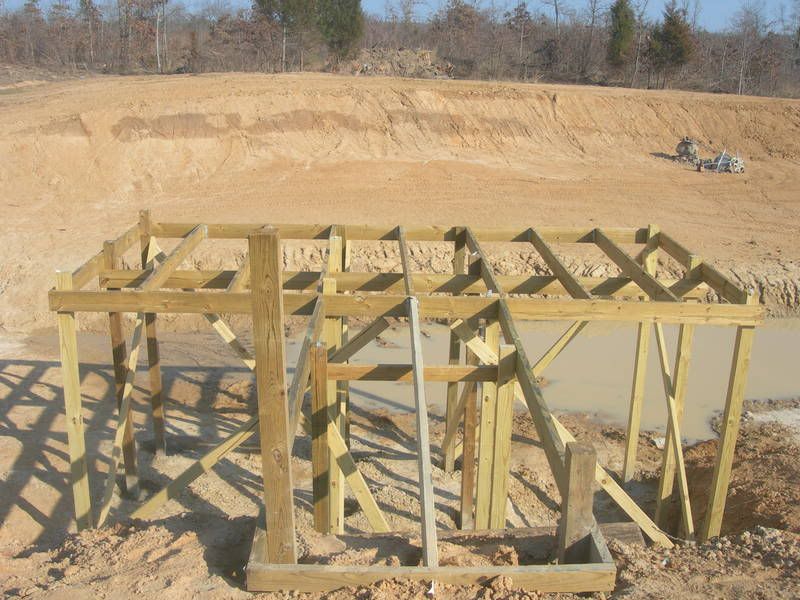
Finished the dock yesterday too.
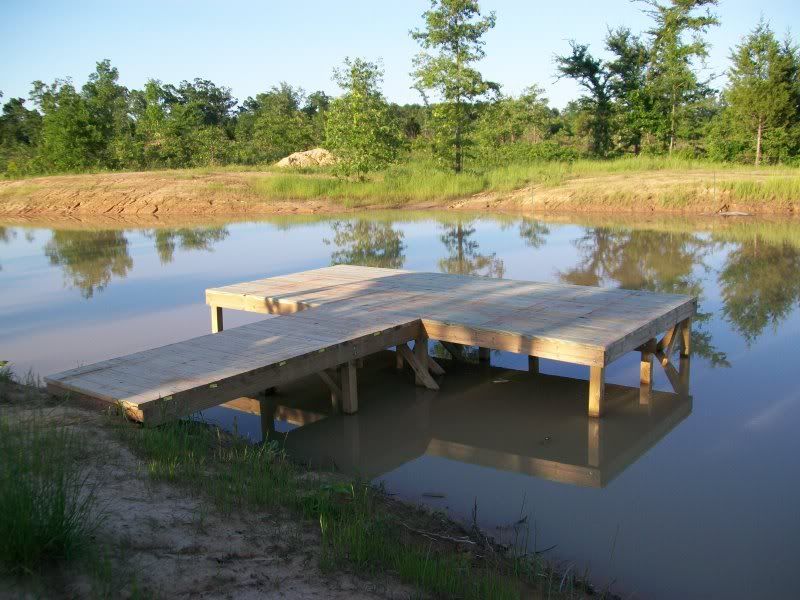
Nice work Chris...looking superb!
Way to go! The dock looks great! I'm looking forward to future stockings.
I can see it now....Young Blood working the deep frier on the end of the dock.
Chris do you have the next one layed out.
I have the sites picked out but nothing other than that. The next time I am down there I would like to set up a transit and see if I have enough elevation change at one site. The pond just down from our campers will be 5-6 acres I am guessing and the other one on the new property next door will be bigger than that.
No need to rub it in, YB.
It just looks to me like the first one is finished, and it is time to get started on number two.
I am going to try and do some more clearing on the duck pond next weekend. The regional duck biologist is going to come look at the site and give me some ideas.
Chris
I will need to be in your area this week.
Let me know when the duck is comming and if I can I would like to meet him.
Otto
He will be there the 1st or 2nd.
Stocked 300 RES and 2 dozen Lake Chubsuckers on Saturday. The fry in the pond have increased to several hundred around the dock. Fish are eating good and start feeding within 10-15 seconds of the feed hitting the water.
I found a leak on the left side of the dam. I think it started when the pond came up the last 3-4 feet. We are going to try and dig down through the top of the dam and pack it with clay.
What is the clarity of the water? Lake chubsuckers are very sensitive to turbidity.
I wonder if there is any information about degree or amount of turdidity that lake chubsuckers will tolerate. There is probably a limiting amount of turdidity where survival and reproduction start to be noticably decreased.
Eric seems to be the man for digging up nuggets like that... But from my research, it appears that the greatest factor that has led to the decrease in lake chubsucker numbers in the upper Midwest area is turbidity. They just can't handle it. How much they can handle is the question...
They may not last very long then if turbidity is a problem. I will try and catch some this fall to see how they do.
That dock looks nice and beefy. Good job!
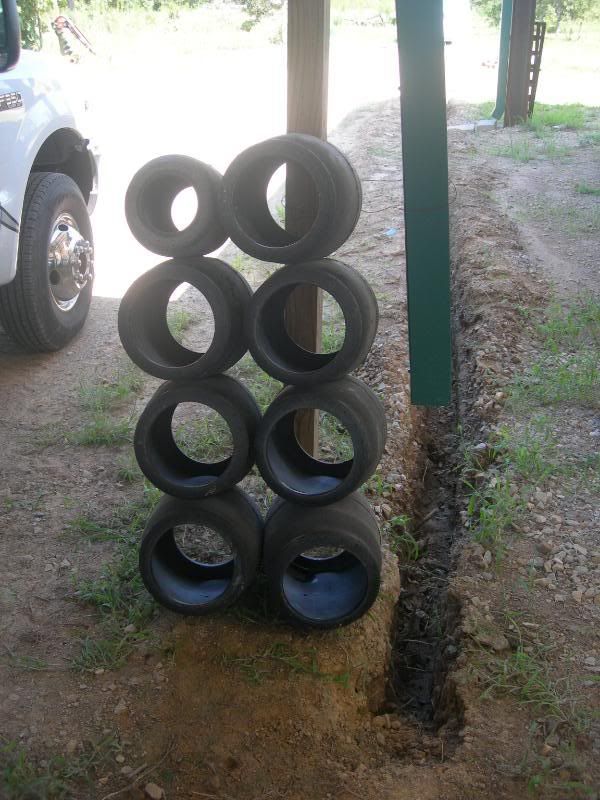
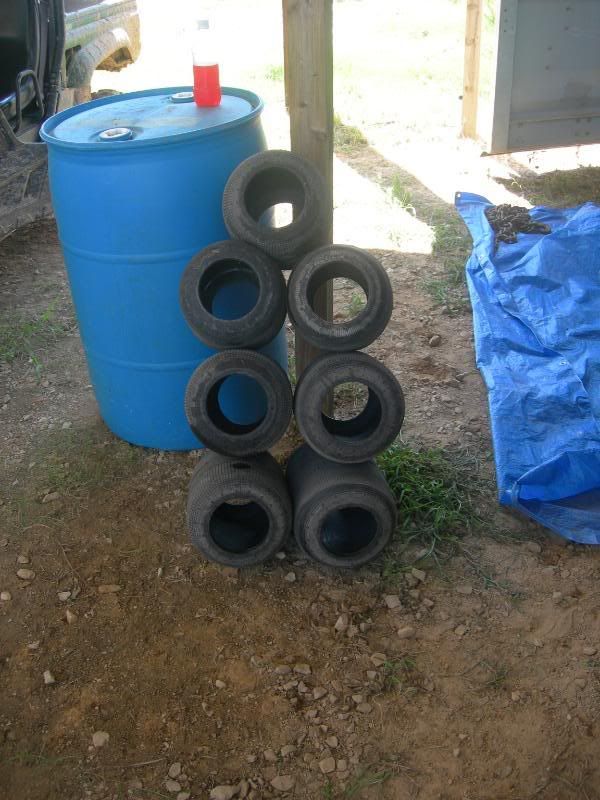
Here are some BG condos I made out of suspension airbags from a bus. The larger ones are 8" in diameter and the smaller ones are 6".
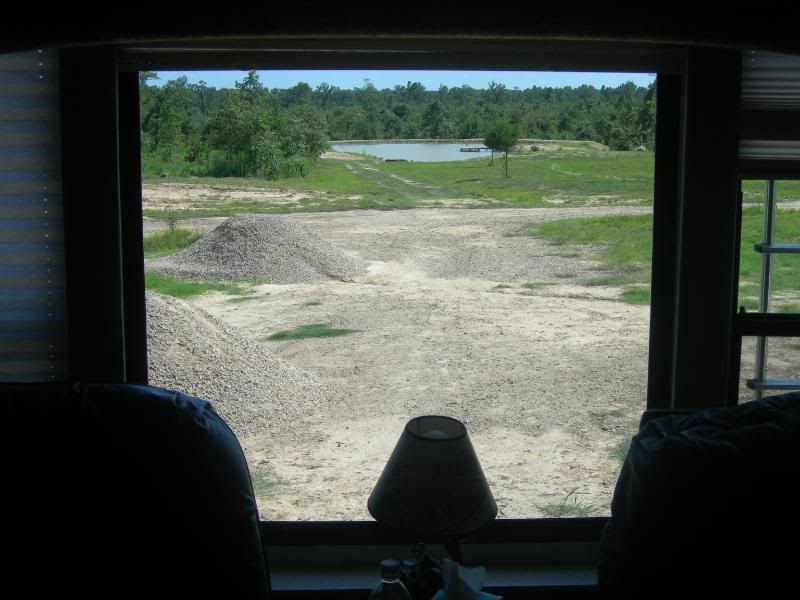
View of the pond from inside our camper.
Those condos oughta work.
The view is great. Kitchen table or bed?
Living room/ guest bedroom
Any sign of your LCS Chris?
I haven't looked for them yet. Next time I am down there I will run a seine through it.
Keep us updated, I have seen any of mine in my ponds either...