So, I've been lurking around PB for a few months. What a great site!

Thanks to all of you for the tips and great information.
But, now the shovel is about to split the dirt and I have a few questions. I've read a number of threads and as much as I could find in the archives on cover and structure. I've read Bob's book on pond management three times. So, I have the basic idea but it's all academic so far. Here's a little background...
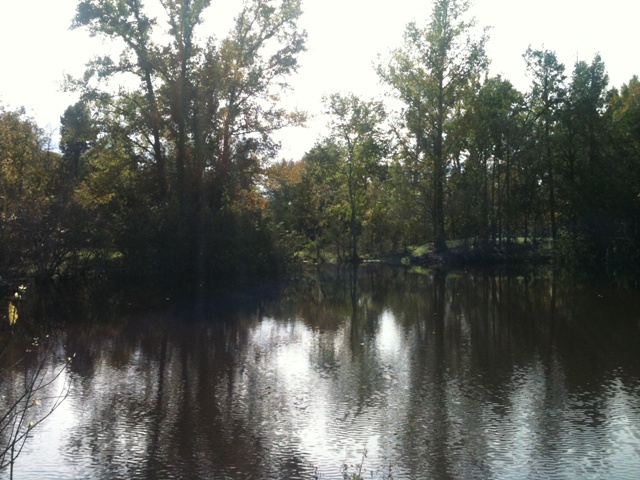
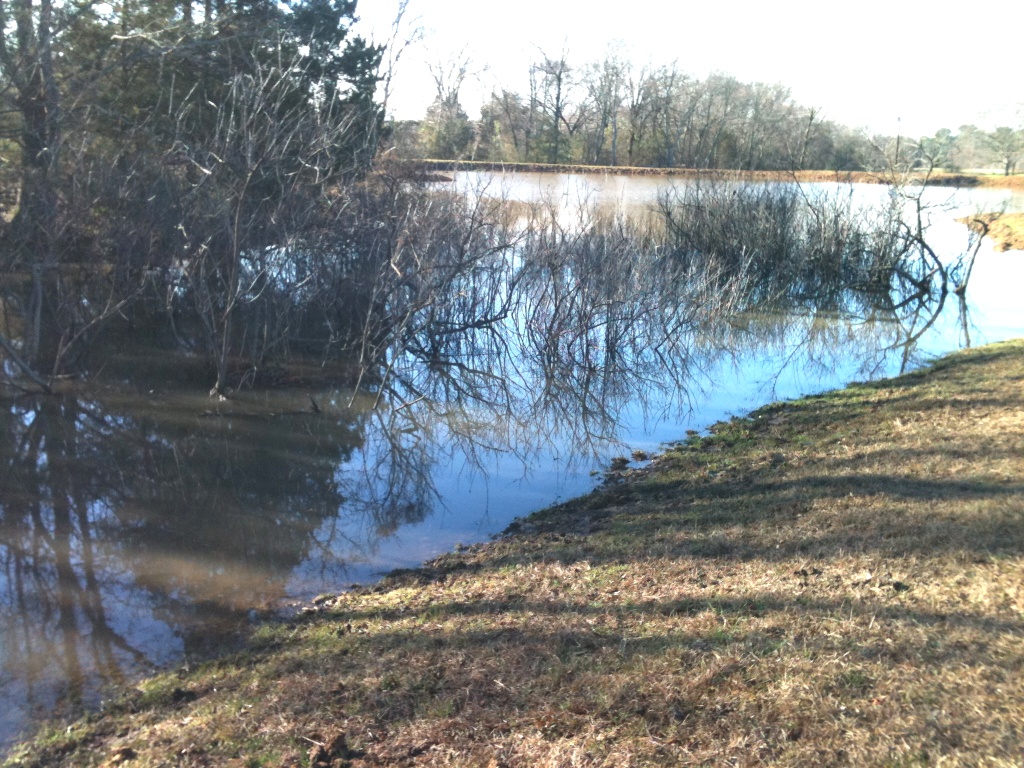
The 0.5 acre cattle tank (photo below) was built by my grandfather in Northeast Texas around the 1940's and, with Otto's help, I plan to enlarge it to about 2 to 2.5 acres. I plan to stock FHM, GS, CNBG, BG, CC and LMB so my wife and I can enjoy fishing in retirement when we're not cruising the country on our Gold Wing.

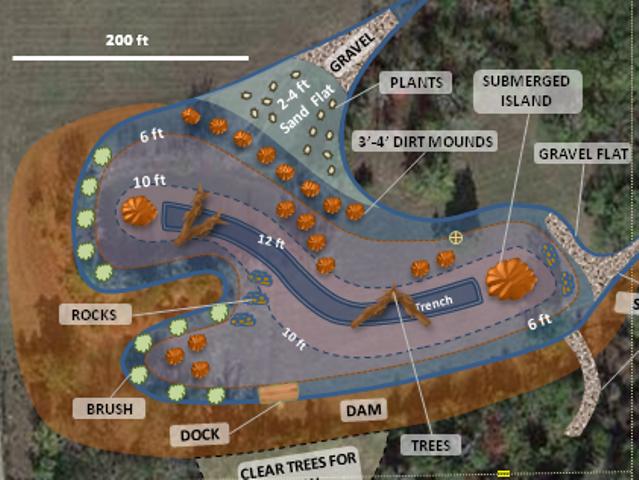
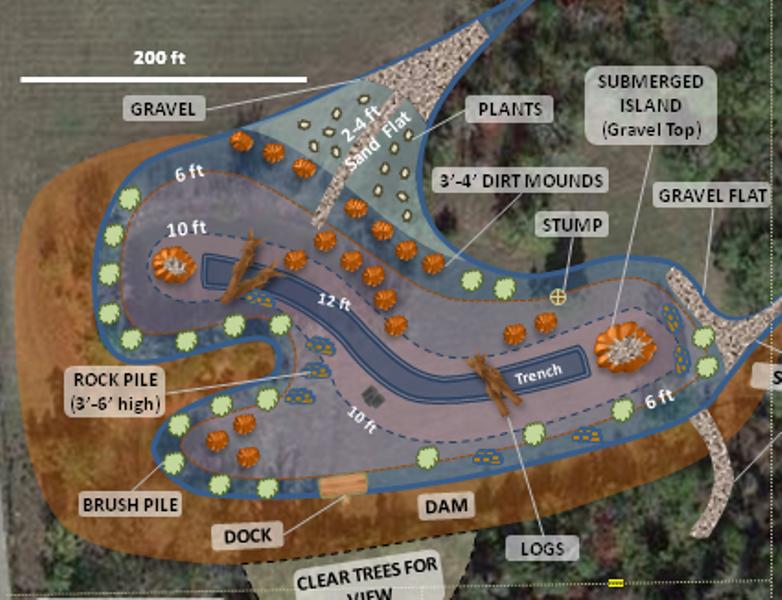
I'm attaching a "concept" drawing of the pond as we haven't shot grade yet. Obviously, mother nature and a crafty dozer will dictate the actual shape. But, we walked it several times and I don't think I'm too far off the topography.
To the point... I'd like to use all natural cover in the pond. In the drawing, I have placed the cover trying to create a "fish highway" as someone described in a previous post. But, again, I am a complete novice and this is all an academic exercise at this point. If anyone has suggestions, I would appreciate your thoughts on the concept drawing and the best types of natural cover. Is this too much or too little cover (I remember a 20% rule-of-thumb from one of the threads)? Does the layout create a suitable "fish highway"? Anything you'd add to the habitat? Any comments or insights would be greatly appreciated.
PS: This is my first attempt to add images so, hopefully, they are attached. If not, I'll keep trying.

Description: Concept drawing showing cover and structure
Description: View of the pond looking south toward the existing spillway
Sweet layout
looks perfectly planned out to me
well done!!
The only thing that I'd like to add is that with natural cover, and especially with the cover that is placed to target YOY and fingerling fish, is that it will decompose rather quickly, and you will have to be replacing it or adding to it every couple of years. Because of that, depending on the soil in and around the pond, the extra nutrients that you will be adding to the pond could be a blessing or a curse.
Nice plan.
Wish I would have thought mine out more ahead of time. The BOW itself was well planned but the cover structure, dock, etc. were all by the seat of my pants as things progressed. Digging post holes for the dock would have been much easier on dry land than in the water.
Oh, well. It all got done.
Wish you the best on your endeavor and hope you and your wife enjoy the pond as much as I and my wife do.
Thanks Peepaw, that's a great compliment coming from a habitat expert. Snrub, what I put on paper and how it unfolds are sure to be two different things. I know this, though, I can throw away my post-hole digger. The soil is solid red iron clay - at least, it is down to 10 ft where we stopped the excavator. So, I may have to use a pile driver instead. In fact, a floating dock suddenly seems like an attractive option.
Esshup, hope you (and Peepaw?) are hunkered down in your basements by now... nasty weather for sure!

When you get back on line, thanks for the advice! My nephew (tournament angler) said exactly the same thing about the natural cover. If it makes a difference, I'm planning to put the brush in shallow water just off the banks so it's relatively easy to replace. I intend to plant the (live) sand flat with aquatic plants (maybe lilies?) for fingerlings and to help oxygenate the water. I could build up the submerged islands to within 3 ft of the water surface for additional plants as well. What do you think?
Also to your point, the tree trunks over the trench(s) will be hard to replace. If I use cedar or hardwoods, they will last longer. But, I can't find any good alternatives for this feature. If you happen to think of something, I'm all ears!
Ok here is what I see. First the key on structure is to think in 3-D. Think water depth/bottom couture then added structure. Make it for all seasons accounting for water stratification / temp and time of year. Then species and spawning to adult tendencies.
On your specifics given your location natural decomposition should not be a problem as much of East TX needs lime and nutrients (fertilizer). But do get your water/dirt tested.
Things to consider WRT your drawing :
on the islands add some gravel on the very top if it is less than 10 ft deep. add isolated brush/wood/pallet structures to give extra relief and a concentration area (about 3) per island just off the top. For example if the top is 6 ft deep at a location just off the top in 7 ft add stand up pallets or brush piles that cover about 3 X 3 and that stand 3-4 feet high.
On the long descending point (top of drawing) bring a 4 ft wide strip of gravel all the way out to 7 feet deep. At the end of that gravel and between there and the dep log structure add a mid level brush/wood structure to complete the 3-D highway.
On the part of the dam to the right of the dock add rock or pallet or brush piles about every 30 feet down the dam and alternate them in depth from 1 foot to 7 feet. The incline of the dam is the biggest bottom contour change you have and is a excellent place to attract fish from deep to shallow water over a short distance.
Add a brush pile in 7 ft of water between the 3 dirt piles and the 10 ft contour line bottom left of your plat. It will connect the highway from there to the 12 ft log pile.
Same concept , add a brush pile in 8 feet of water between the dam brush pile and the deep log structure (cover from bottom to 3 feet deep - a 5 foot high pile.
On the dam at far right end in the bend in 6 ft of water add a brush pile to hold fish from the inlet area to the right.
Ewest... many thanks!! Great advice! I will definitely do the soil and water tests. I was planning to do a water test before and after renovation. I expect high iron and low pH.
I'm incorporating your suggestions in the drawing and will post an update when I'm done.
ewest, here's my update...
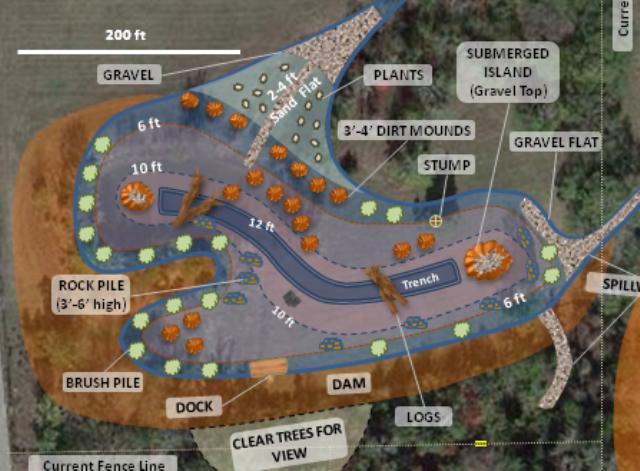
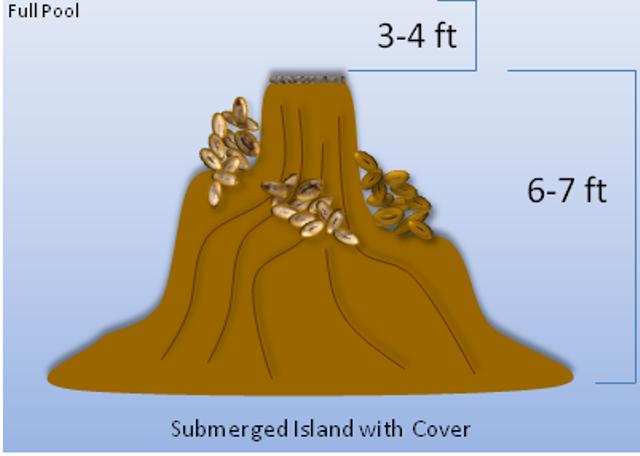
I've tried to connect the highways' placing structure and cover as you suggested. I've substituted rock piles for brush, wood, and pallets where possible because the former will last longer. For the submerged islands, I've put gravel on top. The soil is mostly red clay so I believe I can shape the islands using a track loader with flats to support three separate rock piles. An illustration of the island is attached along with the updated concept drawing of the pond.
Do you know if FHM will use the undersides of lilies for spawning or do they need something more substantial (as in pallets)?
Any more thoughts?

Description: Updated Pond Concept (19-Nov)
Description: Island with flats and cover
Those look great. Step back now and think in 3-D. I would switch the dam rock piles and brush piles to cover more vertical space in the water column (3-D). Brush in deeper water and rock piles near bank. Those islands look great.
The vertical part is hard for me to visualize. I guess that comes with experience.
So, here's the latest. It's off to Mike now. It will be interesting to compare the real cover on structure versus the concept when we're through. If I'm not traveling, I'll try to take some pictures as we go.

Thanks again, ewest!
Description: Updated Pond Concept (23-Nov)
Just try to think like you are a fish ( like in a submarine).
Your plans are looking top notch!!
Eric has many great points about habitat here. Note the comparison of short and tall objects and the "basement" effect.
why fish cribs work or fail
Thanks Peepaw - lots of good info there. Yes the vertical component (in water depth) is often the most overlooked aspect of structure. It is best to cove all depths and locations correctly.
As far as hardwoods over the trench, if you can get some Osage Orange corner posts (we locally call them "hedge posts") they will last 30-40 years as a corner post so submerged I would imagine they would last for as long as the pond had life.
Don't know if they are available in your area. Many years ago lots were cut from the "hedge rows" that were originally used as fence lines from this area and shipped south for both line posts as well as the larger ones for corner posts. They are still used locally for corner posts but most everyone uses steel posts for line posts. I cut from our own hedge rows the ones used in my dock for dock pilings. Also used some old line posts we had taken out of a fence that were already 30+ years old (and still good) to crib up and add boards for FHM spawning and cover for small BG.
In our new pond we have a deep area near the dam then another deep area closer to the opposite side where we excavated with a scraper to get the rest of the dirt for the dam. So the center of our pond is actually shallower than either side. Then in this shallow center area we took the scraper and cut trenches laterally across the pond in about four places. We bridged all the way across in some places and slanted to the bottom in other places structure. Used a variety of things, one being a large Osage Orange stump we removed from near the site turned on its side and weighted down with concrete foundation pieces. The root ball was so large actually had to cut some of it off so it would not be above water (in about a 9' depth area). Another thing we made a lot of use of was concrete foundation pieces we got from our defunct turkey growing operation. The concrete foundations were about a foot thick by two feet wide by anything from six foot to 12 foot in length (whatever broke off when the dozer pushed it out). These concrete chunks ought to last long enough. We also "cribbed" a bunch of them with wild cedar trees standing upright within. Recently I have learned the cedar will go away in a few years so wish I would have added some plastic or other finer material along with the cedars. Oh well, I'm a scuba diver so will be able to inspect and maybe add as needed. Also used some salvaged concrete "slabs" from the same source and made overhang ledges in a few places along drop offs to replicate a "bluff". Maybe someone nearby tearing out some foundations that they might have to pay to dispose of you could get for free?
Just some ideas for you. If you have access to Osage Orange trees or concrete foundation pieces or slabs, they both last a long time.
Take some underwater pics/video when you dive and post them here - a great addition.
Osage Orange is a great wood for specialty items so I would not waste it in the pond - other hard wood will work. Its the exposure to air that mainly breaks down wood - keep it submerged an it will last a long time.
Great wood for specialty items??? LOL. We burn it for heat here. Tremendous btu's in a dense wood. I cant fathom how much of it had been dozed up out of old fence rows and burned in brush piles since the time I was a small kid (a long time ago). Many farms had multiple hedge rows transversing the property to form natural fences for cattle or to separate them from cropping areas. From the time I was a small child through today these rows that were originally planted by pioneers during homesteading time have been removed to create bigger tracts of land to farm, build houses on, etc. What at pioneer times were rapid growing sticker laden bushes are now a foot or more in diameter as natural selection pushed out the smaller trees and only the big ones were left.
In my younger years the "hedges" were cut regularly for line posts then in a few years they grew up again to new posts. Since few use wood posts for fences any more because of the labor costs for both cutting the posts and installing them where steel posts are both cheaper and easier to install, these hedge rows have grown up into huge trees. They sap out sometimes approaching a hundred feet into a field and show up on a yield monitor when harvesting crops depleting the yield to a great degree. So Osage Orange is mostly a scourge to farmers while making a great heating wood for wood stove burners.
It is a beautiful orange wood. I've often thought of getting some made into lumber but sawmills around here generally frown on touching it. They are not fond of the old steeples and nails and wire from barb wire being attached and buried deep into the growing tree over the years. I think it would make beautiful flooring and last forever. Been cutting up some limbs of it just yesterday to keep warm (cutting wood warms you twice, once while cutting it and the second time while burning).
I guess like so many things, beauty is in the eyes of the beholder.
Osage makes a really good longbow.
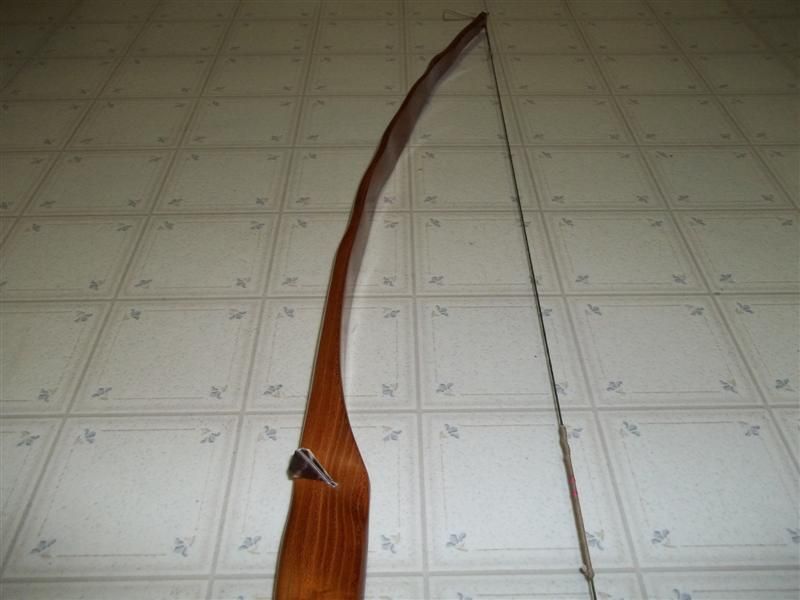
Knife handles , wood carvings , lamp bases , small stands , inlay material and more.
Thanks for the links, Peepaw!
Wow, Eric... those are some great photos and a great article. I can't find any good books on habitat for freshwater ponds. So, I trust you're working on a book deal! I'll take a dozen for gifts...
In any case, I'm starting to see the vertical component a lot better after browsing all of these great materials so thanks for expanding my pond world. I don't know if I can make the basement thing work with submerged islands. But, suffice to say, I'm giving the submerged islands a lot more (vertical) thought. Maybe I should consider replacing them with cribs...?
Snrub, although Osage Orange grows in our area, I can't recall seeing very much of it around. We used Cedar trees for fencing when I was growing up. Cedar makes nice furniture, too. But, as you say about Osage Orange, we always considered Cedar to be a nuisance tree around the farm. It's not good for shade, doesn't produce an edible fruit and it thrives best along fence rows and in the most inconvenient places. Incidentally, I recently read that Christmas trees are the number one cash crop in Texas these days - go figure!
I'm sure we'll push up some Cedar stumps when we extend the dam. We have a small area we plan to clear behind the dam. In the lower depths, without as much oxygen, I'm thinking Cedar logs would probably last as long as I'll be around. Another option is to use concrete culverts but they tend to be a bit expensive ($100's depending on diameter and length).
I found a limestone quarry (rip rap and gravel) within delivery distance. The material cost is about $125 per bob tail load. I'm not sure how much for delivery yet. The trucking company is independent of the quarry. I read that limestone rock piles can help stabilize the water pH and alkalinity over time. I probably won't need much flat (sand) stone so I could probably pick up some planks at any landscape yard. They'd make great shelves as you say. I could easily integrate these into the submerged islands. And, I found an add recently for busted up concrete within 20 miles of the farm - taken from an old parking lot. I'm a little leery of this one because of the potential for motor oil, antifreeze and other residuals in the concrete plus the rebar. But, suffice to say, I'm finding some workable options. All great suggestions and much appreciated!
Very nice bow sprkplug.
My brother does that. Flint knaps too. Belongs to an indian tribe and actually teaches bow making to younger tribe members. He gets his Osage Orange when he comes back to visit.
Lives in Portland now.
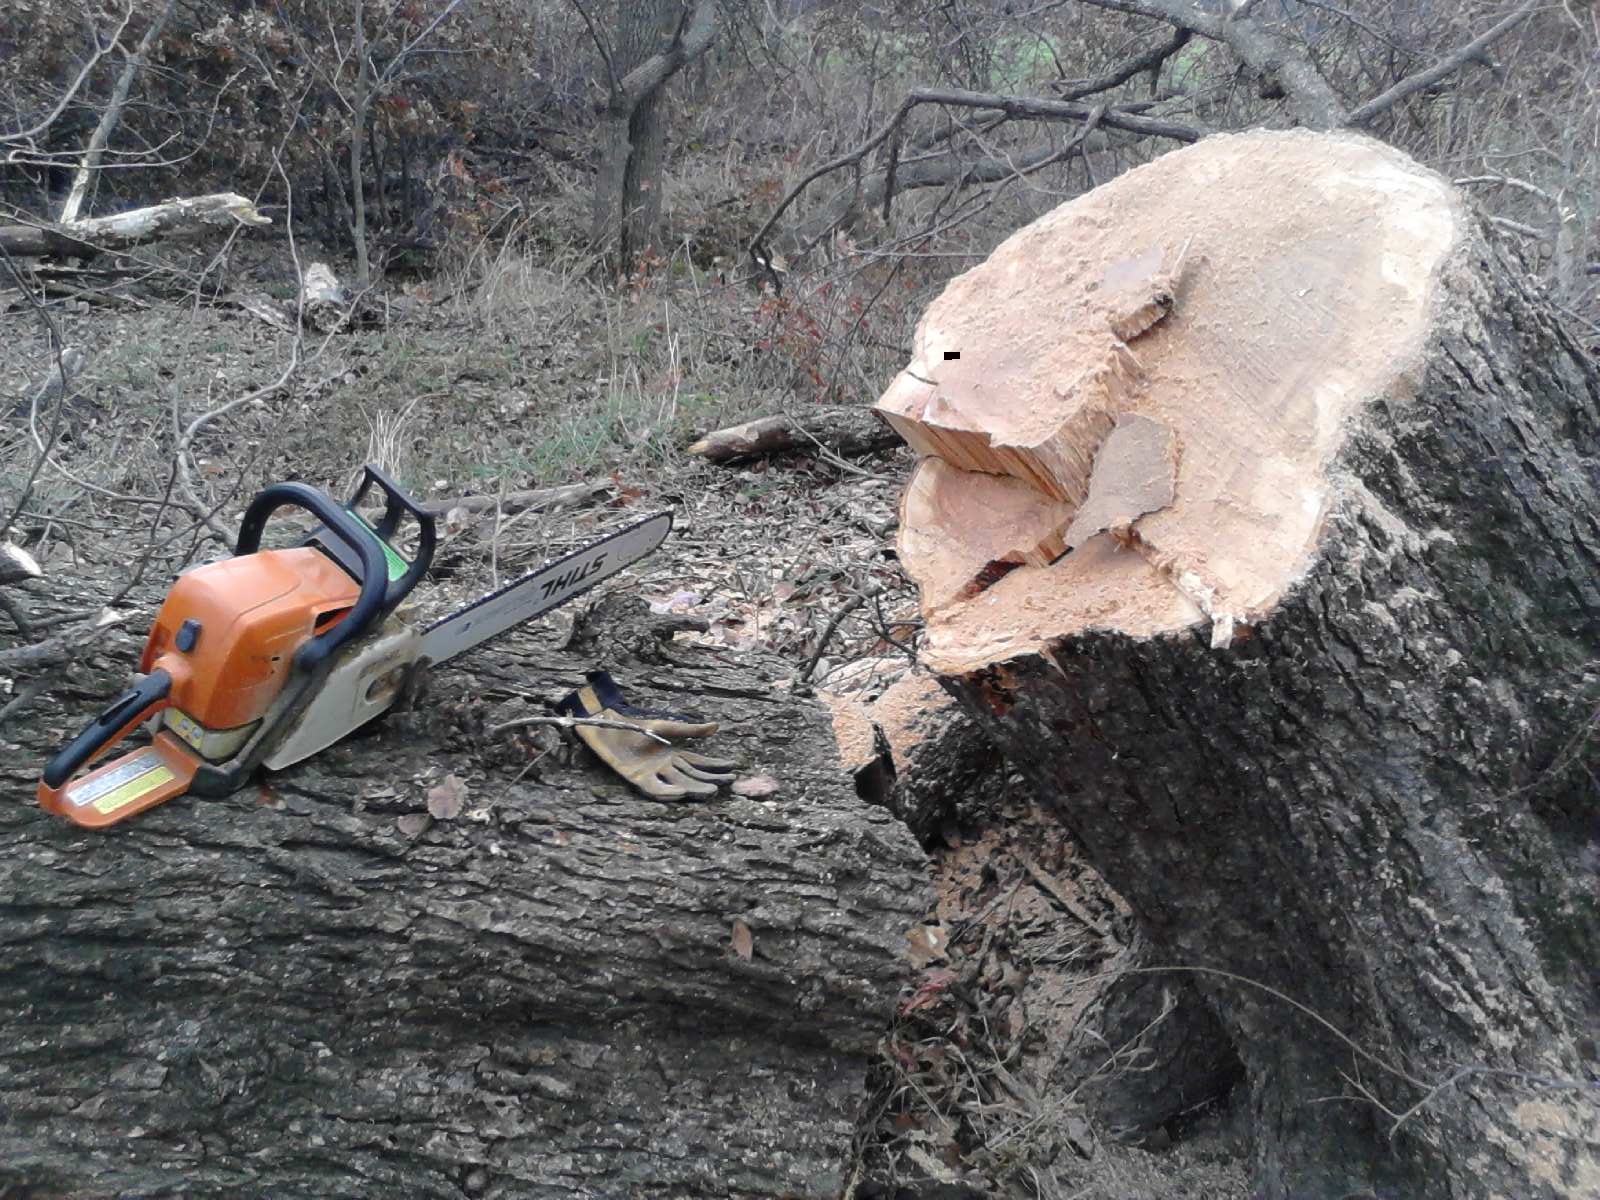
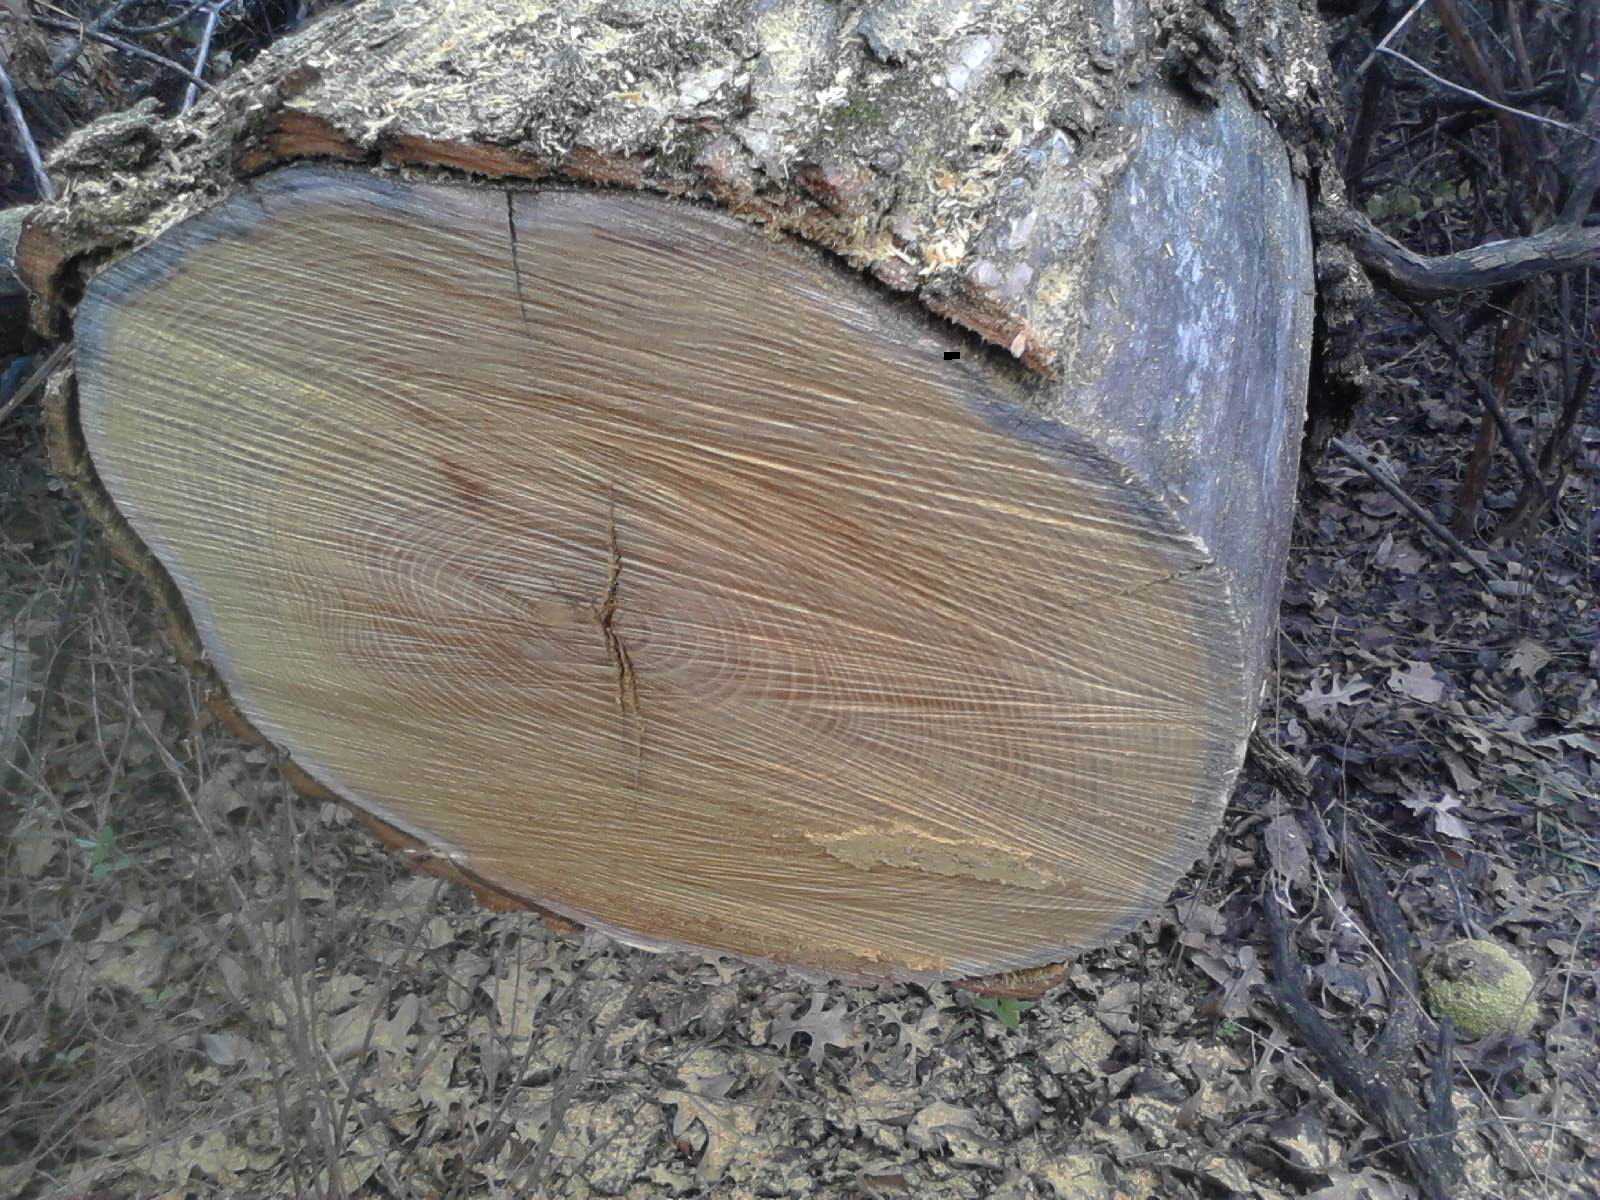
My work with Osage Orange is a little more crude. See picture.
Description: Osage Orange (Hedge locally)
I intend to take some underwater photos but so far the visibility sucks. About 18" this summer. My wife is really the under water photographer. Camera is too distracting for me. She is into macro and it would be really neat to get her to take some macro shots of BG, etc but the chance of getting her diving in pond water is slim to none and slim just left town. She used to dive lakes with me, but I ruined her by going to the ocean. Now she expects 100' visibility.
I hope to do some photos next summer.
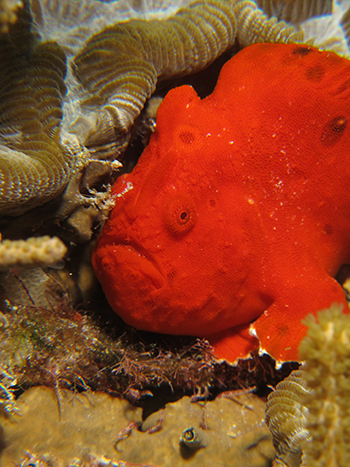
Here is one of her macro photos of a frogfish. I found this little guy when he was only the size of a quarter. Not a great one of a seahorse (she has lots better but not here on my computer). She will loan me her camera, but will not get in the pond. Hang her feet over the dock on a hot summer day, yes. Scuba dive, no.
Description: Frogfish
Description: Seahorse
I've made knife handles out of freshly cut Oasge Orange/bois d'arc/bodark and it is a PITA to work with. Aged stuff is even worse. A carborundom wheel on a grinder only scorches it. I have had to use a rasp and then sand it.
I have found that years later it sometimes splits.
But it is really beautiful wood.
The splitting is one thing I wondered about if using it for something like flooring. Might have to use some clear filler type sealant or something. I imagine oiling the wood might help with the splitting but do not know for sure.
Yes it is hard. I have a pile of old line posts (30 years old maybe??) we took out when the cattle left the farm and once in a while if I need some quick heating wood will cut some up. You can actually see sparks coming off the chain saw chain and if it is an old chain about worn out where the cutters are not very deep it will break one off once in a while. Dried out the stuff is half as hard as steel seems like.
One tree one chain to sharpen ?
Nice pics.
Thanks.
Actually cutting the trees is fairly easy. Outside of the sap being like Elmers glue (around the bark/wood interface), the fresh living wood cuts only a little harder than something like Ash. I have been cutting up some year old limbs from some trees we had to remove when we built the pond. They are partially dried out but still cut fairly easily and a sharp chain will last about as long as on any other wood. It is just when the wood ages it gets like iron. Seems like the older it gets the harder it gets. If a person was going to make lumber from a big tree I would guess the best bet would be cut the timbers and let them dry for a month so the nasty sap would not foul the lumber mill. But you would definitely want to turn it into lumber before it aged over a year or so.
OK, I've been waiting on Mike to break out the big equipment for several months. He dug a couple of 6-8' holes a few months ago - seemed to be a good mix of mostly red clay and sand. I thought we were ready to start but I haven't heard from him since then.
Mike is a virtual genious. I learned more from walking the pond with him in that one afternoon than I've learned from everyone else combined including the local farmers. But, when you're good, you're in demand and Mike is certainly both. My little 2-acre project seems to have dropped off the radar. So, to all of you NE Texas pondmiesters, any suggestions for another good dirt guy in the area?
WingNuts, what program are you using to design the pond concept??? I'm in the design phase and would love to be able to use something like that. Thanks
Hi Beaux... I couldn't find a good topo program (that I could afford) so I did it the hard way. I grabbed the satellite image from Google Maps and pasted it into MS Powerpoint. In Powerpoint, I added the contours and features using the drawing options.
Ok great. Thanks Wing, i think i can handle that
In our bow shooting club one guy made his bow from Osage Orange also and before retiring as a model maker we used Osage Orange for some of our clay sculpturing tools.
Before my pond filled I used lots of rock, bricks & building blocks to make rock reefs in my pond. Lots of gravel and sand for spawning bluegills areas and a large rolled up farm fencing in one pond area. Nine tires tied together in a pyramid 4-3-2 with rock in the bottom four tires and hole drilled in the tops of the lower seven tires to allow the water to escape but not in the upper two so as to keep the unit upright while sinking to the bottom.
..O O
.O O O
O O O O
I set them on my the frozen pond and it sank upright when the ice melted. Also rift raft rocks in another area for crayfish.
Also a couple of 4'x 4' rafts with many upright 4' stakes and then these were sunk with rocks on the rafts.
Wingnut if you raise your island above the water you may want to put some rocks or even stacked sackcreat around the earth base to keep the earth from floating outward from the base over time. Your can just lay sackcreat in the bag and it will harden on it's own and become a big rock.
Great ideas... especially, the sacrete. I hadn't thought of that. Thanks, John!
Frig! I just took a bunch of fence to the scrap yard, all rolled up and squashed with my tractor bucket! Why didn't I think of that!
OK, here's an update for anyone interested...
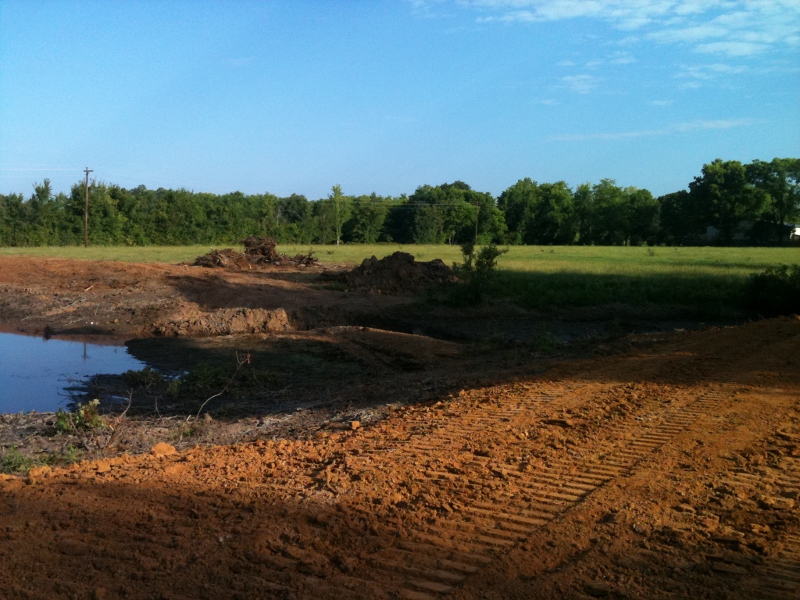
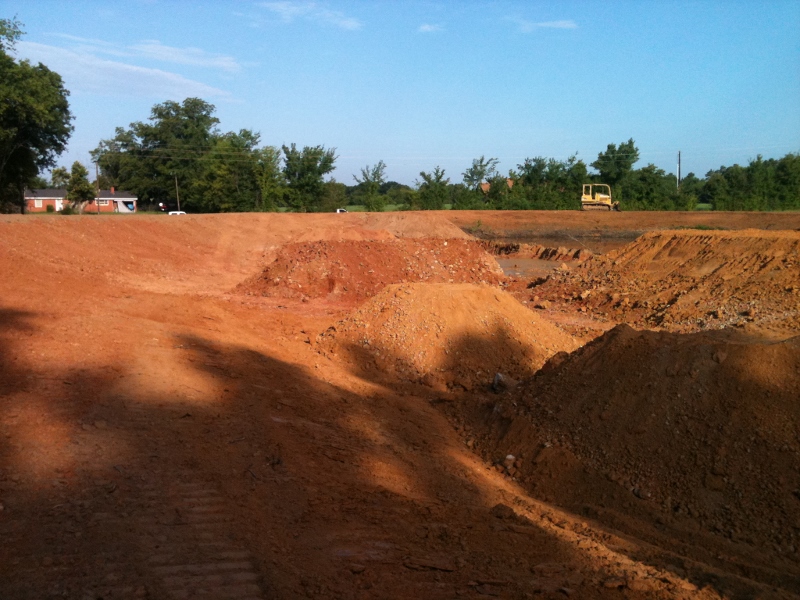
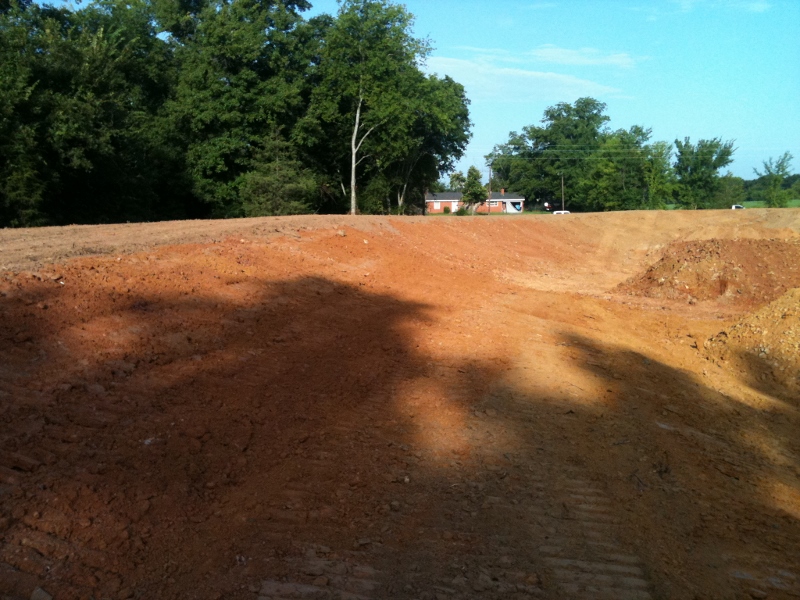
I found a young dirt contractor right down the road who seemed to have a good sense about pond building. Jay Walton did the dirt work for me and I've attached some photos of the finished dirt work. As expected, the pond is not exactly as shown in the concept drawings but the key features are there.

Starting at the upper end of the pond, there was an existing spawning area. I plan to throw some pallets into the upper end for FHM. We connected this spawning area with a trench to the deeper basin. I'll fill the trench with gravel and add brush at the end to form the first "fish highway" as suggested by Eric.
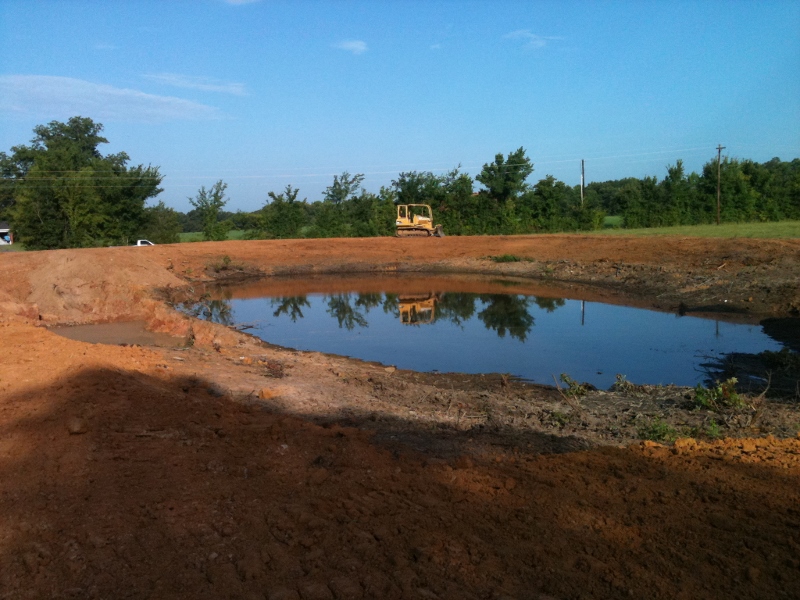
We didn't do anything to the old pond basin but we raised full pool by about 2 ft. So, this will form the deepest part of the pond at 18-20 ft. We added some peninsulas that weren't in the concept drawing. Between the peninsulas is a small ridge line that provides a little more structure between the old and new sections of the pond.
We created dirt mounds down the center line of the new pond area as shown in the photos. I plan to sculpt those with my track loader, add gravel on top and create shelves as described previously if it doesn't rain before I can get to it. We placed two large tree trunks between the mounds (not shown). Finally, we built a "shelf" along the dam where I'll place rip rap and brush in a crib type layout also suggested by Eric. The shelf along the dam leads to a second 2-3 ft spawning area near a very gentle sloping spillway forming a second fish "highway".
Thanks for all of the suggestions and input.

More to follow, I'm sure...
Description: This is the old spawning area. We dug a trench on the far side which I'll fill with gravel.
Description: The old pond basin will be about 17-18 ft deep when at full pool.
Description: These are the dirt mounds. I hope to sculpt these and add gravel before it rains.
Description: Along the dam is a shelf which will be about 4-5 ft deep. I'll add gravel and brush to form a sort of crib.
Looks good and you seem to have it well thought out.
One problem I have encountered with all the structure I have in my pond. I've already lost one boat anchor because of it (still need to dawn the scuba and try to find it). I put a LOT of concrete foundation sections (1'x2'x6-10' long) cribbed up log cabin style with a cedar tree upright in the center of the crib. The multiple structures work well for the fish, but is a hazard for fishing lures and anchors.
The pontoon paddle boat I use catches a lot of wind, so is no fun on windy days to try keeping it in position fishing. An anchor tends to drag in the mud bottom then finally catch on something like structure and snag, sometimes permanently.
I'm getting to the point. Slowly, but I'm getting there.
My final solution (to the pontoon boat needing to be moored on windy days and anchors getting eaten by my structure) is going to be to get my scuba gear on, take some rope and small floats, and put permanent boat moorings attached to the concrete foundation pieces in strategic locations around the pond so I no longer need to use an anchor. Just pull up to one of several rope moorings and hook up. Where we scuba dive in the Caribbean it is very common to have permanent boat moorings attached to large screws screwed into the reefs instead of having anchors tearing the reef up every time a boat drops anchor (where I got the idea).
The point to this thread is, had I came up with this idea before the pond filled, it would have been much easier to attach the mooring ropes than what it will be to do so now.
You probably don't have a need for boat moorings in your pond. But if you do, now would be a good time to determine where you want them and where to attach them. Earth anchors in the bottom of a mud pond would work well if no sturdy structure is there (like my concrete foundation bars). Or if you want a floating swimming island (floating dock in the middle of pond), a good time to screw in anchor points would be before the pond fills rather than after.
Just a thought or three.
Thanks Snrub... It's only well thought out because of the advice I've gotten from you and the rest of the Pond Boss gang.
I don't plan to do concrete condos but I'm thinking seriously about the tire pyramids that John suggests - would be great for CC. It's hard to see in the photos but one of the dirt mounds will be 2 ft above pool for an island and the peninsulas will be our "docks".
I'll be adding rock piles, brick and gravel over the next week or two similar to the concept drawing. I can't think of anything else to add ahead of the water. I'm building a fence around the pond area and clearing a lot of scrub trees so I'll add brush to connect the "highways" as I clear.
All good fun!
Just a personal opinion here, but with CC being so inexpensive to stock, I'd rather control the CC population by catch, remove and restock than wonder how many baby CC survived a spawn.......
Esshup, I'd like to establish a natural food chain. But, I'm not a professional so that's a tall order.

I think it would be good to have the structure and cover to support it if it happens but I'm expecting to restock occasionally.
So, here's my plan...

I'm bringing in some gravel / rip rap (hopefully, next weekend). I'll add stone piles along the shelf by the dam and place as much rip rap as I can around the base of the dirt mounds to support them (in lieu of sacrete). I'll try to sculpt some 'shelves' on the mounds. I'll place landscape bricks and patio stones (my wife wants me to get rid of) on the 'shelves' for cover. I plan to add a few small trees in strategic locations at a later date which, as you pointed out previously, will eventually have to be replaced.
I decided against the tire pyramid because I don't think I have enough room for it in the newly excavated area and I don't think the pond is big enough for much of a boat so I'll forego the anchors.

But, both are a great idea for a larger BOW when I win the lottery.
I'll be working on it next weekend so, if I make progress, I'll post some new photos. Thanks again for the ideas and lessons learned...

Latest photos...
I have to admit my plans were ambitious. A $500 load of rip rap just doesn't go very far.

I still want to add more tree trunks and root balls if I can find some and I intend to add a lot of brush (cedar trees) in strategic locations. I took Snrub's advice and bought some metal posts to drive into the tops of the submerged islands for mooring points. I forgot to take photos of the spawning areas

but I added gravel and brush to create a "highway" from the first spawning area to the old pond basin. I threw in a pallet for the FHM when the time comes. I'll do the same for the second spawning area next time around.
It doesn't look like much but, after taking some time out to finish a stretch of fence, I spent about 10-12 hours on the bobcat. And, there's a lot more open space I could have filled if I hadn't run out of materials.
It's football season so it may be a while before I get back to it but more to come later...

.jpg)
.jpg)
.jpg)
.jpg)
.jpg)
I hope you have your brush and wood anchored down very well. When covered with water they will want to float like a cork. When the mud bottom softens lots of wood biomass (like stumps) has buoyancy and can pull out stakes driven into the bottom. Been there done that.
Thanks for the tip, Bill.

I used a bucket without a grapple to pick up the brush so the brush piles have a lot of sand mixed in that I scooped up in the process. I'll add some more dirt and maybe push some rip rap over on top to keep the small brush piles in place.
The tree trunks could be a problem, though. They are big and heavy - hard to lift even with my T-180 track loader. Will these float? If so, any thoughts on how to anchor them down? I thought about pounding a metal post into the ground beside each trunk and tying them to the post. I could also dump dirt over one end but, as big as they are, I don't think that would hold them in place.

Any insights would be appreciated!
I don't have any unique ideas to hold big wood in place. All I know if a lot of wood biomass even though big and heavy has a lot of buoyancy.
Bill... you were right. Some of the logs are floating.

Not much I can do about it other than hope and pray that a few of the bigger ones stay in place. Tire pyramids and cinder blocks would have definitely been a better choice.
For anyone interested... I've attached updated photos. I'm at about 1/3 to 1/2 full pool in these photos taken 2-3 weeks ago. With the recent rains, I'm hoping to see a 2/3 full pond when I drive up this weekend.

More background... besides the 5" rain we got a month ago, we drilled a 500 ft water well and I buried a 1 1/4" Sched 40 PVC pipe from the well, over the levee and to the pond. The water cascades over some limestone rip rap to aerate it a bit before it trickles into the pond. The pump is rated to 30 gpm. The well jetted 50 gpm for 2 hours after it was completed with about 7ppm total iron.

After six weeks of 24/7 pumping, it started cavitating so I had to back it down. Right now, I've got it cruising along at about 6-8 gpm.

I also tested the water after we drilled the well.
Original Pond - pH = 7.0; Alkalinity = 20
Well Water - pH = 6.5; Alkalinity = 60
It's holding water so far and I don't want to jinx it but guess I need to start thinking about stocking it now.

Description: Spawning areas on opposite side of the pond in this photo.
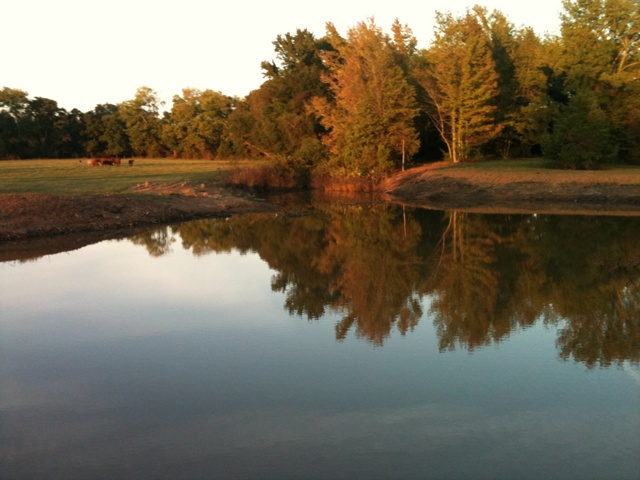
Description: (Almost) Submerged Island
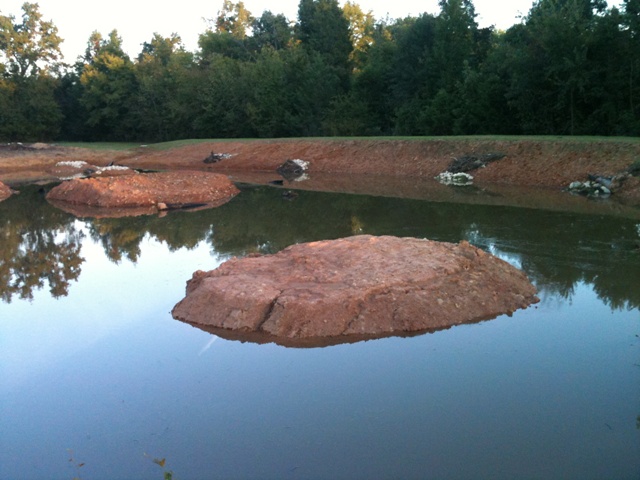
Description: Floating Logs (eek!)
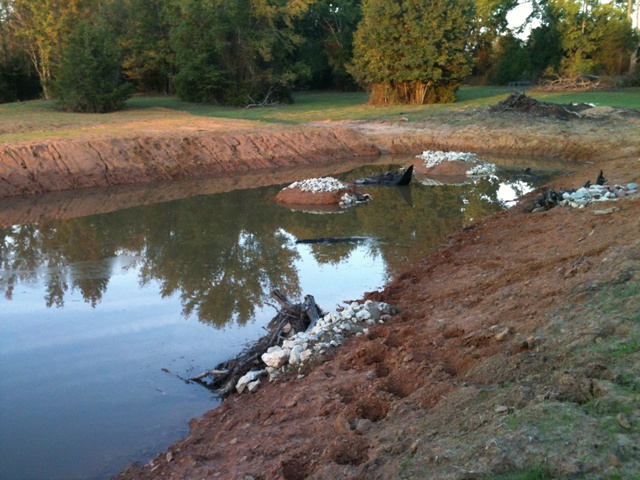
Description: More (almost) submerged islands.
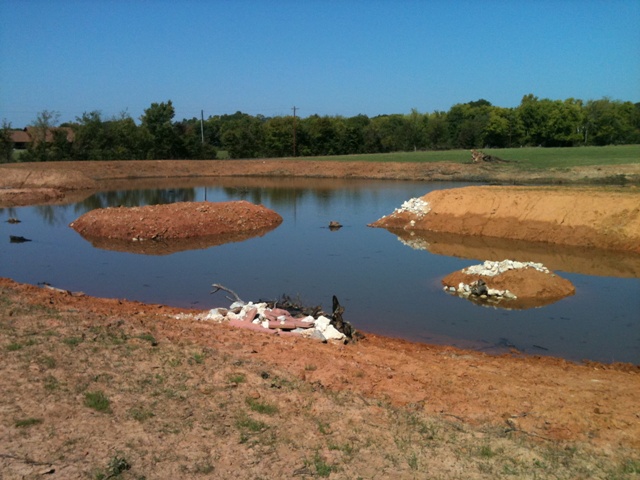
I think you're going to like it.
This is like watching water boil... come on rain!! I'm hoping the mounds are under water when we visit for New Years. I can't wait to drive the anchor posts in the top of the mounds and get some lilies started around them for cover. Guess I'll need a boat soon... maybe Santa's listening!

Pallets have stayed put (under water) in the spawning area with no weights or stakes. Most of the brush is holding - just a few logs floating. Overall, wish I'd used cinder blocks instead of rip rap because they are cheaper & provide cavities where forage fish and fingerlings can hide. I may still throw in some cinder blocks. I have a huge root ball I need to push in along the bank somewhere. A few cedar trees near the spawning areas should finish off the cover. So far, I'm pretty happy with the result.

I'll be stocking soon! - FHM, BG with CC and (limited) LMB later...

A few photos are in the attached file showing our progress from excavation until now. Enjoy and have a MERRY CHRISTMAS!
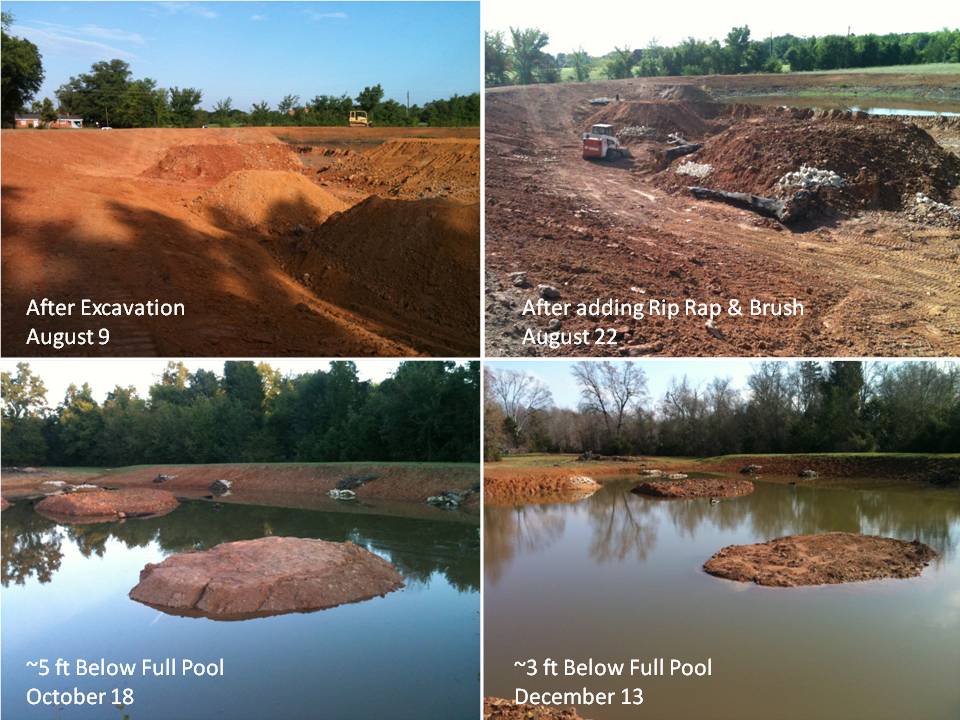
Happy New Year, PB'rs!!
I think this will be the last post on this thread for a while unless I can get some pictures this weekend. I'm waiting for Google maps to update so I can post a 'before' and 'after' satellite photo of the renovated pond.

In the meantime, here are some shots I took on Jan 3rd when the pond was about 1-2 ft below full pool. We were not running over the spillway but getting very close. As you can see, the submerged islands are almost completely under water.

I still need to throw in some cedar trees for cover and plant lilies on the submerged island. A few more pallets in the spawning areas and I think I'm done.

I'll be doing an electroshock survey when the water warms up in late February with the help of Walt from Overton Fisheries. I'll try to take some pictures. At the same time, we'll cull the undesirables, do some water tests, etc. With this info, Walt has promised a recommendation for re-stocking. If it's not too many pages, I'll post the report to the "Stocking a New Pond" forum for anyone that wants to read it.

This is too much fun!!

Description: Islands almost completely submerged.
.jpg)
Description: Standing near the spillway looking back across the pond.
.jpg)
Description: Looking down the dam toward the spillway.
.jpg)
Description: Only one island left above water. The other 3 are submerged.
.jpg)
Description: The spring and spawning area are shown in the upper left corner of this photo.
.jpg)
Description: Looking over the old pond basin.
.jpg)
WingNuts, you going to be able to make it to the conference next month?
Thanks for reminding me. I have a tight schedule that week so I need to clear some time. And, I need to register. Looks like it will be a blast!
These will be my last photos until Google Earth updates. With the recent ~3" rain, all of the islands are now completely submerged.

The runoff from the recent rain is causing the 'muddy' look in the photo but I'm sure that will dissipate. I cut the spillway in just after I took these photos so the pond is now at full pool. I have a few finishing touches once I'm able to float a boat but I'm over to the "Stocking a New Pond" forum (or, maybe, "Corrective Stocking") very soon. If all goes well, I'll kick off the new thread with the electroshock results when the water warms up.
Something I forgot to mention for anyone that is thinking about doing this type of tank-to-pond renovation... the new part of the dam settled about 1-2 ft as the pond filled with water.

We intended to have 2-3 ft of freeboard by design so we got very close to overflowing the dam when it settled. We built the dam during the driest part of the year. Just something to keep in mind. We've gone back with the dozer and added more clay on top of the dam. No signs of leaks or other issues so I think we're fine. Just a few more grey (or white, I should say) hairs.

Description: Islands are all submerged now (yeah!)
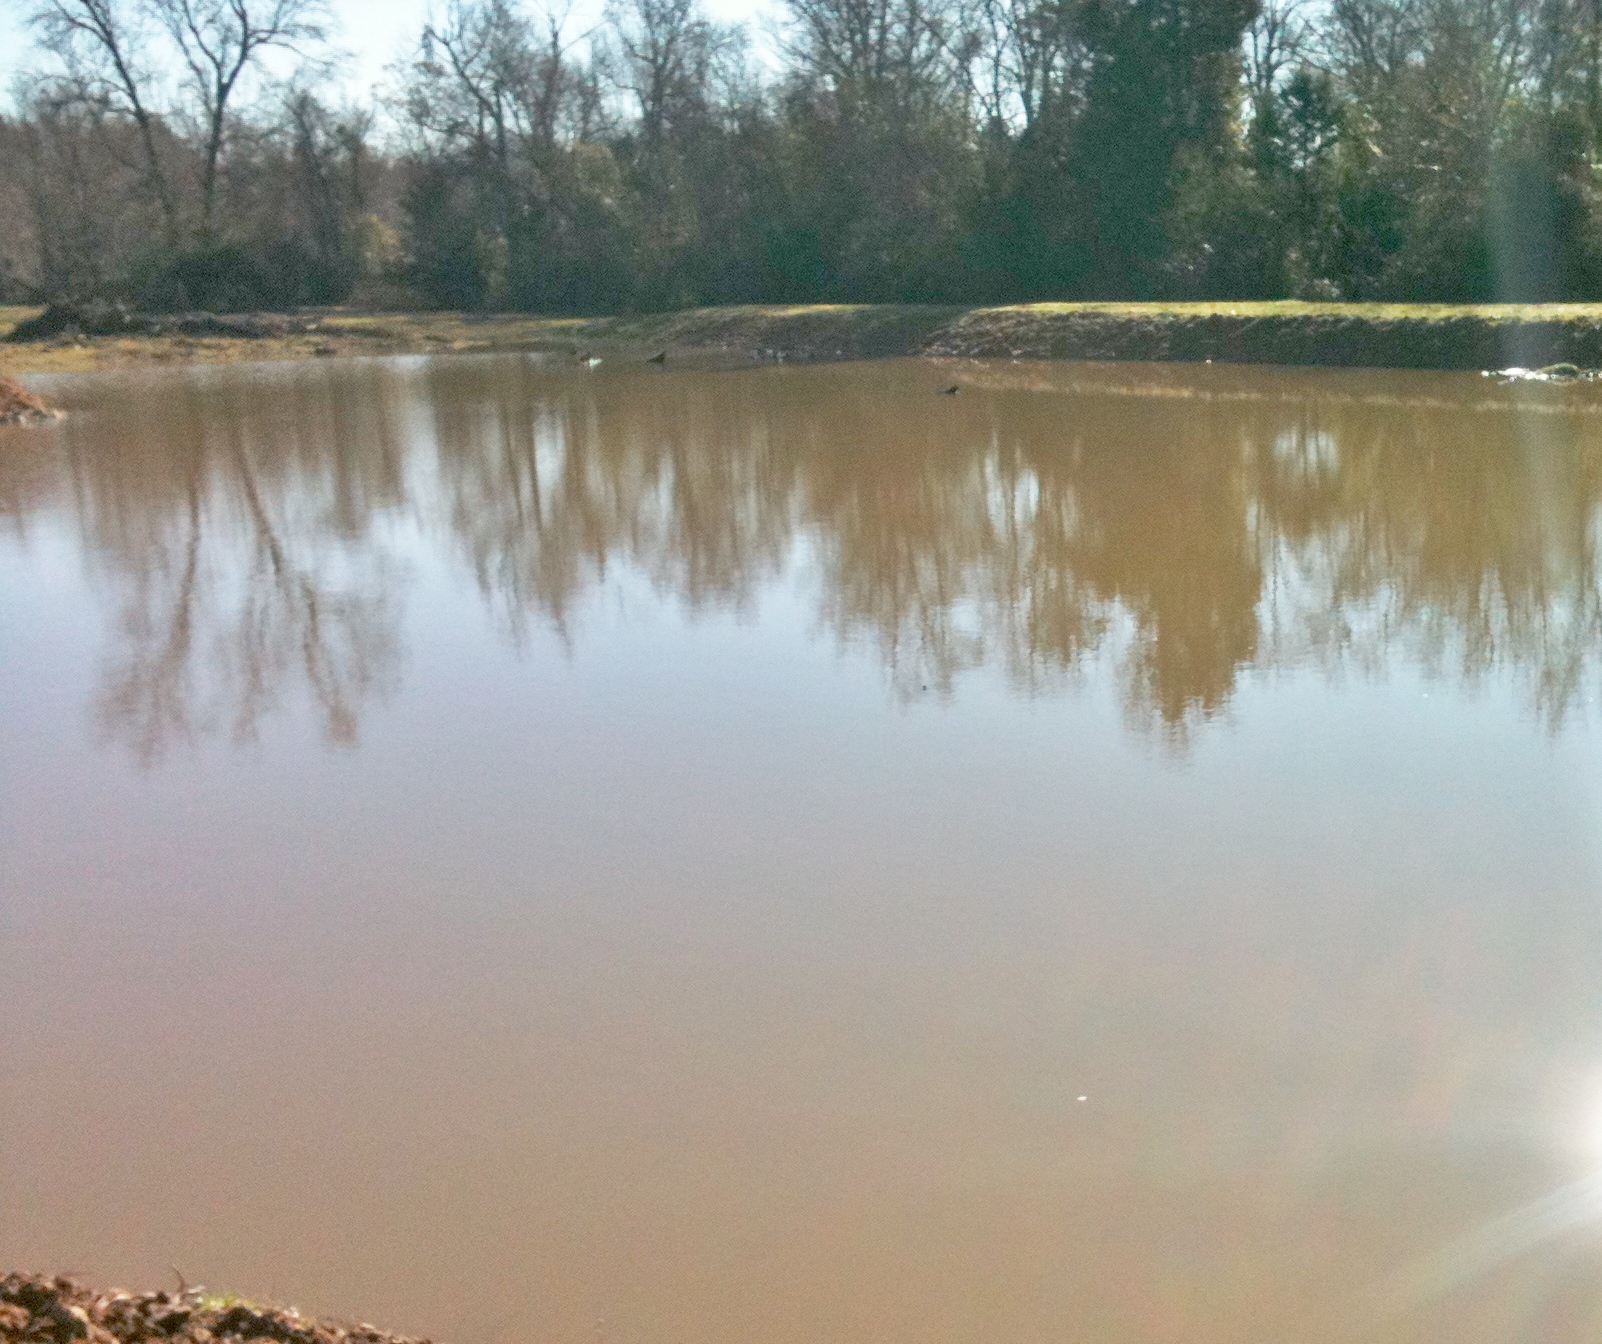
Description: From the spring / spawning area looking toward the dam.
That's a LOT of settling. Keep an eye for leaks!
Will do, Esshup... My dozer guy swears there are no leaks. To put things in perspective, the section of the dam that settled is about 14-15 ft above grade (all new clay) and 20-25 ft wide at the bottom. There are other parts of the dam (not as high) that have settled about 6 inches or so. I'm pretty sure it's just the clay mix soaking up water and compacting. We cored the new section and there doesn't appear to be any shifting. But, all things considered, it still seems like a lot of settling to me so you can bet I'll be watching.

We're heading up this weekend and there hasn't been much rain recently. So, I should be able to tell if there are any new streams of water flowing from around or under the dam.

OK, the water level was down about 4-6 inches but I think that is due to the lack of rain and evaporation thanks to a recent cold front. I couldn't find any wet areas behind the dam.
There's a wet spot in the old creek bed that's about 15 feet behind the dam but that's been there as long as I can remember. Otherwise, dry as a bone.
Will keep watching...
Well, the pond is at full pool again and, with all the rain, it''s hard to tell if there's a leak. If there is a leak, it's not keeping up with the rain - not even close. The spillway is going strong after the last 5 inches of rain. I noticed another 2-4 inches of settling where we used fresh clay on the dam. I'll have to keep an eye on that area but I just don't see any signs of leaks.

The turtles are up and we rescheduled the electroshock survey for the 24th with Overton. Should be a fun day!

WimgNuts Most real problems will show up the first time the pond is full, all ponds leak and a wet spot behind the dam is not out of the line.
Hi Mike, thanks! That's good to know. We didn't see anything early on except for the settling. That seems to have stopped now or, at least, slowed down a lot.
 Thanks to all of you for the tips and great information.


.jpg)
.jpg)
.jpg)
.jpg)
.jpg)

.jpg)
.jpg)
.jpg)
.jpg)
.jpg)
.jpg)