Pond Boss
Posted By: wickedinhere koender windmill assembly started - 02/22/06 05:01 PM
here is a pic of the blade assembly it took me about 2hours to get it together and tightened. it went pretty easy of course i have an electric impact.
here is a pic more to come.
Posted By: Theo Gallus Re: koender windmill assembly started - 02/22/06 06:42 PM
Wicked:

I believe I can see the hub-mounting hardware in place in the middle. Did you have any trouble getting those pieces lined up and attached?
Posted By: wickedinhere Re: koender windmill assembly started - 02/22/06 06:57 PM
they lined right up, the only part that i had a little trouble aligning was one bolt hole on one of the 3 pieces that the blades bolt too.
I paid the dealer $200.00 to assemble mine and I believe another $200.00 to deliver and install it with anchor kit so if the go'n gets tough just consider what you may be saving \:\) Sometimes you have more $$ then time sometimes more time then $$, today I would probably tackle it too !!
Posted By: wickedinhere Re: koender windmill assembly started - 02/23/06 12:45 AM
well we were hit by hurricane rita and i have a lawn service so there wasnt very many leaves to pick up this winter. needless to say i lost 50 percent of my customers due to them moving or selling there property but its starting to pickup finally.
Posted By: wickedinhere Re: koender windmill assembly started - 02/23/06 11:59 AM
sorry i didnt finish my last post,what i was getting at i have more time than money right now
Posted By: wickedinhere Re: koender windmill assembly started - 02/23/06 07:43 PM
here is a pic update i will start the tower tomorrow

Posted By: wickedinhere Re: koender windmill assembly started - 02/26/06 10:28 PM
i finally got started on the tower today it wasnt hard to put together just time consuming and the holes lined up pretty good i will finish it tomorrow hopefully.here is a pic
Posted By: wickedinhere Re: koender windmill assembly started - 02/28/06 01:28 PM
i got the tower finished yesterday now all i have to do is wait for the guy to finish a little dirt work around the pond and i will install it. i hope it will be standing at the end of the week. here is a pic of the tower complete.
Posted By: Cary Martin Re: koender windmill assembly started - 03/04/06 02:30 AM
wickedinhere,

Keep up the photos, this is always good to see how others are accomplishing task on thier ponds. Good work!
Posted By: wickedinhere Re: koender windmill assembly started - 03/04/06 03:36 AM
i was hoping to have it up and running by now but the dirt contractor didnt finish dressing up the sides of my pond yet so i am at a stand still till he does. more pics to follow
Posted By: wickedinhere Re: koender windmill assembly started - 03/13/06 11:55 PM
finally got it up today here is a pic
Posted By: burgermeister Re: koender windmill assembly started - 03/14/06 04:32 AM
Great job! Also, nice looking uncluttered work shop. I'm very jealous. :)So is my wife.
Posted By: wickedinhere Re: koender windmill assembly started - 03/14/06 12:15 PM
thanks you very much
Posted By: Theo Gallus Re: koender windmill assembly started - 03/14/06 01:38 PM
 Quote:
Originally posted by burgermeister:
Great job! Also, nice looking uncluttered work shop. I'm very jealous. :)So is my wife.
Ditto on the workshop - it looks like a class 10,000 Clean Room compared to my workspaces around here.
Posted By: EricF Re: koender windmill assembly started - 04/09/06 05:22 PM
I'm new to this very useful group, and thought I'd add some of my experience with an aerating windmill.

My 20' Koender windmill has been up through its first winter now and I'm very happy with how the aeration has eliminated the sulphrous smell for our heated horse water trough. Although on some very cold still nights (below -25C) ice formed over the hole, most of the winter had a 6-8ft opening -- even though ice on other parts of the pond was 8-12" thick.

The aerator is ~8' below the surface, and I opted for a double rubber diaphragm unit that makes significant turbulence even in low wind.

Anchoring tip: around here, pouring concrete posts is about the only way to ensure that frost won't cause the base to tilt. However, I was challenged about how to set the posts accurately enough to clamp the base to them later. My solution was to construct the lower frame first (just the first 4' section), so I could position it on blocks with the anchor posts clamped in place but dangling into the sonotubes. When I poured the concrete, it hardened around the posts, and I could loosen the clamps to build the rest of the tower.

My nephew and I built the tower and blade assemblies in a barn (where it was cool!), then carried each out to the site. Each is just manageable for two people to carry, but wear gloves and watch the edges!

Since I knew the anchors would fit exactly, we blocked two feet and raised the tower so the end was ~8' off the ground supported on some wooden posts. The two of us were then able to slide the blade assembly into place using the tractor bucket as a platform. Raising the windmill was easier than I expected: we just kept adding longer posts to lift it a bit at a time until it got to a tipping point. A rope tied to the top helped me take some of the weight as my nephew guided the 3rd foot into place.

Unfortunately we were too busy to take pictures of the process but here's what it looked like last fall and in early March.


End of September 2005. I took the picture from the roof of our nearby horse barn. The inlet for irrigation and horse water is ~5' out from the diagonal logs, and about 6' below the surface.


March 5, 2006. The aerator keeps the ice away except on the very coldest days, but even then it only takes a day or so to open up again.


As you can see, the pond is fairly small: we had it dug out 8 years ago from a marshy area. It has a constant flow from nearby springs, and has seemed quite healthy. However, vegetation decaying at the bottom had been making the water smell bad during the winter, and algae bloom in the spring was a concern. There are plenty of small fish in the pond -- although otters come by for a cleanout whenever they get to 5-6"!

There may be better windmills out there wickedinhere, but I hope you'll be as happy with yours as we are!
Posted By: Bill Cody Re: koender windmill assembly started - 04/09/06 05:38 PM
Your situation is a good application for a windmill.
Posted By: Brettski Re: koender windmill assembly started - 04/10/06 01:11 AM
Very helpful post, Eric...thanks.
Luv the "post card" shot! #1 could come right outta Cades Cove in Tennessee (except, of course, the high tech windmill ;\) )
Posted By: EricF Re: koender windmill assembly started - 07/18/07 09:39 PM
I thought I should post an update about how our pond is now providing heat and AC to the house -- and a caution about using an aerator if you install a heat pump.

The 2005 pond dam leaked, and this group helped me diagnose the problem: I used fill with rocks & junk and the ice forming around these items made gaps for meltwater.
When our furnace crapped out, we decided to install a geothermal heat pump. The pond looked like a good heat source, but I soon learned I was close to the edge for heat capacity.

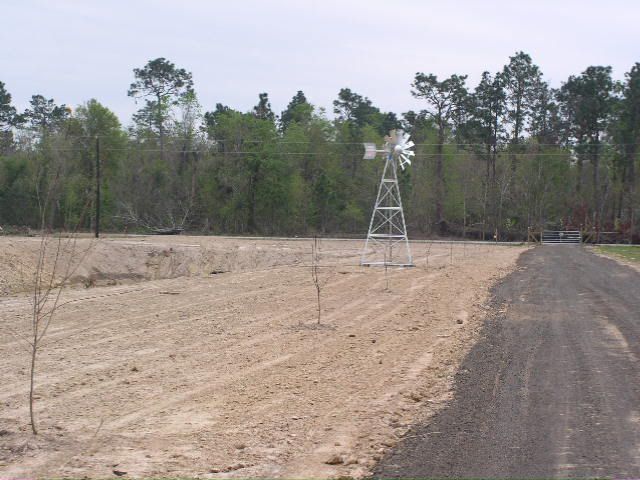
So, time to expand the pond and fix the dam problem... We dug out below the old dam into blue clay and packed a core of good clay loam.
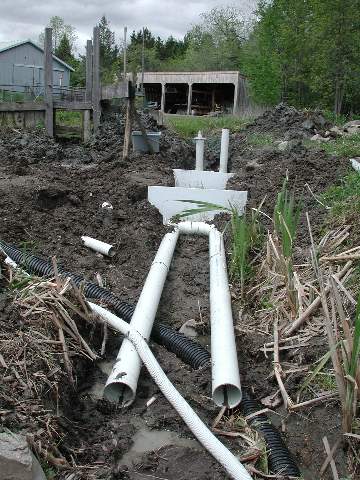
I used corrugated field tile to divert the water as I installed my drain made from 4" pipe.
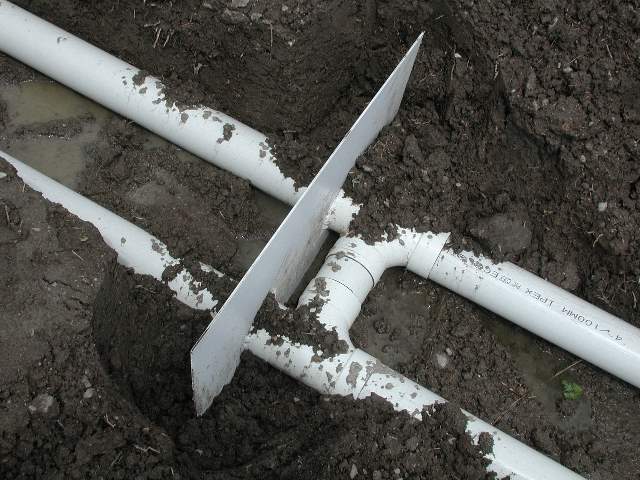
As the picture below shows, I ran two 24' tubes with 2 plastic "shields" to slow any water making its way along them.
The risers in the background were cut at the level I wanted, and I included an extension at the pond end to be able to drain it if I ever need to.


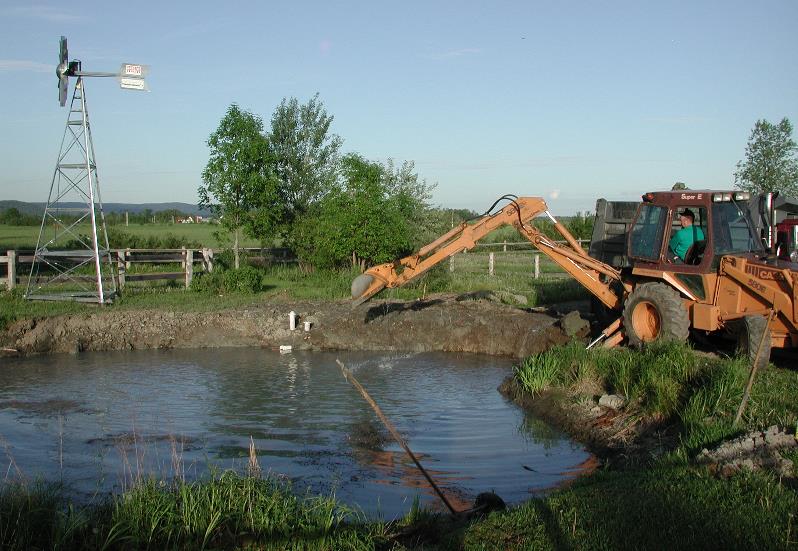
With the outlet drain in place and tamped, the backhoe removed the material in front of it and 9 truckloads of clay.


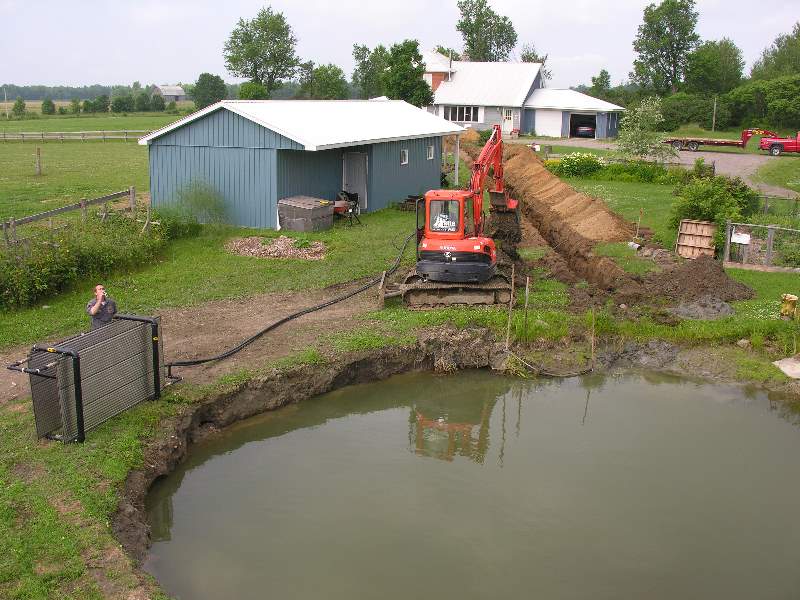
A month later, I had the geothermal heat pump installed in the house, and two 2" lines running out to the pond at ~6' below the surface (to be below the frost line).
The picture below shows the excavation for the lines and the heat exchanger just before we lowered it into the pond.


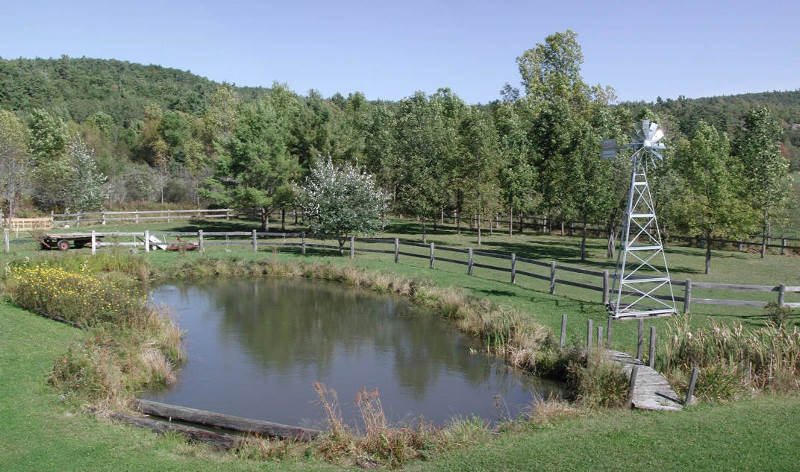
A bit over a year later, the pond has recovered and we've been through a leakless winter.
Our overall energy costs were ~$1,700 lower than the previous year when we used oil for heat and HW and had no A/C at all.
Now when the house is cool as I work on a 38C muggy July day, I can thank my pond!


The panorama above was taken a year after the major surgery to the pond. The Canada Geese were just visiting.

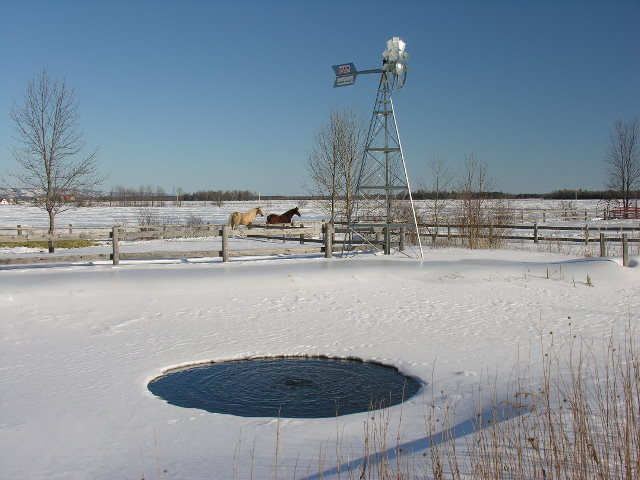
And the aerator? I disconnected it in the winter because the extra cooling makes the GHP less efficient.
The unit can potentially remove 6 degree F from the closed loop, and with the top of the exchanger only a few inches from the bottom of the ice (at 32F), I didn't want to push my luck!
The aerator was reconnected when the ice left and keeps the water sparkling clean.

Thanks to all in this group who helped me on this adventure, and I'm happy to reciprocate by answering any questions about it.
Posted By: Theo Gallus Re: koender windmill assembly started - 07/18/07 11:15 PM
Nice update, Eric.
Posted By: Rad Re: koender windmill assembly started - 07/19/07 12:13 AM
Beautiful and efficient, great combo.
Posted By: M. Paris Re: koender windmill assembly started - 07/19/07 05:30 PM
Great post Eric!
I love how you used your pond for your house heating and cooling.
Can you share with us the cost breakdown of the pond heat pump? Was this added to an existing heatpump outside your house?

Great topic for an article!
Posted By: EricF Re: koender windmill assembly started - 07/19/07 11:57 PM
The heat pump was ~Cdn$18,000 installed, and that included the thermostat and all the duct changes. The fan on a GHP (ours is a Water Furnace E060) is way more powerful than a typical oil or gas furnace, and small ducts will result in more wind noise than many would want. Luckily, our house had a huge old oil furnace and large ducts already installed. The ducts nearest the intake and outlet have dense sound insulating material which helps a lot. Our unit is set horizontally because of a low ceiling; vertical models with the same performance are less expensive and easier to install.

The heat exchanger is two 4x8' stainless steel panels connected by a manifold to allow the antifreeze solution in the closed loop to dump or pick up heat from the pond. It is possible to have a 6F difference in temperature between in and out, so the pond needs to have enough volume or flow to handle it without freezing or overheating. (Read about the Geo Lake Plate at www.awebgeo.com)

The 2 x 200' of tubing to the pond, the heat exchanger and all labor and taxes brought the total cost up to ~$25,000.

This may seem like a lot for a heating system but we had to replace an old oil furnace, an oil hot water heater and an indoor oil tank. Their replacement costs would have been around $11,000 for an efficient oil system (gas is not an option where we live)--and if we wanted even just basic air conditioning in a couple of rooms, we'd need to add another $1,000 or so. So, the GHP option really costs "only" ~$13,000 more than oil. For that, we end up with more space in the basement, no oil tank, no devices using fire to heat--and can feel good about reducing our carbon footprint!

Even better, the payback will be faster than we'd expected: our first year's energy cost was $1,700 less than the year before. The GHP provides most of our hot water during winter and summer, and we get full-house air conditioning. As well, the cost typically adds the full amount to the resale value of a home and are several programs provide rebates (up to $7500 in many parts of Canada).

Since a GHP heats by circulating warm air instead of adding hot air in bursts, the heat (and A/C) is much more consistent throughout the house, and heat from any rooms with solar gain or a wood stove gets moved around to reduce the need for heat even further.

We're upgrading many of our windows and insulation in a renovation this summer, so we could probably have managed with a smaller unit.

If you are making a pond, I'd highly recommend considering how you could use it for a GHP.

Eric
© Pond Boss Forum