We have elected to put the second slab pour on hold. Not only are we waiting for a series of rain-free days, but we need to re-charge the checking account. My in-house bookkeeper has been VERY cooperative in juggling the books to meet my all-consuming pondmeister's disease, but my suggestion to forego eating has been trumped. Somewhat distrought, I immediately hooked up the trailer and initiated a 2 hour therapy session at Menards. There's something magical about quality time spent selecting, pumping, and bench pressing a bunk of green treat lumber. More importantly, my green-treat health plan has been pre-approved and funded

.
-
The docks have been engineered to consider the lateral force of shifting ice as our strongest foe at the foundation. This is the reason rebar cages were embedded within the concrete piers. The stainless steel post bases (pic in prev post) should provide a stout transition from the concrete pier tops to the 6 x 6 green treat timber vertical supports. 2 x stock will be the connecting structurals. All this will be tied together with stainless steel hardware.
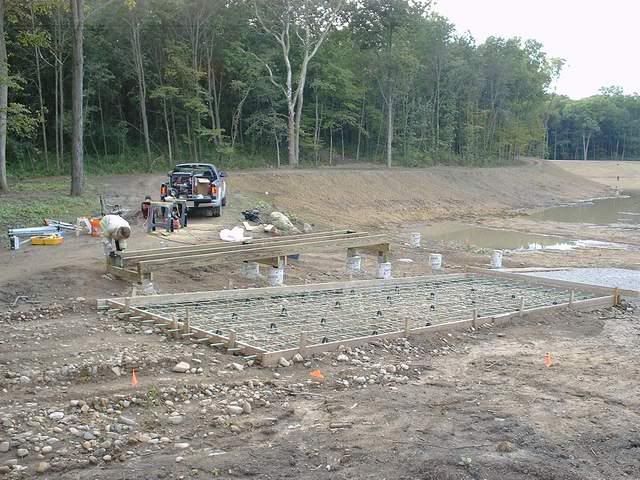
After the concrete piers cured, and during our last visit to tie the rebar mat for the upcoming 2nd concrete launch pour, we shot the top elevations of each pier. This allowed me to run the calc's and pre-cut the cumbersome 6 x 6 verticals at home. The 2 x stock is much easier to handle and will be cut to size at the jobsite.
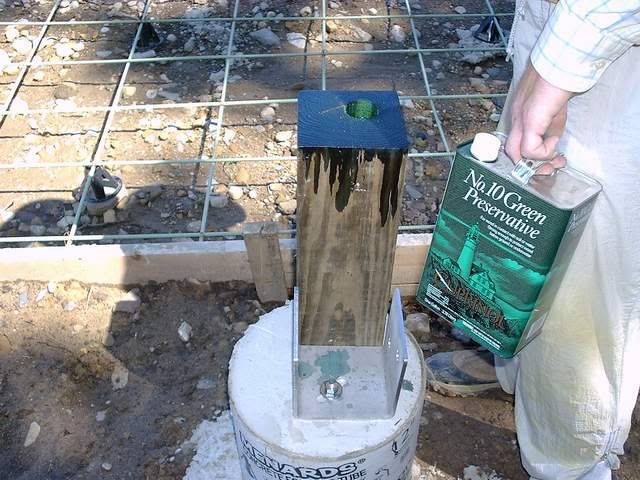
The tops of the SS anchor bolts protrude about 1". I want the timbers to bear directly down and upon the supporting post base, so an accommodation hole must be bored. This was done with a 1.750" dia forstner bit on site. 1.750" dia was selected to elimate bearing restriction by the 1.500" dia double washers under the nut on the post base bracket. The accommodation hole was bored on site because it's location varied from pier-to-pier based on fine-tuning the post base bracket location within the overall layout. I had the brackets fabricated with a 2.5" long slot for just this very reason.
After the hole is bored, we soaked the entire end of the timber and hole with preservative.
-
-
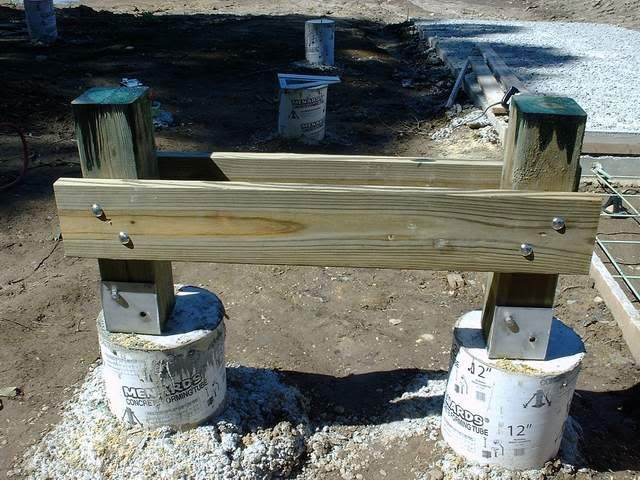
The vertical was dropped into the bracket and plumbed for level. 2 pc of 1/2" x 4" stainless lags are then cranked in, one from each side, to complete the vertical support. EDITOR'S NOTE: If you have ever done this kinda stuff and remember the time and effort expended spinning and cranking on a ratchet and socket to drive lag screws, there's a new sheriff in town. He's riding a compressor and slingin' an impact driver. Absolutely, positively, this is the only way to drive those beasts, hands down! (another editor's note: it just hit me like a ton'a'brix...DOH! I have a brand new Bosch hammer drill that I bought 2 years ago, sitting in a box in the basement. Betcha that would'a blown the bolt holes thru the timbers alot easier than the standard 1/2" drill I used. Like I said...DOH!)
OK, I'm a little better now...let's continue.
2 x 8's were used as ledger boards. They are attached to the verts with 1/2" x 10" stainless carriage bolts (these are the holes that I was talkin' about during my above "hammer drill" epiphany).
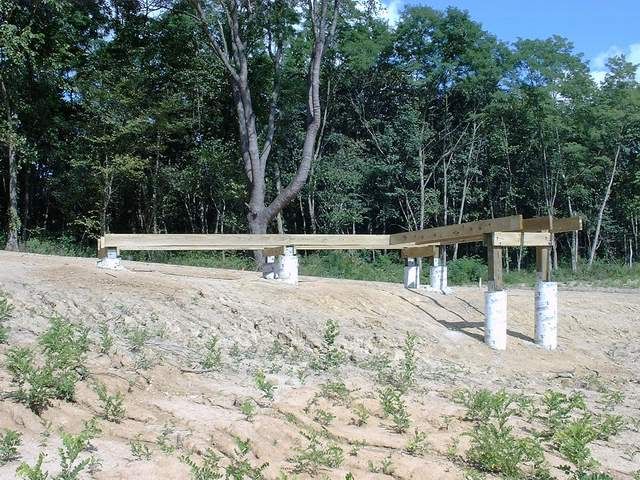
This foundation technique is typical and repeated for all the dock supports.
-
-
The dock at the this launch area has a 14' x 16' covered deck planned. This will be a construction headache unto itself and will be saved for another (soon to come) day. As a result, we are done for today on this dock after we install the 2 x 8 deck stringers. These outside stringer members are lagged into the verts with 5/16" x 4" stainless lags. The center stringer is toe-nailed into the ledgers with #10 x 3" stainless screws. 2 x 8 cross-blocking is planned between the stringers to minimize twist and rack; soon come. The resulting mass is strong.
Donna-ski applies liberal coats of preservative to the tops of the verts as I chug Gatorade and take a few file pics.
-
-
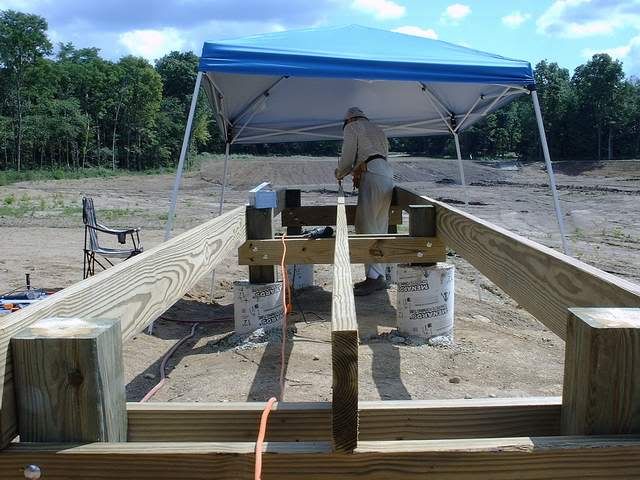
We pack up the truck and head on over to the beach area (man, I can't wait for the day when that means a picnic and a dip in the water). Not today, lifeguard boy. Strap on your toolbelt, we got's mo' woik to du.
We followed the exact same process at the beach dock, except this project is a somewhat simpler since there is no covered deck planned. The first section of dock is 20 feet long, parallel to the sand beach. The second "L" section is another 12', the last 2 feet cantilevered.
We selected this spot to create the beach area because of it's southern exposure, topography, and great view. As planned, there is virtually no shade on the entire knoll. Enter another good decision; the 10' square collapseable shelter.
-
-
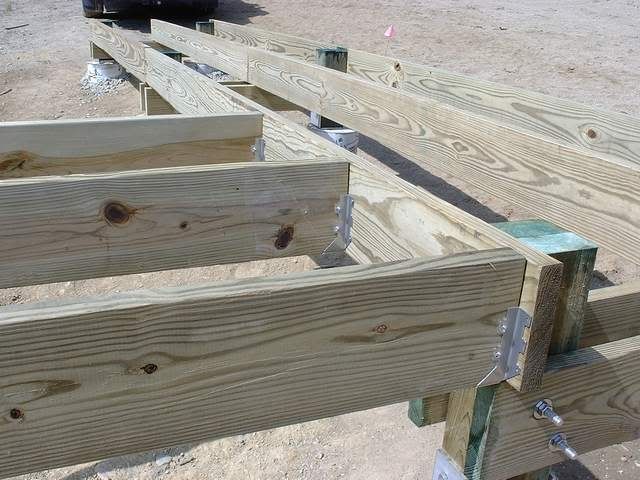
The "L" section was attached to the main dock section with stainless steel joist hangers. Instead of using nails, we opted for #10 x 3" screws to increase grip.
-
-
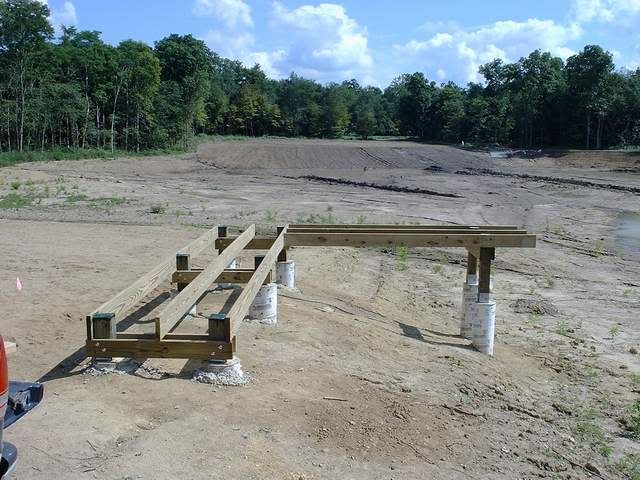
...and then, the final product. This structure will also receive 2 x 8 cross blocks to resist twist and rack, but that will be the final touch before applying decking.
-