The construction of my new pond - 09/06/09 08:10 PM
I discovered the PB site a few days ago when searching for some information about stocking a pond. Wow! I'm loving all of the information and things I've been reading about. It's fascinating!
I wanted to contribute my recent experience. I've added several photos since they're usually a welcome addition (I like pictures).
My family and I live on 57 acres in South-Central Kentucky. We love the area and enjoy our "homesteading" adventure. One of my big projects is building a house (I blog about it at Cedar Ridge Farm, in case anyone is interested). We moved here in 2003, and one of the things we've wanted to do is build a pond. We've had the site in mind, but we haven't had the funds to make it happen until this summer (we don't do debt). The intended purposes for the pond are swimming, some fishing, irrigation, and to add beauty. It's located near the house I'm building. So, we'll be right next to it and able to enjoy it year-round.
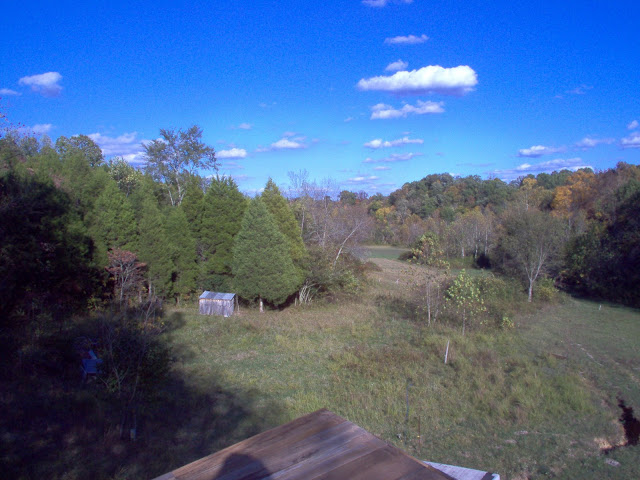
This is the site for the pond a couple of years ago. I was standing on the roof of the house I'm building when I took this photo.
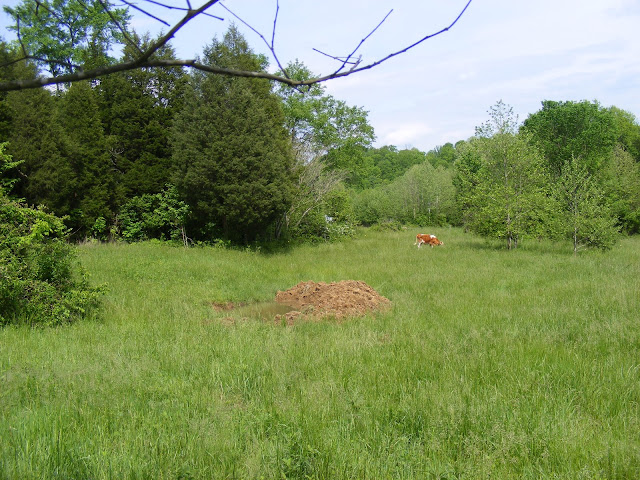
Here's another photo of the site taken this spring. I dug a small hole (about 9' x 4') with a borrowed backhoe to test for clay. There was clay, and the hole held water all summer.
I had a couple individuals come out from NCRS a couple of years ago for an evaluation of the pond site. They were less than helpful. Based upon their records for the soil in the area, they gave me a 50/50 chance of a pond there holding water. They did say that whoever I got to build the pond would be able to tell once he started. They didn't do much more than get out of the car and talk to me for a few minutes.
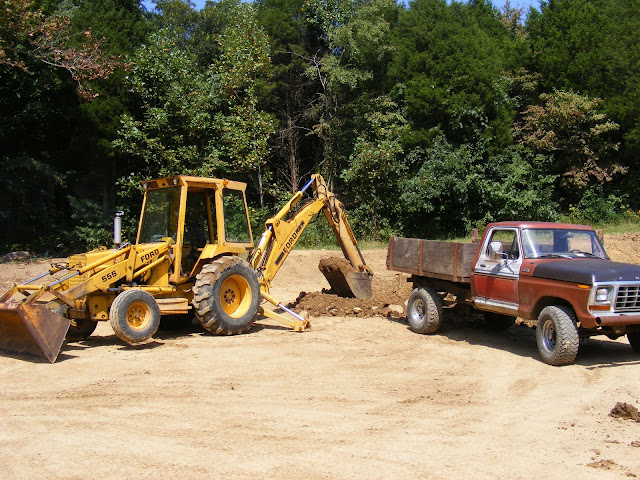
After we'd had a bit more dry weather in August, I talked with and then hired a local guy to come in with his trackhoe and dump truck to make the pond. I didn't find PB until the job was just about finished. He originally estimated that it would take 3 days to dig the pond and build the dam. It didn't work out that way, though.

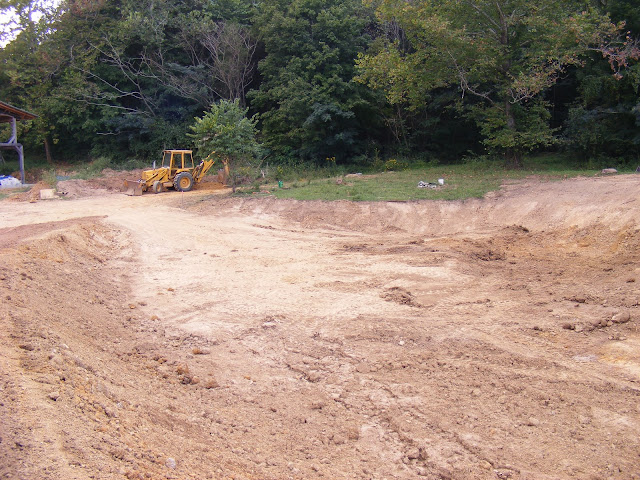
Here he is shortly after beginning the excavation. He was moving the top soil behind the dam location so that it could be pulled back up onto the outside of the dam later. It was shortly after this point that we realized the project wasn't going to be as simple and quick as we both hoped. There were some major pockets of top soil. We're talking like 6 or 7 feet of it. Neither of us expected that. Apparently, over the last several hundred years, a lot of material has washed down off the ridge above and settled here. He said that if I was closer to the main road (I'm glad I'm not, though), I could've gone into business selling top soil.

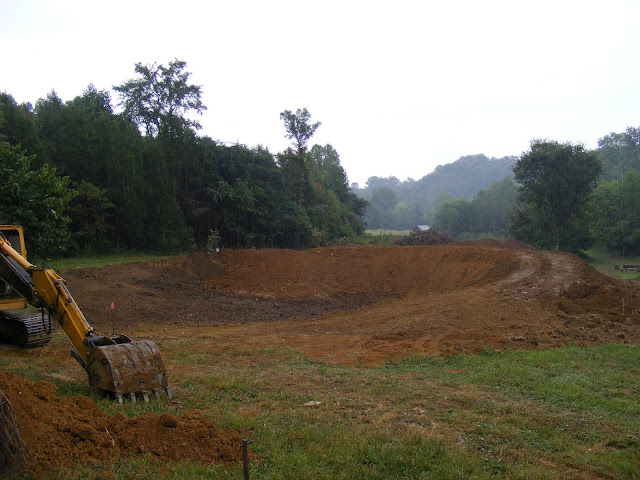
Here's another view of the site after he scraped off the sod and a foot or two of top soil.

In this photo, he had started digging out the extra top soil in order to get to the clay. He loaded the dump truck and stock piled the dirt behind the far end of the proposed dam (you can see some piles near the trees to the back right). There was good clay under there, thankfully.
In some places the clay wasn't too deep. In other places, there were seams of top soil in between ridges of clay. He might dig three feet into clay and still have top soil adjoining it at that depth.
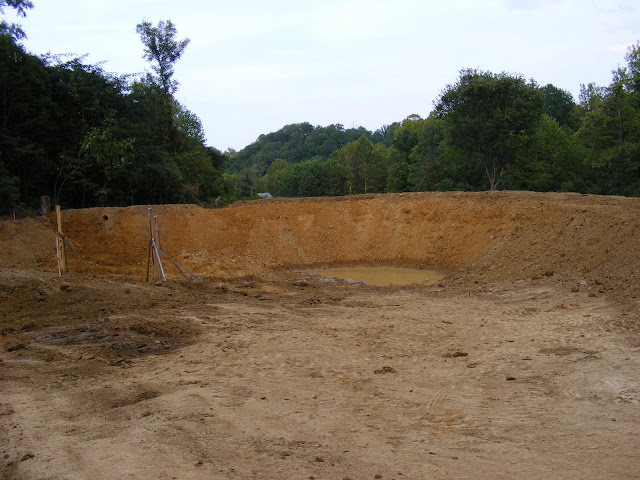
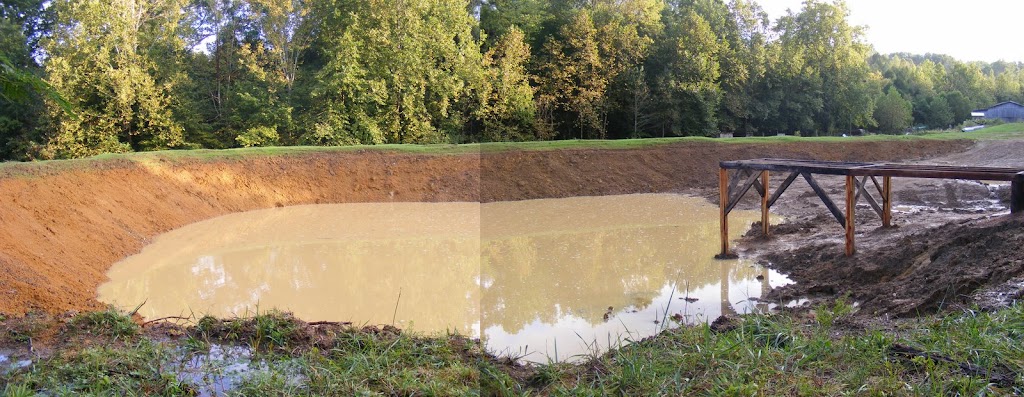
I had wanted to make the pond as large and deep as possible. But, with the cost of the project increasing with each day required to move more top soil, I decided to move the dam back a bit, making the pond a little smaller. It will have right at 1/4 acre of surface area instead of 1/3 acre that it would've had as originally planned. It will be 12-13 feet deep on the far end, though. We didn't take all of the top soil out. I'm considering borrowing my friend's backhoe again and taking a bit more out on the shallower end.
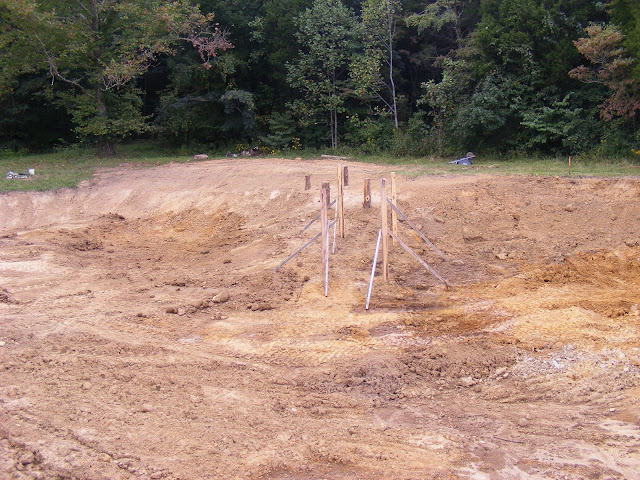
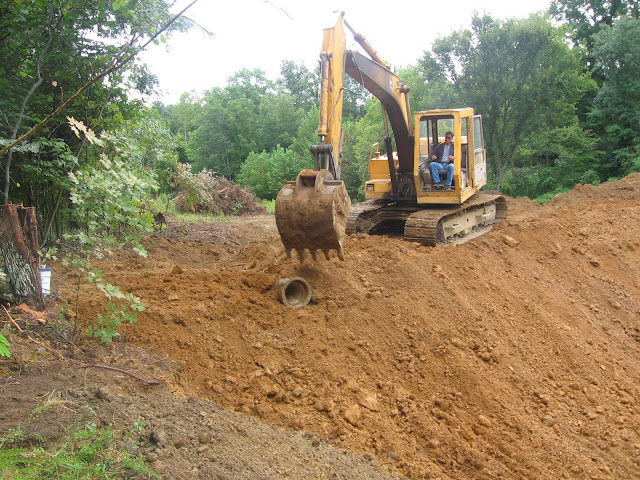
He dug down to good clay for the dam, allowing a good core trench. After he built the dam up a few feet, he had to move clay from another area of the pond:


I was happy with digging down for clay for the dam because that made the pond deeper.
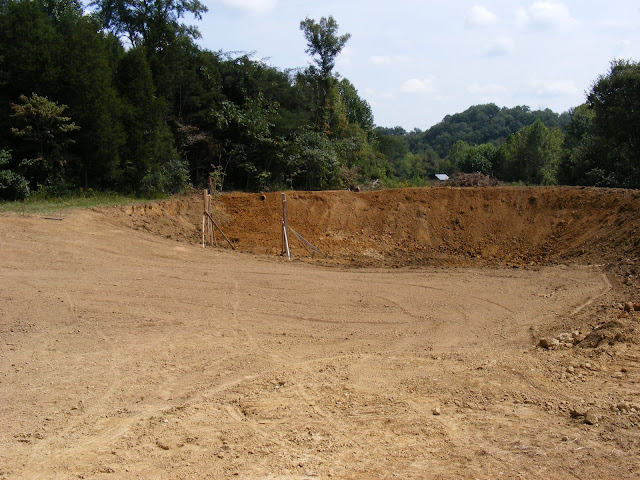
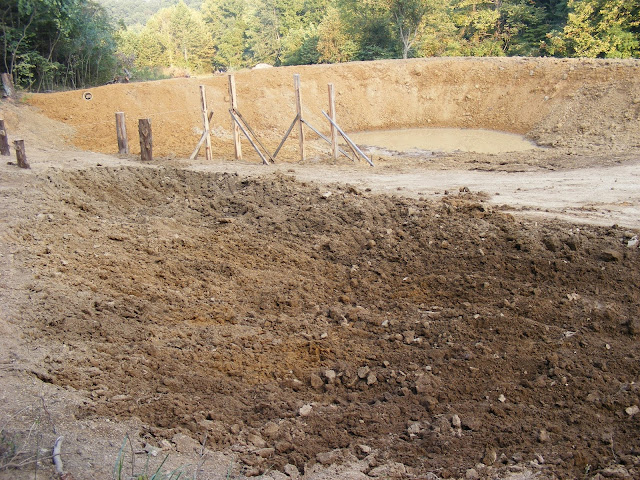
After a week's worth of work, this is what things looked like. We were pretty much done, and I was just about out of money. There were only a couple of things left to do: install the overflow pipe and emergency spillway and build up shape the back side of the dam. You can see in this photo that the slope on the back side was a bit extreme.
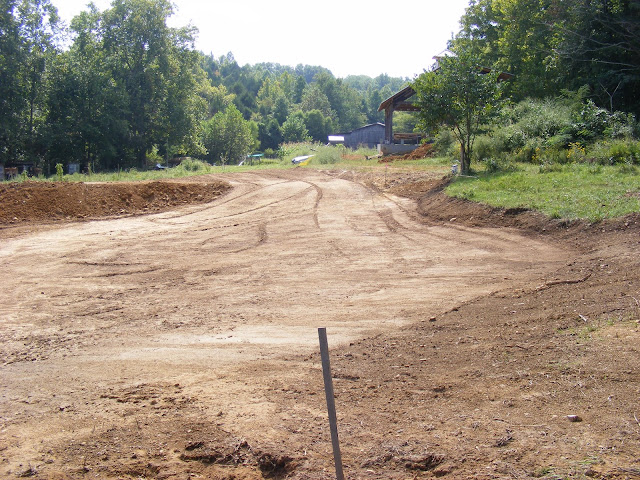
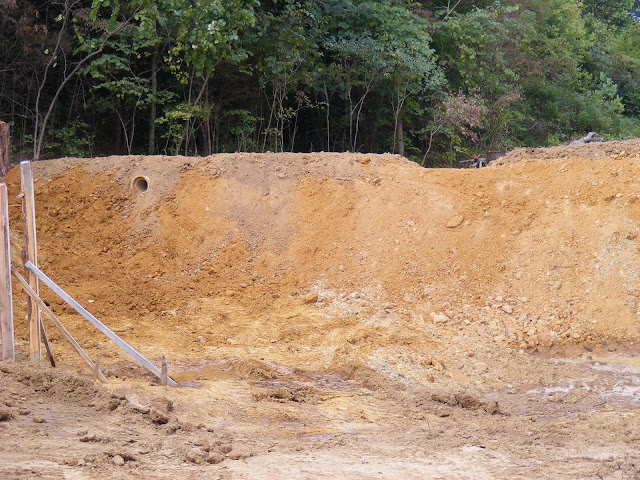
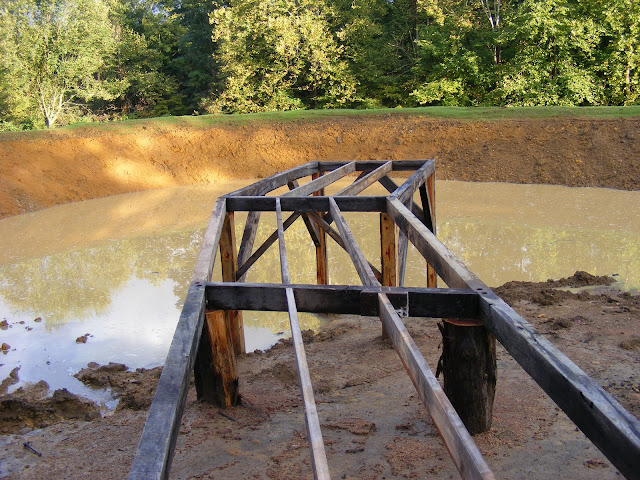
We used a 12" concrete culvert that was here on our farm for the overflow. This should be sufficient over 90% of the time. The watershed for the pond is about 8 acres of hillside. There is another 12" culvert under one of my drives through which the water has been flowing when it rains, draining into a small creek. It has handled the water quite well. We also cut an emergency spillway near the overflow pipe for those times when we get a goose-drowner. The water coming into the pond will mostly come out of a fairly level draw between the hill sides.

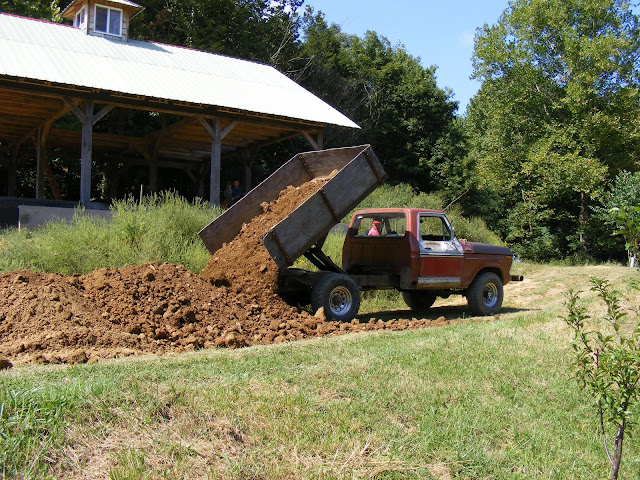
With one more day of work, he was able to move the stockpiled top soil and put it on the outside of the dam. I'm glad we had it to put there.

As you can see in these photos, it is rough and was not packed down. The dam itself was well-packed, but the top soil added to the back slope on the last day of work was not. If he'd had a dozer, he would have run over it. I'm going to let it settle over the winter, and then disk and drag it in the spring before seeding it with grass. I would like to broadcast a cover crop on it this fall, though. I'm wondering if there are any advantages to winter rye over wheat or vice versa. Any suggestions?
I have a few more photos in a Picassa photo album if you're interested.
I'll post more as I continue working on the pond. I'm building a dock and hopefully a beach area. It'll be great to see it begin to fill up when we start getting some rain this fall.
I look forward to learning more from everyone on this site. Thanks already for what you've contributed and what I've been able to glean already. I'm glad to have found this site. I am open to all comments and/or suggestions about my project.
mudburn
I wanted to contribute my recent experience. I've added several photos since they're usually a welcome addition (I like pictures).
My family and I live on 57 acres in South-Central Kentucky. We love the area and enjoy our "homesteading" adventure. One of my big projects is building a house (I blog about it at Cedar Ridge Farm, in case anyone is interested). We moved here in 2003, and one of the things we've wanted to do is build a pond. We've had the site in mind, but we haven't had the funds to make it happen until this summer (we don't do debt). The intended purposes for the pond are swimming, some fishing, irrigation, and to add beauty. It's located near the house I'm building. So, we'll be right next to it and able to enjoy it year-round.
This is the site for the pond a couple of years ago. I was standing on the roof of the house I'm building when I took this photo.
Here's another photo of the site taken this spring. I dug a small hole (about 9' x 4') with a borrowed backhoe to test for clay. There was clay, and the hole held water all summer.
I had a couple individuals come out from NCRS a couple of years ago for an evaluation of the pond site. They were less than helpful. Based upon their records for the soil in the area, they gave me a 50/50 chance of a pond there holding water. They did say that whoever I got to build the pond would be able to tell once he started. They didn't do much more than get out of the car and talk to me for a few minutes.
After we'd had a bit more dry weather in August, I talked with and then hired a local guy to come in with his trackhoe and dump truck to make the pond. I didn't find PB until the job was just about finished. He originally estimated that it would take 3 days to dig the pond and build the dam. It didn't work out that way, though.
Here he is shortly after beginning the excavation. He was moving the top soil behind the dam location so that it could be pulled back up onto the outside of the dam later. It was shortly after this point that we realized the project wasn't going to be as simple and quick as we both hoped. There were some major pockets of top soil. We're talking like 6 or 7 feet of it. Neither of us expected that. Apparently, over the last several hundred years, a lot of material has washed down off the ridge above and settled here. He said that if I was closer to the main road (I'm glad I'm not, though), I could've gone into business selling top soil.
Here's another view of the site after he scraped off the sod and a foot or two of top soil.
In this photo, he had started digging out the extra top soil in order to get to the clay. He loaded the dump truck and stock piled the dirt behind the far end of the proposed dam (you can see some piles near the trees to the back right). There was good clay under there, thankfully.
In some places the clay wasn't too deep. In other places, there were seams of top soil in between ridges of clay. He might dig three feet into clay and still have top soil adjoining it at that depth.
I had wanted to make the pond as large and deep as possible. But, with the cost of the project increasing with each day required to move more top soil, I decided to move the dam back a bit, making the pond a little smaller. It will have right at 1/4 acre of surface area instead of 1/3 acre that it would've had as originally planned. It will be 12-13 feet deep on the far end, though. We didn't take all of the top soil out. I'm considering borrowing my friend's backhoe again and taking a bit more out on the shallower end.
He dug down to good clay for the dam, allowing a good core trench. After he built the dam up a few feet, he had to move clay from another area of the pond:
I was happy with digging down for clay for the dam because that made the pond deeper.
After a week's worth of work, this is what things looked like. We were pretty much done, and I was just about out of money. There were only a couple of things left to do: install the overflow pipe and emergency spillway and build up shape the back side of the dam. You can see in this photo that the slope on the back side was a bit extreme.
We used a 12" concrete culvert that was here on our farm for the overflow. This should be sufficient over 90% of the time. The watershed for the pond is about 8 acres of hillside. There is another 12" culvert under one of my drives through which the water has been flowing when it rains, draining into a small creek. It has handled the water quite well. We also cut an emergency spillway near the overflow pipe for those times when we get a goose-drowner. The water coming into the pond will mostly come out of a fairly level draw between the hill sides.
With one more day of work, he was able to move the stockpiled top soil and put it on the outside of the dam. I'm glad we had it to put there.
As you can see in these photos, it is rough and was not packed down. The dam itself was well-packed, but the top soil added to the back slope on the last day of work was not. If he'd had a dozer, he would have run over it. I'm going to let it settle over the winter, and then disk and drag it in the spring before seeding it with grass. I would like to broadcast a cover crop on it this fall, though. I'm wondering if there are any advantages to winter rye over wheat or vice versa. Any suggestions?
I have a few more photos in a Picassa photo album if you're interested.
I'll post more as I continue working on the pond. I'm building a dock and hopefully a beach area. It'll be great to see it begin to fill up when we start getting some rain this fall.
I look forward to learning more from everyone on this site. Thanks already for what you've contributed and what I've been able to glean already. I'm glad to have found this site. I am open to all comments and/or suggestions about my project.
mudburn